06
46
Major Tears
For a major tear in the kite fabric, consult your dealer for a reputable kite repair loft.
Minor Tears
For a minor tear in the kite fabric, you may repair the tear with kite repair tape. Your kite has been supplied with an adhesive
kite repair material.
1. Clean and dry your kite.
2. Lay the kite flat on a clean, dry, smooth surface.
3. Cut two pieces of repair tape the same size, making sure they are each big enough to cover the entire tear.
4. Carefully cover one side of the tear with a piece of the repair tape. Gently rub the tape smoothly onto the surface of the kite.
5. Next, cover the opposite side of the tear with the second piece of repair tape, in the same manner as before.
6. Make sure the tape is secure.
REPAIRING STRUT BLADDERS
Key Points to Remember
• Before attempting to repair one of your kite bladders, make sure your kite is clean and dry. Always keep your kite pump,
valves and bladders free of sand, water and other things that will dirty them.
• Make sure the bladders are deflated.
• Avoid repairing your kite on the beach or in dirty, dusty, windy, or abrasive areas. It is best to find a clean, dry spot out of
the wind. A grassy spot is ideal.
• You will need a set of flying lines and a bladder repair kit (supplied with kite) before you begin to repair the bladder.
1. First, lay the kite out with the struts facing up.
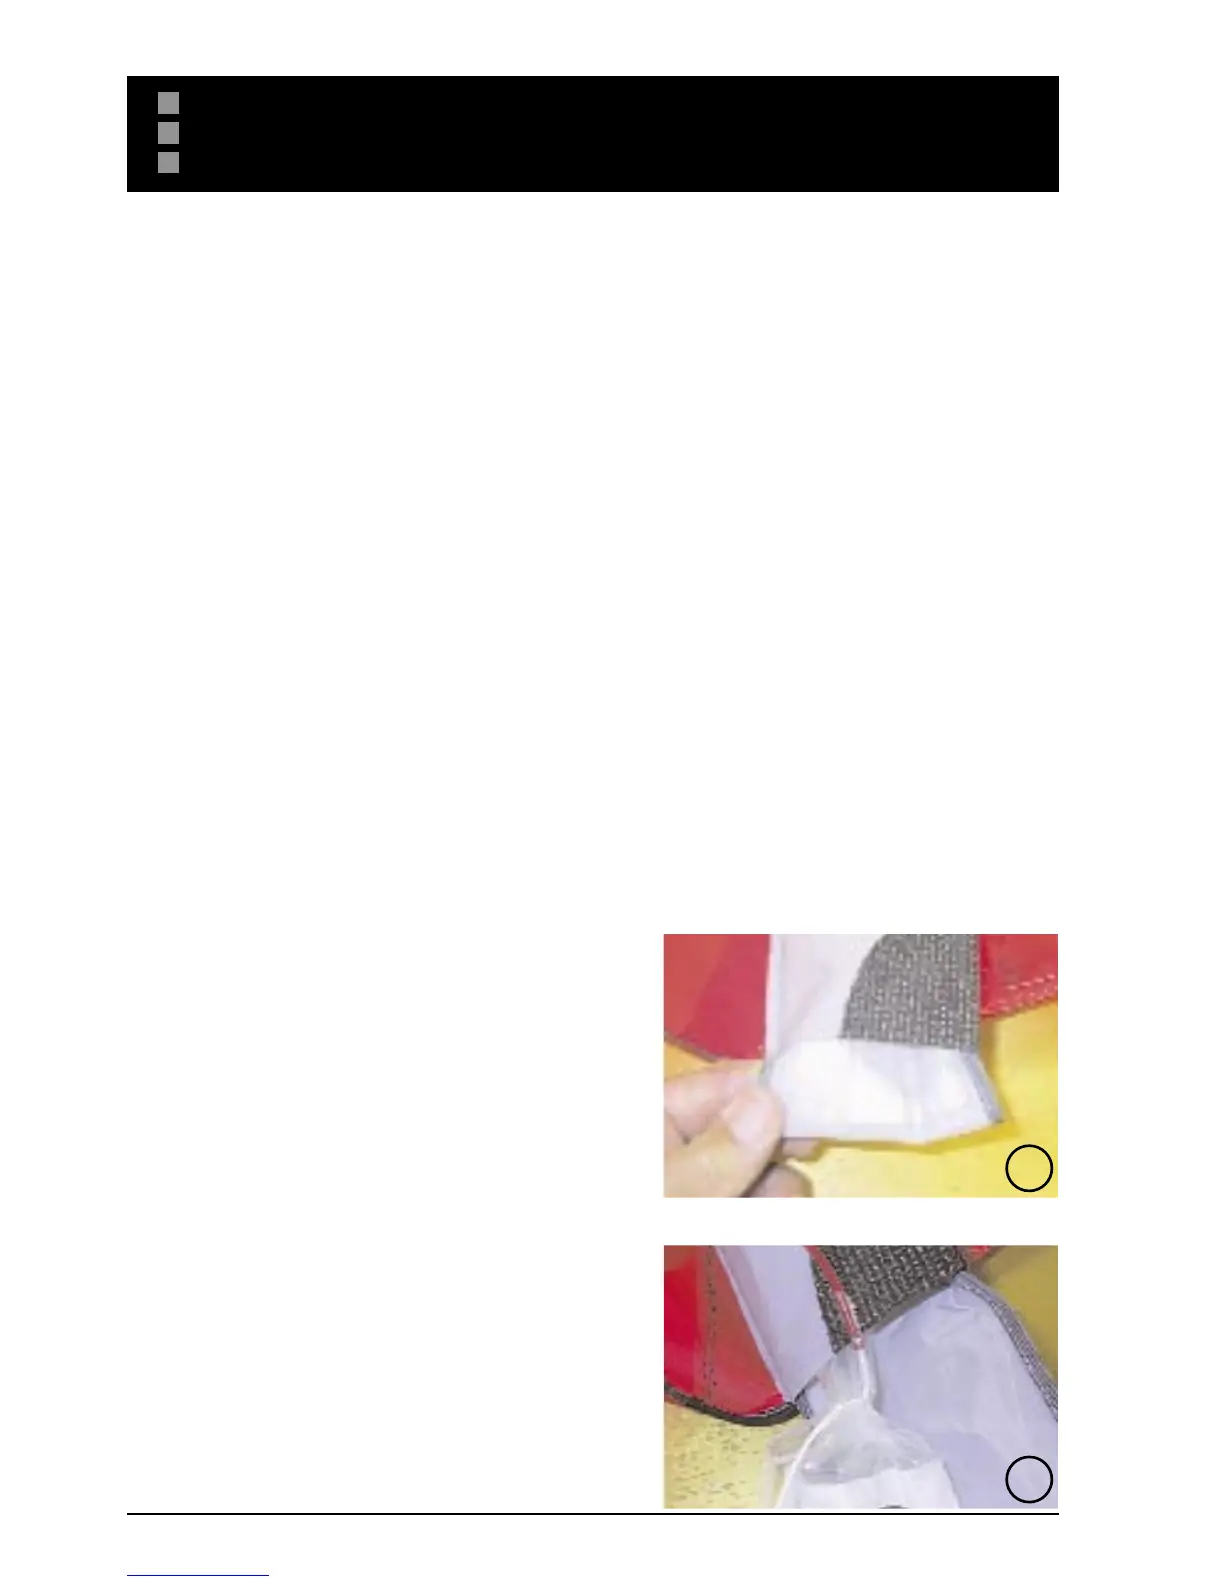
2. Detach the Velcro closure at the base of the damaged strut. This
will open up the sleeve of the strut and will allow you access to
the internal bladder. (Fig. 1)
3. Next, separate the valve plug from the Velcro closure so that the
valve is free from the strut’s sleeve. This will essentially discon-
nect the bladder from the sleeve. Keep track of the valve plug for
later use.
4. Tie one flying line around the valve. Cinch it down well on the
valve. Do not tie the knot through the hole on the valve or you
may damage it.
5. Gently insert the valve down into the strut sleeve.
6. Go to the base of the sleeve and gently pull the bladder out of
the sleeve, leaving the flying line through the sleeve. Having the
flying line through the sleeve will allow you to easily replace the
bladder once it is repaired. (Fig. 2)
7. Inflate the bladder and plug the valve so that it maintains air. Do
not over inflate the bladder.
1
2
R EP AI RS
TEARS / STRUT BLADDERS