06
49
• Again, inflate the bladder and check to make sure it is now holding air.
• Deflate once again.
• Tie each flying line to the corresponding ends of the bladder.
• Lay the bladder flat near the center access pocket and fold it, accordion
style, so that you may feed each end back into the sleeve without twisting
the bladder.
• Starting with one end, feed the bladder into the access pocket.
• Walk to one end of the leading edge and gently pull on the flying line,
while holding the end of the sleeve. Slowly feed the bladder back into this
side of the sleeve.
• Next, follow the same instructions with the other side of the bladder, until
the valve is near the hole and the bladder is fully inserted.
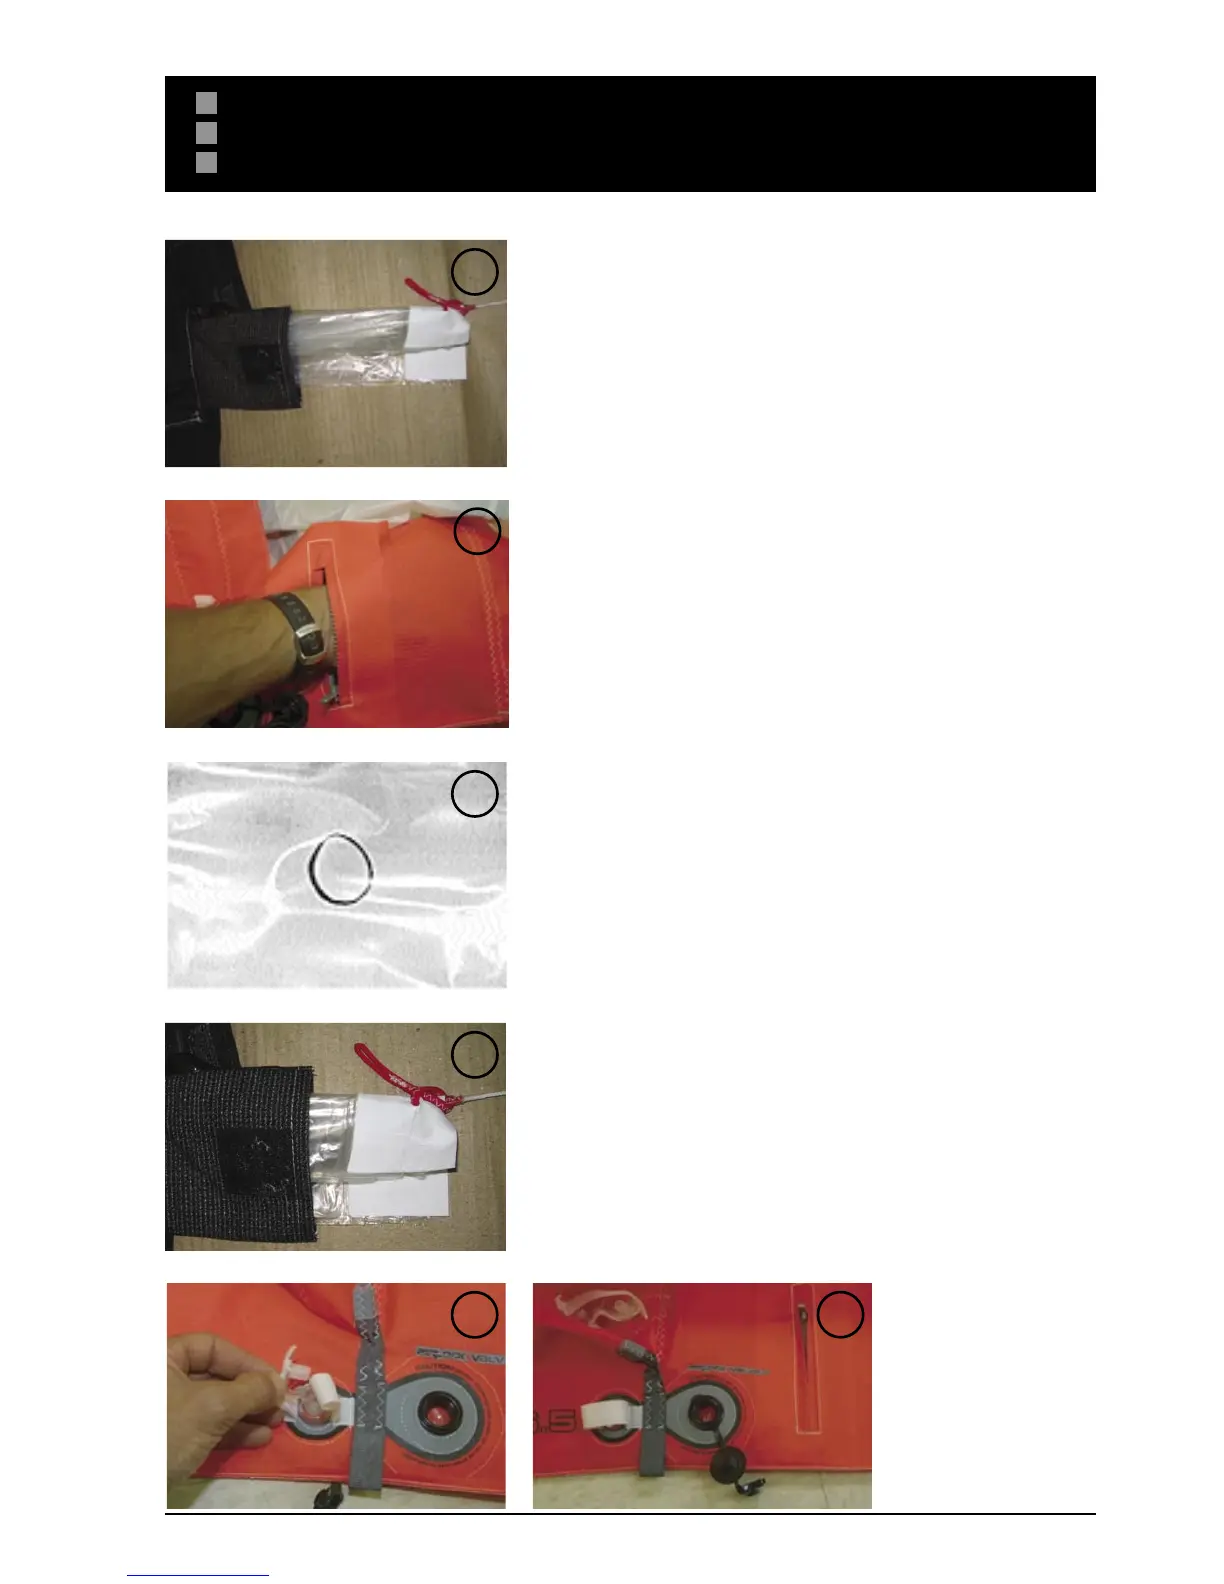
• Tuck the ends of the bladder into the corresponding tips. (Fig. 9)
• Once the bladder is replaced, pull the valve back into the hole of the
sleeve. (Fig. 10)
• Next, place the standard valve back into position and replace the valve
plug in the Velcro. (Fig. 11)
• Making sure not to catch the internal bladder in the zipper, close the
center LE zipper pocket. Next, fold over wingtip access pockets and secure
the Velcro strips.
• Re-attach the Airlock Valve Assembly.
• Partially inflate the Leading Edge to make sure the bladder fits into all four
corners of the sleeve.
• Inflate the Leading Edge entirely or deflate it if you are going to store the
kite.
10
9
6
7
8
11
R EP AI RS
LEADING EDGE BLADDERS