PN 21157307 A | User Manual 7 - ENG
HELiOS
Operating Instructions –
Filling a Portable
1. Verify the level of liquid oxygen in the unit (see
Operating Instructions — Level Verication).
2. Clean and dry the ll connectors on both the
HELiOS reservoir and the portable unit. Wipe
gently using a clean, dry, lint-free cloth.
WARNING: THE FILL CONNECTORS MUST
BE CLEAN AND DRY WITH A LINT-FREE
CLOTH ON BOTH THE STATIONARY AND
PORTABLE UNITS TO PREVENT FREEZING
AND POSSIBLE EQUIPMENT FAILURE.
WARNING: SHOULD LEAKAGE BE EXCES-
SIVE TO THE POINT THAT A STREAM OF
LIQUID IS PRESENT, LEAVE THE AREA
AND CALL YOUR HEALTH CARE PRO-
VIDER IMMEDIATELY.
WARNING: DO NOT DEPRESS OR DIS-
TURB THE METAL POPPET ON THE FILL
CONNECTOR WHEN DRYING IT. THIS CAN
CAUSE LEAKAGE OF LIQUID OXYGEN.
Caution: Should there be any liquid
leakage from the HELiOS reservoir after
separating the units, set the portable
aside, ensuring it remains vertical, leave
the room and call your health care pro-
vider immediately.
3. Turn the ow control knob on the portable unit to
the off (0) position.
4. Follow the lling instructions provided for your
portable unit.
Operating Instructions –
Breathing Directly from the
Reservoir
Note: Use the duration charts available at www.
cairemedical.com as a guideline to determine the
length of time your HELiOS reservoir will operate
continuously at a given flow rate.
1. Verify the level of liquid oxygen in the unit (see
Operating Instructions — Level Verication).
2. Use the following chart as a guideline to the
recommended tubing length.
FLOW
SETTING
MAXIMUM (RECOMMENDED)
TUBING LENGTH*
(LPM) 22-psig
1-6 100 Ft. (30.5 m)
8 100 Ft. (30.5 m)
10 50 Ft. (15.2 m)
*Length is oxygen tubing only. Does not include a 7 Ft. cannula.
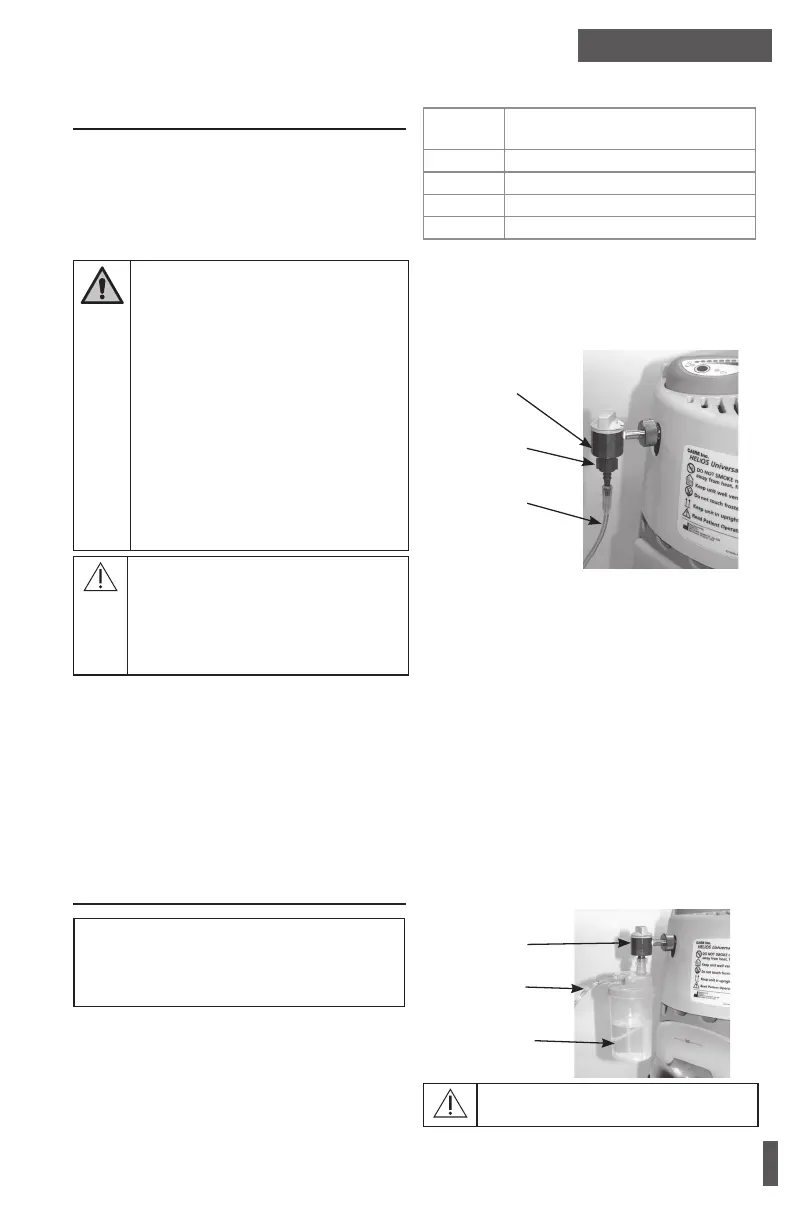
3. Attach an external ow control valve (FCV) to
the DISS connection of the reservoir. Make sure
to tighten the nut until no hissing sound is heard.
External
Flow Control
Tubing Adaptor
Nasal Cannula
Attachment of external ow control valve
4. Ifahumidierbottlewillnotbeused:
• Attach a tubing adaptor to the bottom of the
external ow control valve.
• Attach your nasal cannula or oxygen tubing
to the tubing adaptor.
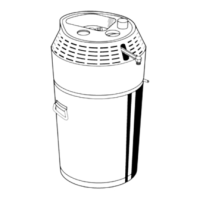
Ifahumidierbottlewillbeused:
• Attach a humidier bottle to the bottom on
the external ow control valve.
• Fill the humidier bottle with distilled
water to the proper level as indicated by the
humidier’s instructions.
• Attach your nasal cannula or oxygen tubing
to the connector on the humidier bottle.
Humidier
Bottle
Nasal Cannula
External
Flow Control
Valve
Caution: To ensure proper flow rates, verify that all
fittings are tight and leak free.
Attachment of a humidier bottle to the external ow control valve.