*
!"#$%#&$'()!"#$"#&$'(
Lerchenfeldstr. 9 87600 Kaufbeuren Tel.: +49(0)8341 / 9764-0 Fax: +49(0)8341 / 67806
35
Insert the plug connector into the socket provided on the device. The plug
connectors can only be inserted and locked into the correct socket and in the
correct position. Make sure that the locking engages securely. To withdraw the
connector plug, the locking must be released by pressing the two wings
together.
Connecting a 12-pole plug connector
,+1
1
The illustration (Fig. 7) shows the contacts available in the 12-pole plug
connector. Connect the 12-pole plug connector to the supply battery (battery
II), the starter battery (battery I) and the generator according to the connection
diagram (fig. 8).
Make sure that the contact pins engage securely with the plug connector!
Loose contact pins can lead to malfunctions or short-circuiting.
Fig. 7
Connect the negative charging cable for the battery II (blue
6
mm²) to the contacts 24 and 25 of the device and the
negative pole of the battery II.
Connect the positive charging cable for the battery II (red
6 mm²) to the contacts 16 and 17 of the device and the
positive pole of the battery II. For cable lengths of o
m, this cable must be equipped with a fuse near the
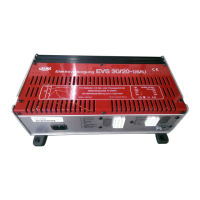
positive pole of the battery II! For the power supply EVS
30/20-
DS/IU a 30 A fuse must be used. For the power
supply EVS 30/30-DS/IU a 40 A fuse must be used.
Connect the positive supply cable (red 6 mm²) to the contacts 20, 21, and 22 of
the device and the positive pole of the battery II. It is essential to install a 40 A
fuse near the positive pole of the battery II!
Connect the measuring cable (red 0.75 mm²) to the B+ input, contact 19 of the
device and the positive pole of the battery II. It is essential to install a 2 A fuse
near the positive pole of the battery II!
Connect the positive cable of the battery I (red 6 mm²) to the contacts 26 and
27 of the device and to the positive pole of the battery I. It is essential to
install a 40 A fuse near the positive pole of the battery I!
 Loading...