— 3 —
Tabletop Mounting
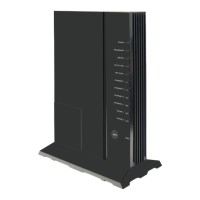
Calix GigaHubs can be mounted on a tabletop in a “tower” confi guration
using the tabletop stand shipped with the product.
Assemble the tabletop stand and the GigaHub as shown in the following
diagram.
Line-up GigaHub and
Desktop Stand as Shown.
Allow a 9/16” Offset Between
Bottom Corner of GigaHub
and the Top Edge of the Desktop Stand
1
Slide GigaHub Down
Onto Desktop Stand until
Flush
2
3
Push Stand to the right while
Pulling the GigaHub to the
left until locked into place.
Remove Fiber Access Cover
(remove screw) and set aside
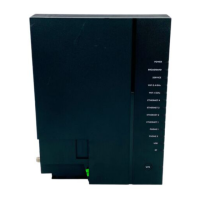
WPS
ETHERNET 3
ETHERNET 4
PHONE 1
PHONE 2
7761
Assembling Stand onto
the 814G GigaHub
4
CLICK !
Connecting the Equipment
In order to facilitate table-top mounting of the 814G GigaHub, do the follow-
ing:
1. Remove the 814G GigaHub from its packaging and inventory all parts.
2. Remove the fi ber access cover and set aside temporarily.
3. Attach the fi ber pigtail to the bulkhead fi tting on the GigaHub until it
snaps into place. Make sure the fi ber does not violate manufacturer’s
bend radius specifi cations and that the fi ber is not kinked or pinched.
Re-install the fi ber access cover.
4. Plug in the power adapter to an available wall socket.
5. Plug in the 2-pin barrel connector into the GigaHub. The power-up
sequence begins and will complete in about 3 minutes.
NOTE: To ensure proper airfl ow around the unit, do not block the
sides of the GigaHub.
 Loading...