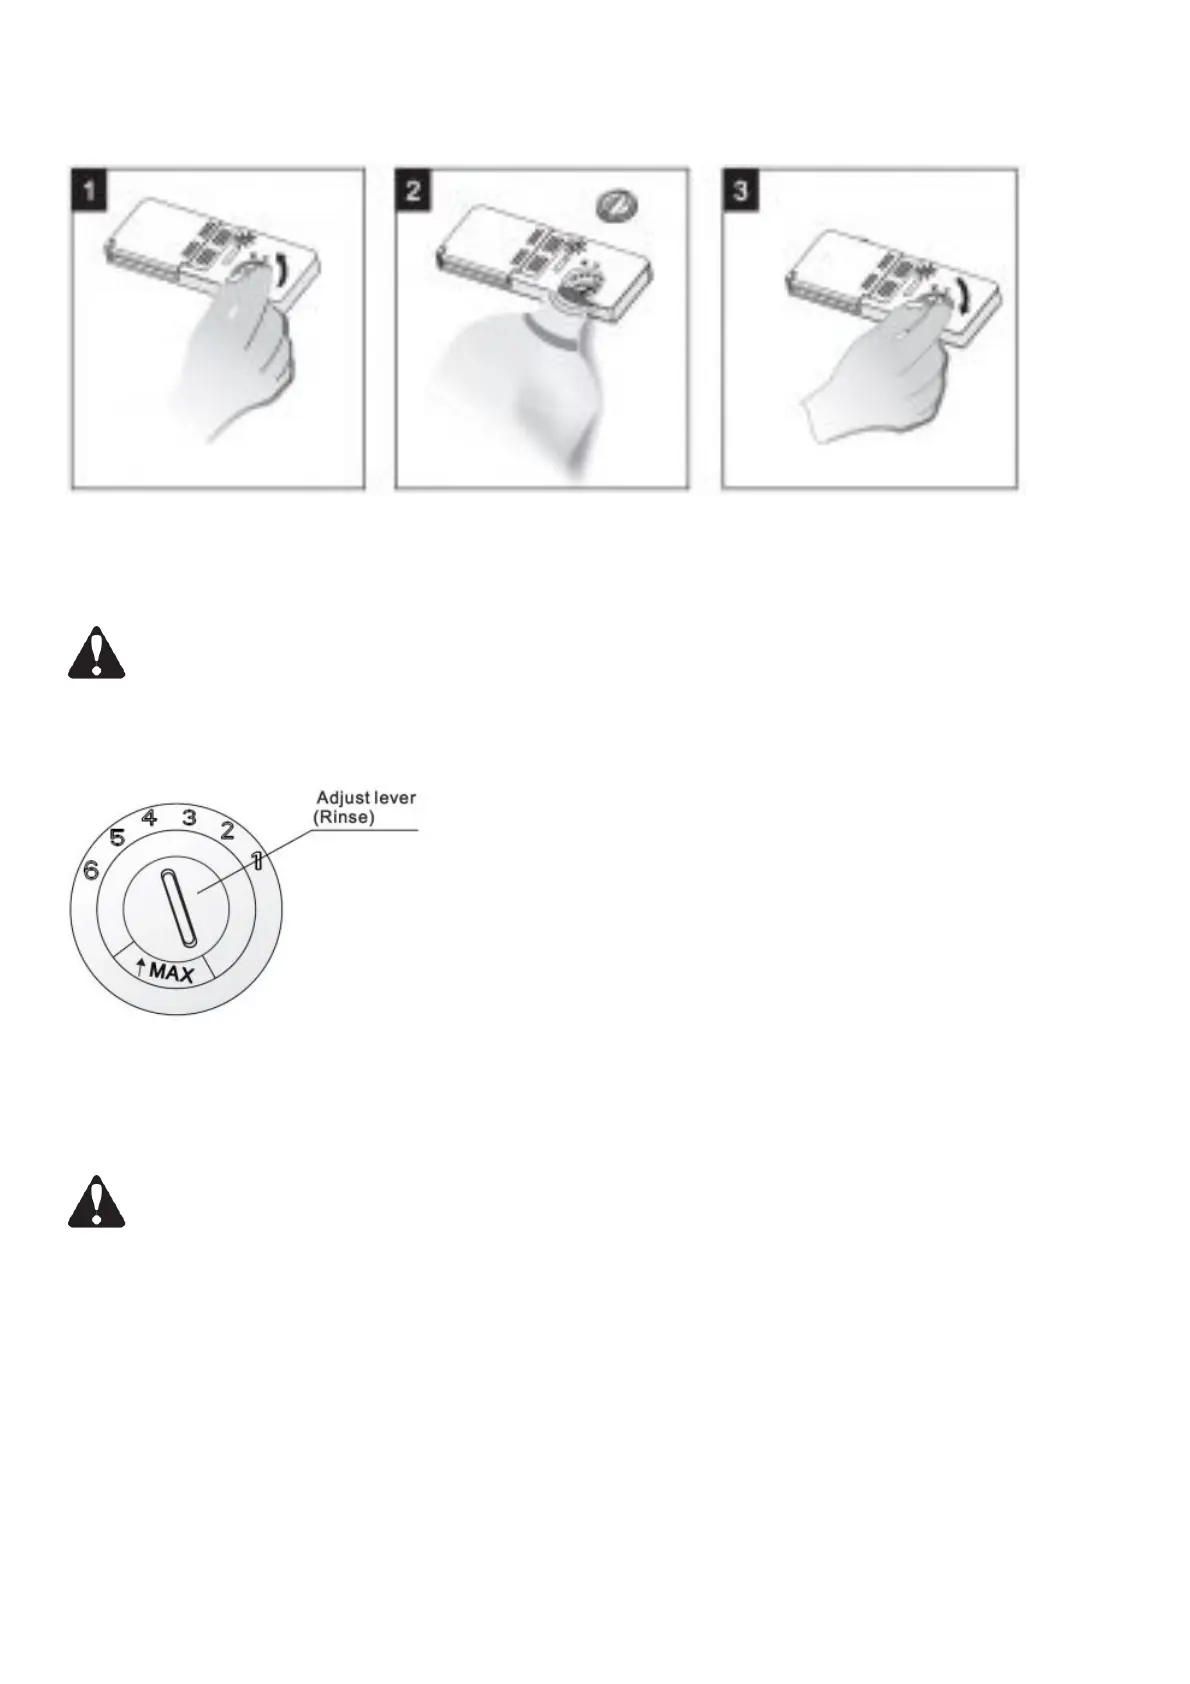
How to fill the Rinse Aid Dispenser
1. To open the dispenser, turn the cap to the “open” (left) arrow and lift it out.
2. Pour the rinse aid into the dispenser, being careful not to overfill.
3. Replace the cap by inserting it aligned with “open” arrow and turning it to the closed (right) arrow.
NOTE: Clean up any rinse aid spill during filling with an absorbent cloth to avoid excessive foaming during the
next wash. Don’t forget to replace the cap before you close dishwasher door.
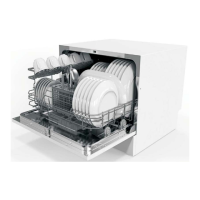
Adjusting Rinse Aid Dispenser
The rinse aid dispenser has six or four settings. Always start with the dispenser set on “4”. If spots and poor drying
are a problem, increase the amount of rinse aid dispensed by removing the dispenser lid and rotating the dial to “5”. If
the dishes still are not drying properly or are spotted, adjust the dial to the next higher number until your dishes are
spot-free. The recommended setting is “4”. (Factory value is “4”.)
NOTE:
Increase the dose if there are drops of water or lime spots on the dishes after washing. Reduce it if there are sticky
whitish stains on your dishes or a bluish film on glassware or knife blades.
C. Detergent
Detergents with have chemical ingredients that are necessary to remove dirt, crush dirt and transport it out of the
dishwasher. Most of the commercial quality detergents are suitable for this purpose.
Normally new pulverised detergent is without phosphate. The water softener function of
phosphate is not given. In this case we recommend to fill salt in the salt container even when
the hardness of water is only 6 dH. If detergents without phosphate were used in case of hard water often white
spots appear at dishes and glasses. In this case please add more detergent to reach better results. Detergents
without chlorine do only bleach a little. Strong and coloured spots will not removed completely. In this case please
choose a programme with higher Temperature.