5. Set A5R size paper (A5 portrait orientation) in the Multi-purpose Tray Pickup Tray. Side align the Side Guide Plates
and select <MF-A5R>, then press OK.
6. Slide the Side Guide Plates so that the distance between them becomes maximum while no paper is loaded on the
Multi-purpose Tray Pickup Tray. Then select <MF-MAX>, and press OK.
7. Slide the Side Guide Plates so that the distance between them becomes minimum while no paper is loaded on the
Multi-purpose Tray Pickup Tray. Then select <MF-MIN>, and press OK.
NOTE:
• When installing to the host machine, proceed to “Image Position Adjustment” on page 552.
• When Installing to the Multi-drawer Paper Deck, proceed to "Input of Adjustment Values on the Service Label (When Installing
to the Multi-drawer Paper Deck)".
■ Input of Adjustment Values on the Service Label (When Installing to the Multi-
drawer Paper Deck)
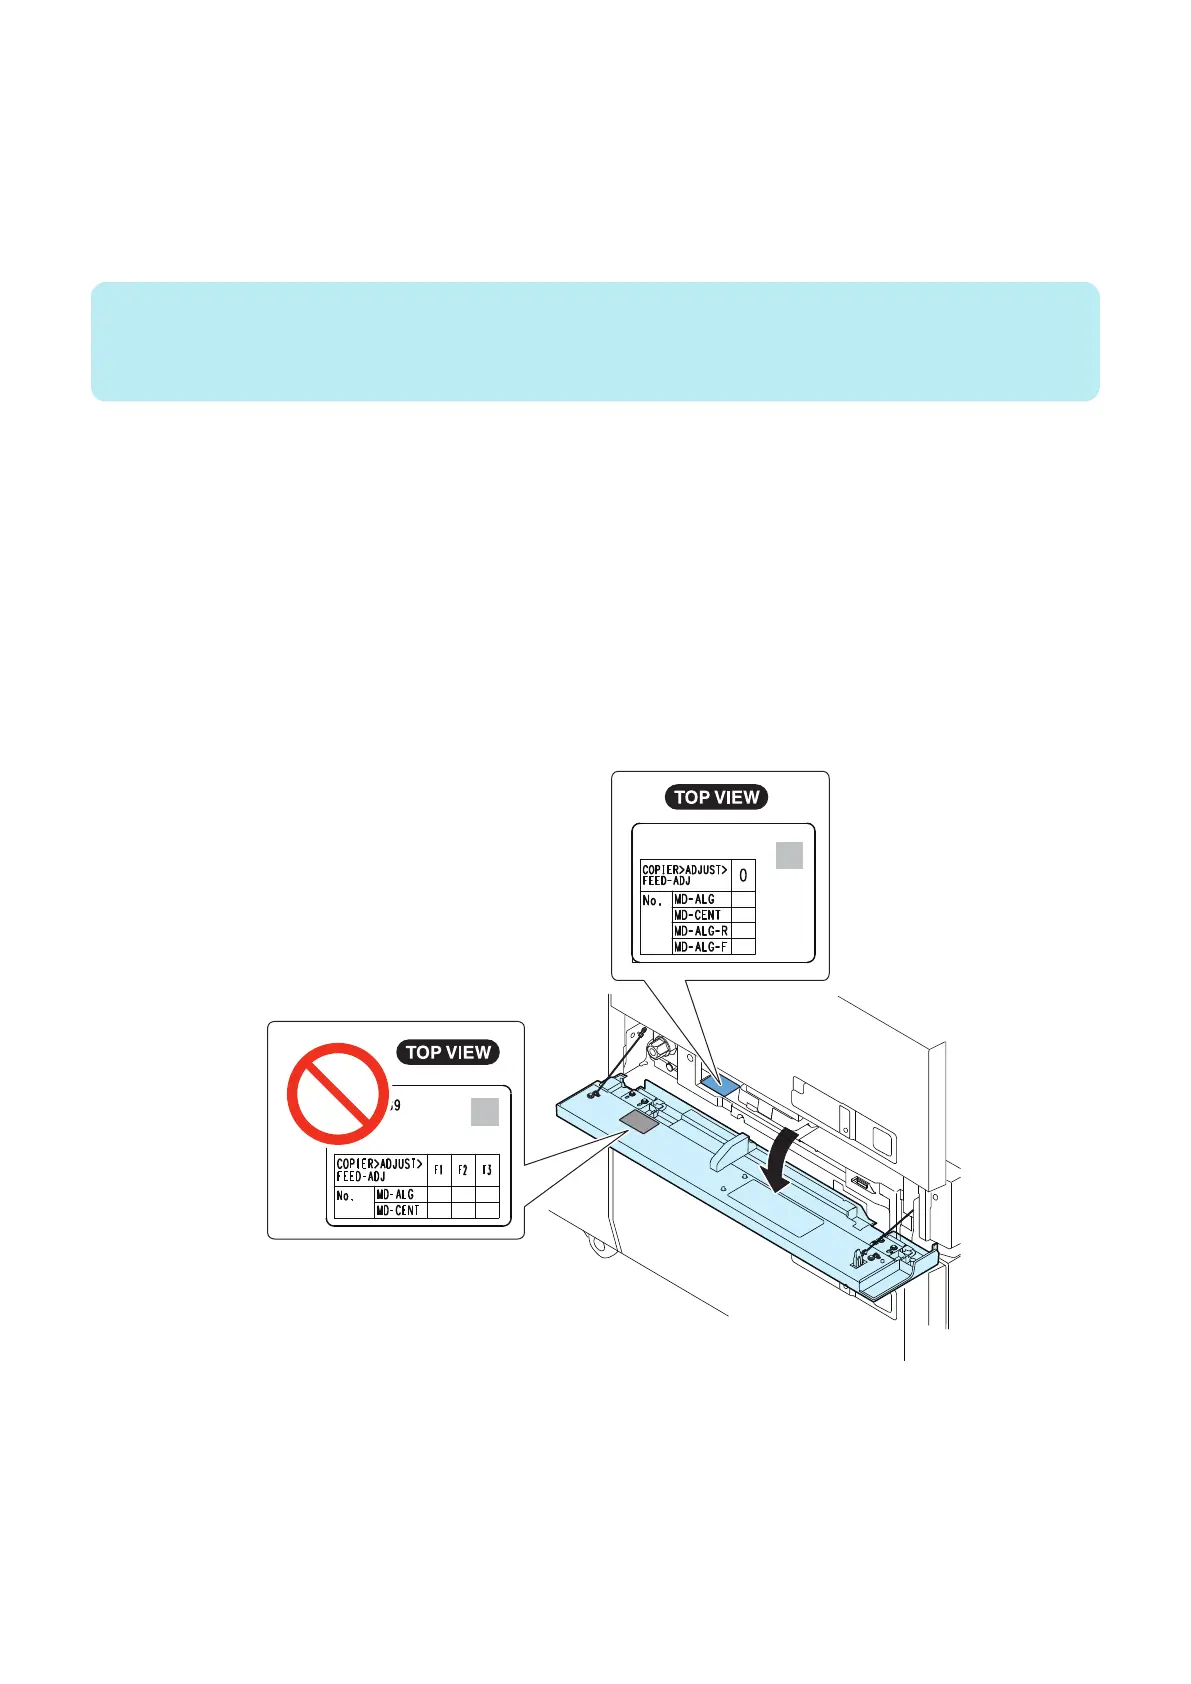
1. Open Through Path Front Cover. Enter the Service Mode and input the adjustment value on the service label.
• Through-path Alignment Width Adjustment
COPIER > ADJUST > FEED-ADJ > MD-ALG
• Adjustment of the Through-path Alignment Center Reference Position
COPIER > ADJUST > FEED-ADJ > MD-CENT
• Adjustment Value of Through-path Feed Belt Pressure Rise Switching Position
COPIER > ADJUST > FEED-ADJ > MD-ALG-R
• Adjustment Value of Through-path Feed Belt Pressure Drop Switching Position
COPIER > ADJUST > FEED-ADJ > MD-ALG-F
2. Close the Through-path Front Cover and exit the service mode.
5. Paper Feed Options
549
 Loading...