2
4
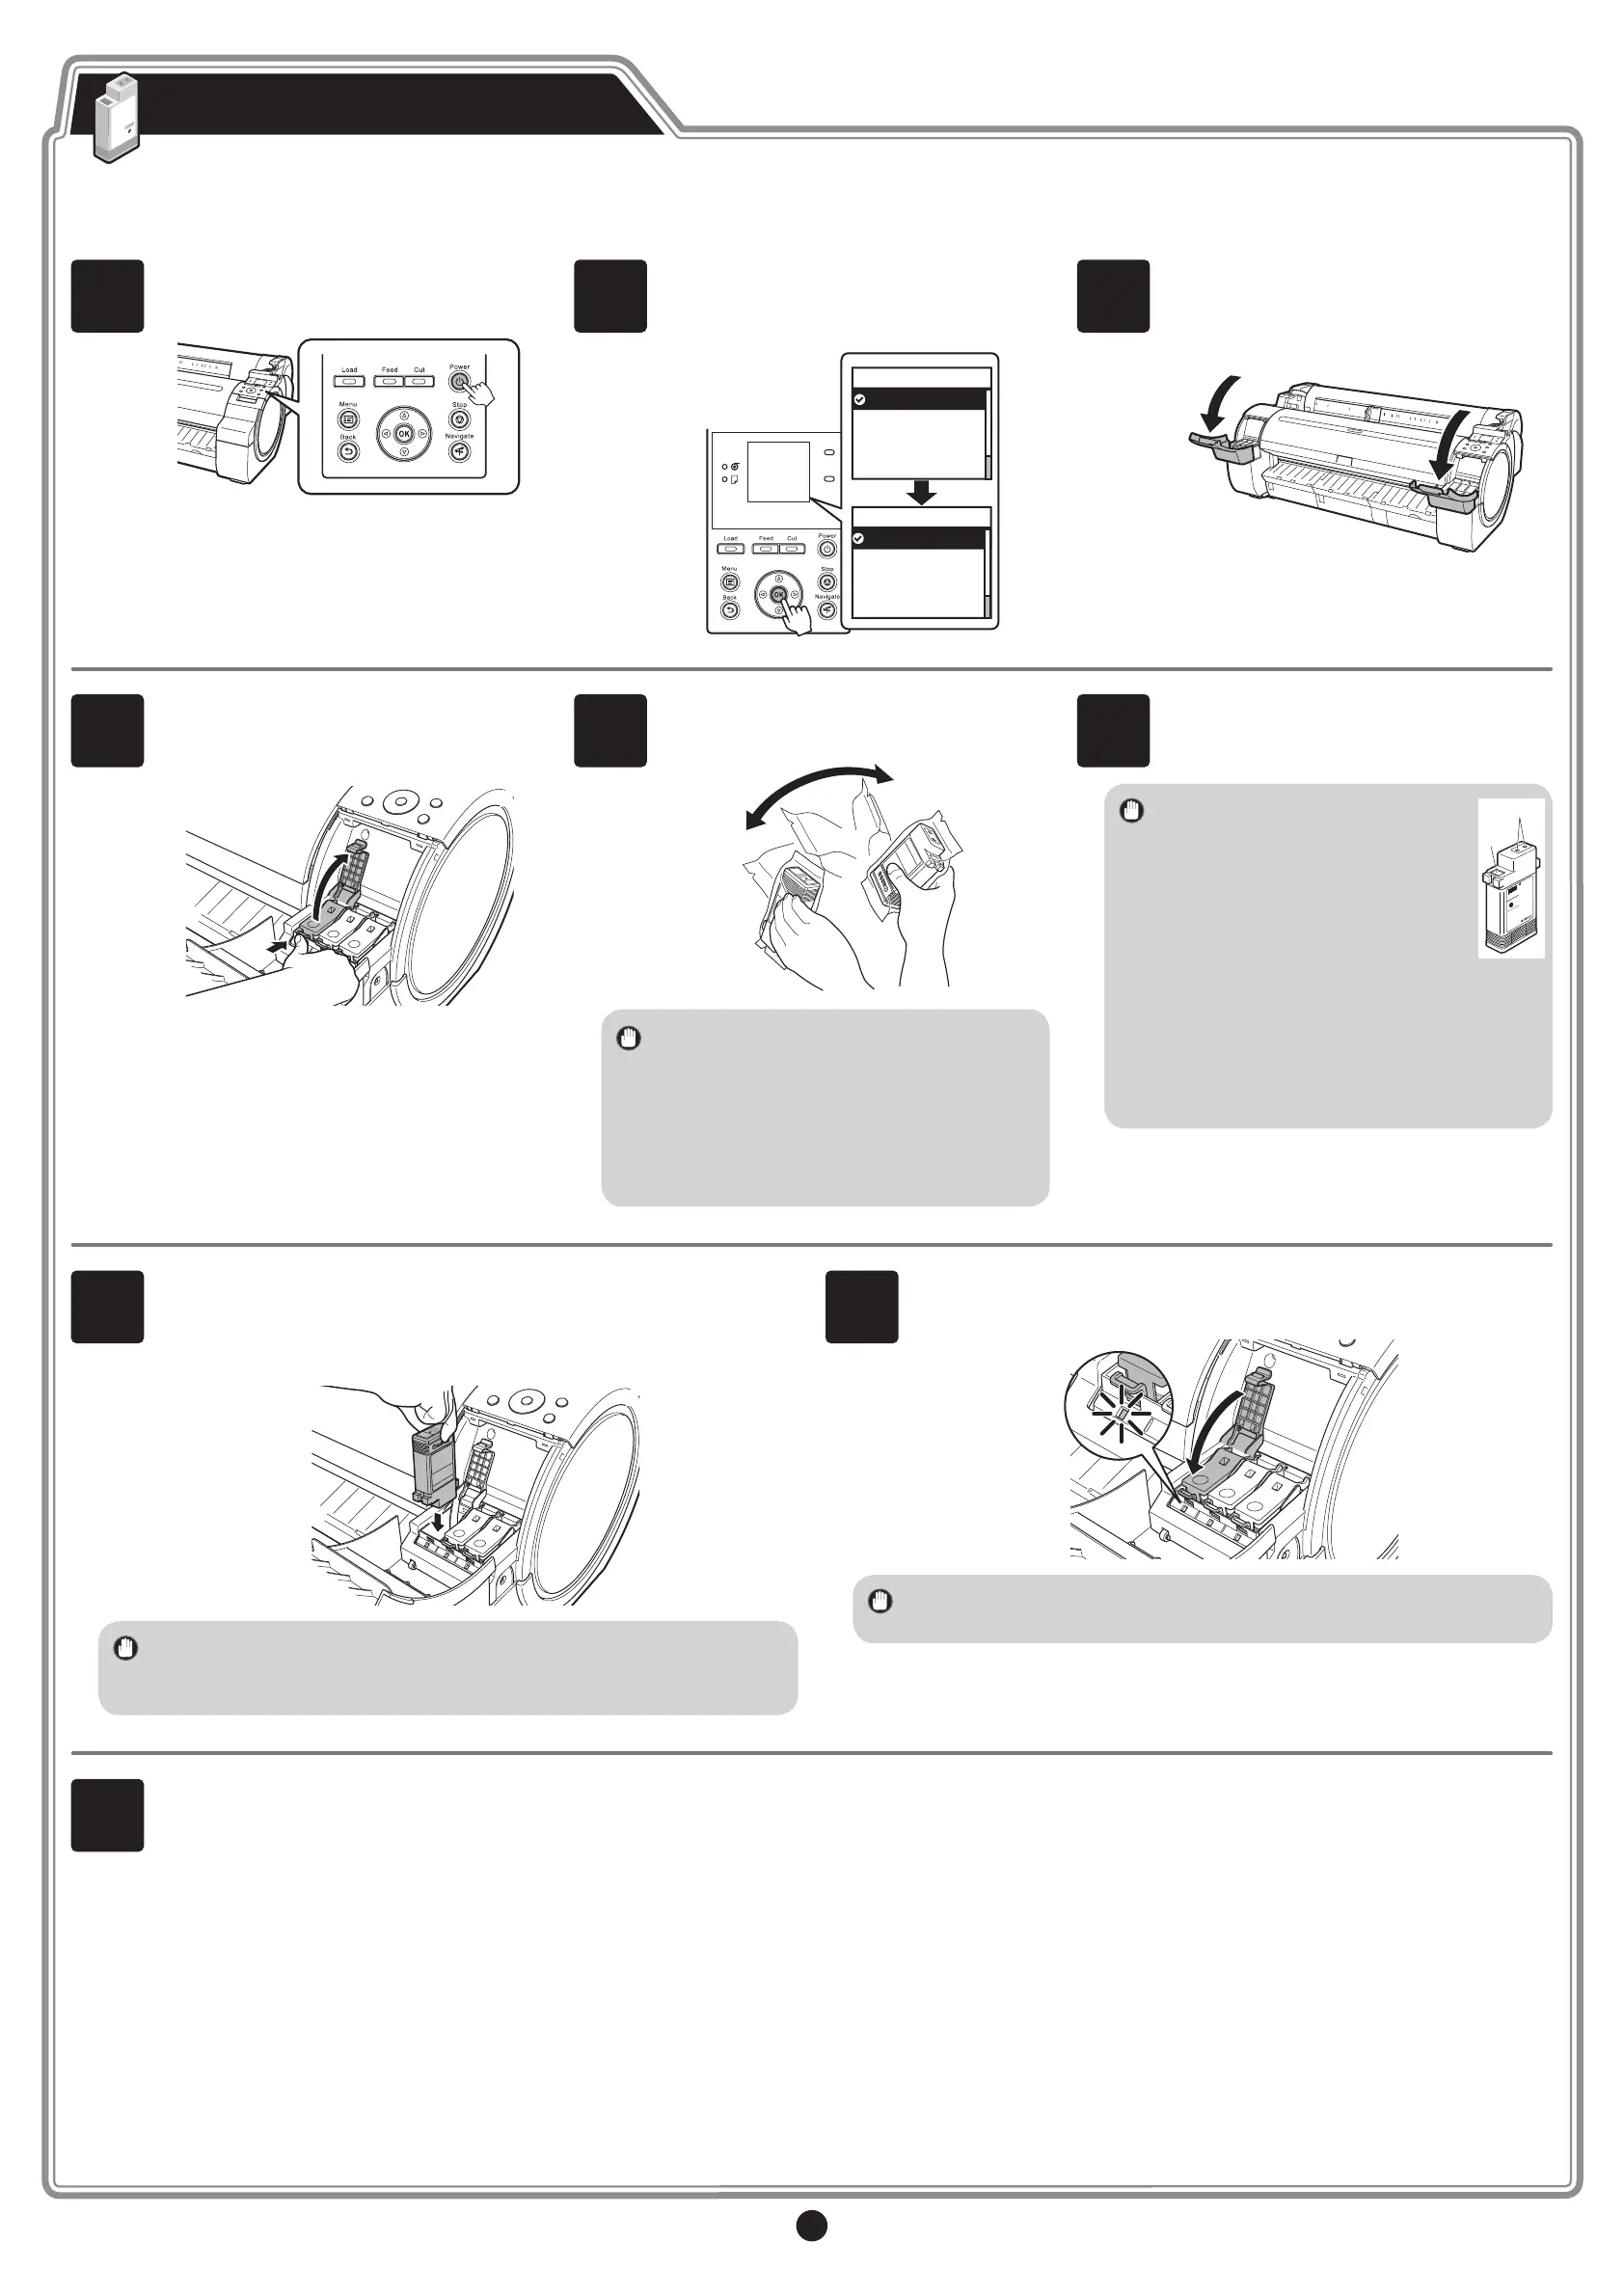
While pressing the stopper of the ink tank
lock lever inwards, open the ink tank lock
lever upwards.
5
Shake the ink tanks gently 1 to 2 times
before opening the pouch.
• Failure to shake ink tanks may result
in reduced print quality because ink
ingredients have settled on the bottom
of the tank.
• If the ink tank is cold, allow it to adjust to
room temperature before attaching it to
the printer.
6
Open the pouch and remove the ink tank.
• Never touch the ink holes (a)
or metal contacts (b). Touching
these parts may cause stains,
damage the ink tank, and
affect print quality.
b
• Avoid dropping the ink tank after
removing it from the pouch.Otherwise,
ink may leak and cause stains.
• Do not remove and shake ink tanks that
have already been installed in the printer
because ink may leak out.
1
Press the power button to turn on the
printer.
2
Select your language and time zone.
Use the ▲ and ▼ keys to select and
press OK.
Data
Message
1/2
Language
English
日本語
Français
Italiano
Deutsch
1/5
Time Zone
0:London (GMT)
+1:Paris,Rome
+2:Athens,Cairo
+3:Moscow
+4:Eerevan,Baku
3
Instructions on ink tank installation
are shown on the display screen. As
instructed, grab the handle on the ink tank
cover to open it.
Install the 6 ink tanks by following the guidance displayed on the printer display.
Install the Ink Tanks
7
Insert the ink tank into the holder facing as shown, with the ink holes
down.
At this time, detach and reattach the ink tanks 2 to 3 times and
ensure that the ink tanks are security attached.
• If the ink tank does not t in the holder, make sure the color of the
ink tank lock lever matches the color of the ink tank, and check the
orientation of the ink tank.
8
Close the ink tank lock lever until it clicks into place. Make sure the
ink lamp is lit in red.
• If the ink lamp is not lit, repeat steps 4 and 8.
9
Once you have installed all 6 ink tanks by repeating steps 4 to 8,
close the ink tank cover.