5
For network connection
• If the printer is already connected to the network,
conrm the IP address assigned to the printer.
Ask your network administrator for further
information.
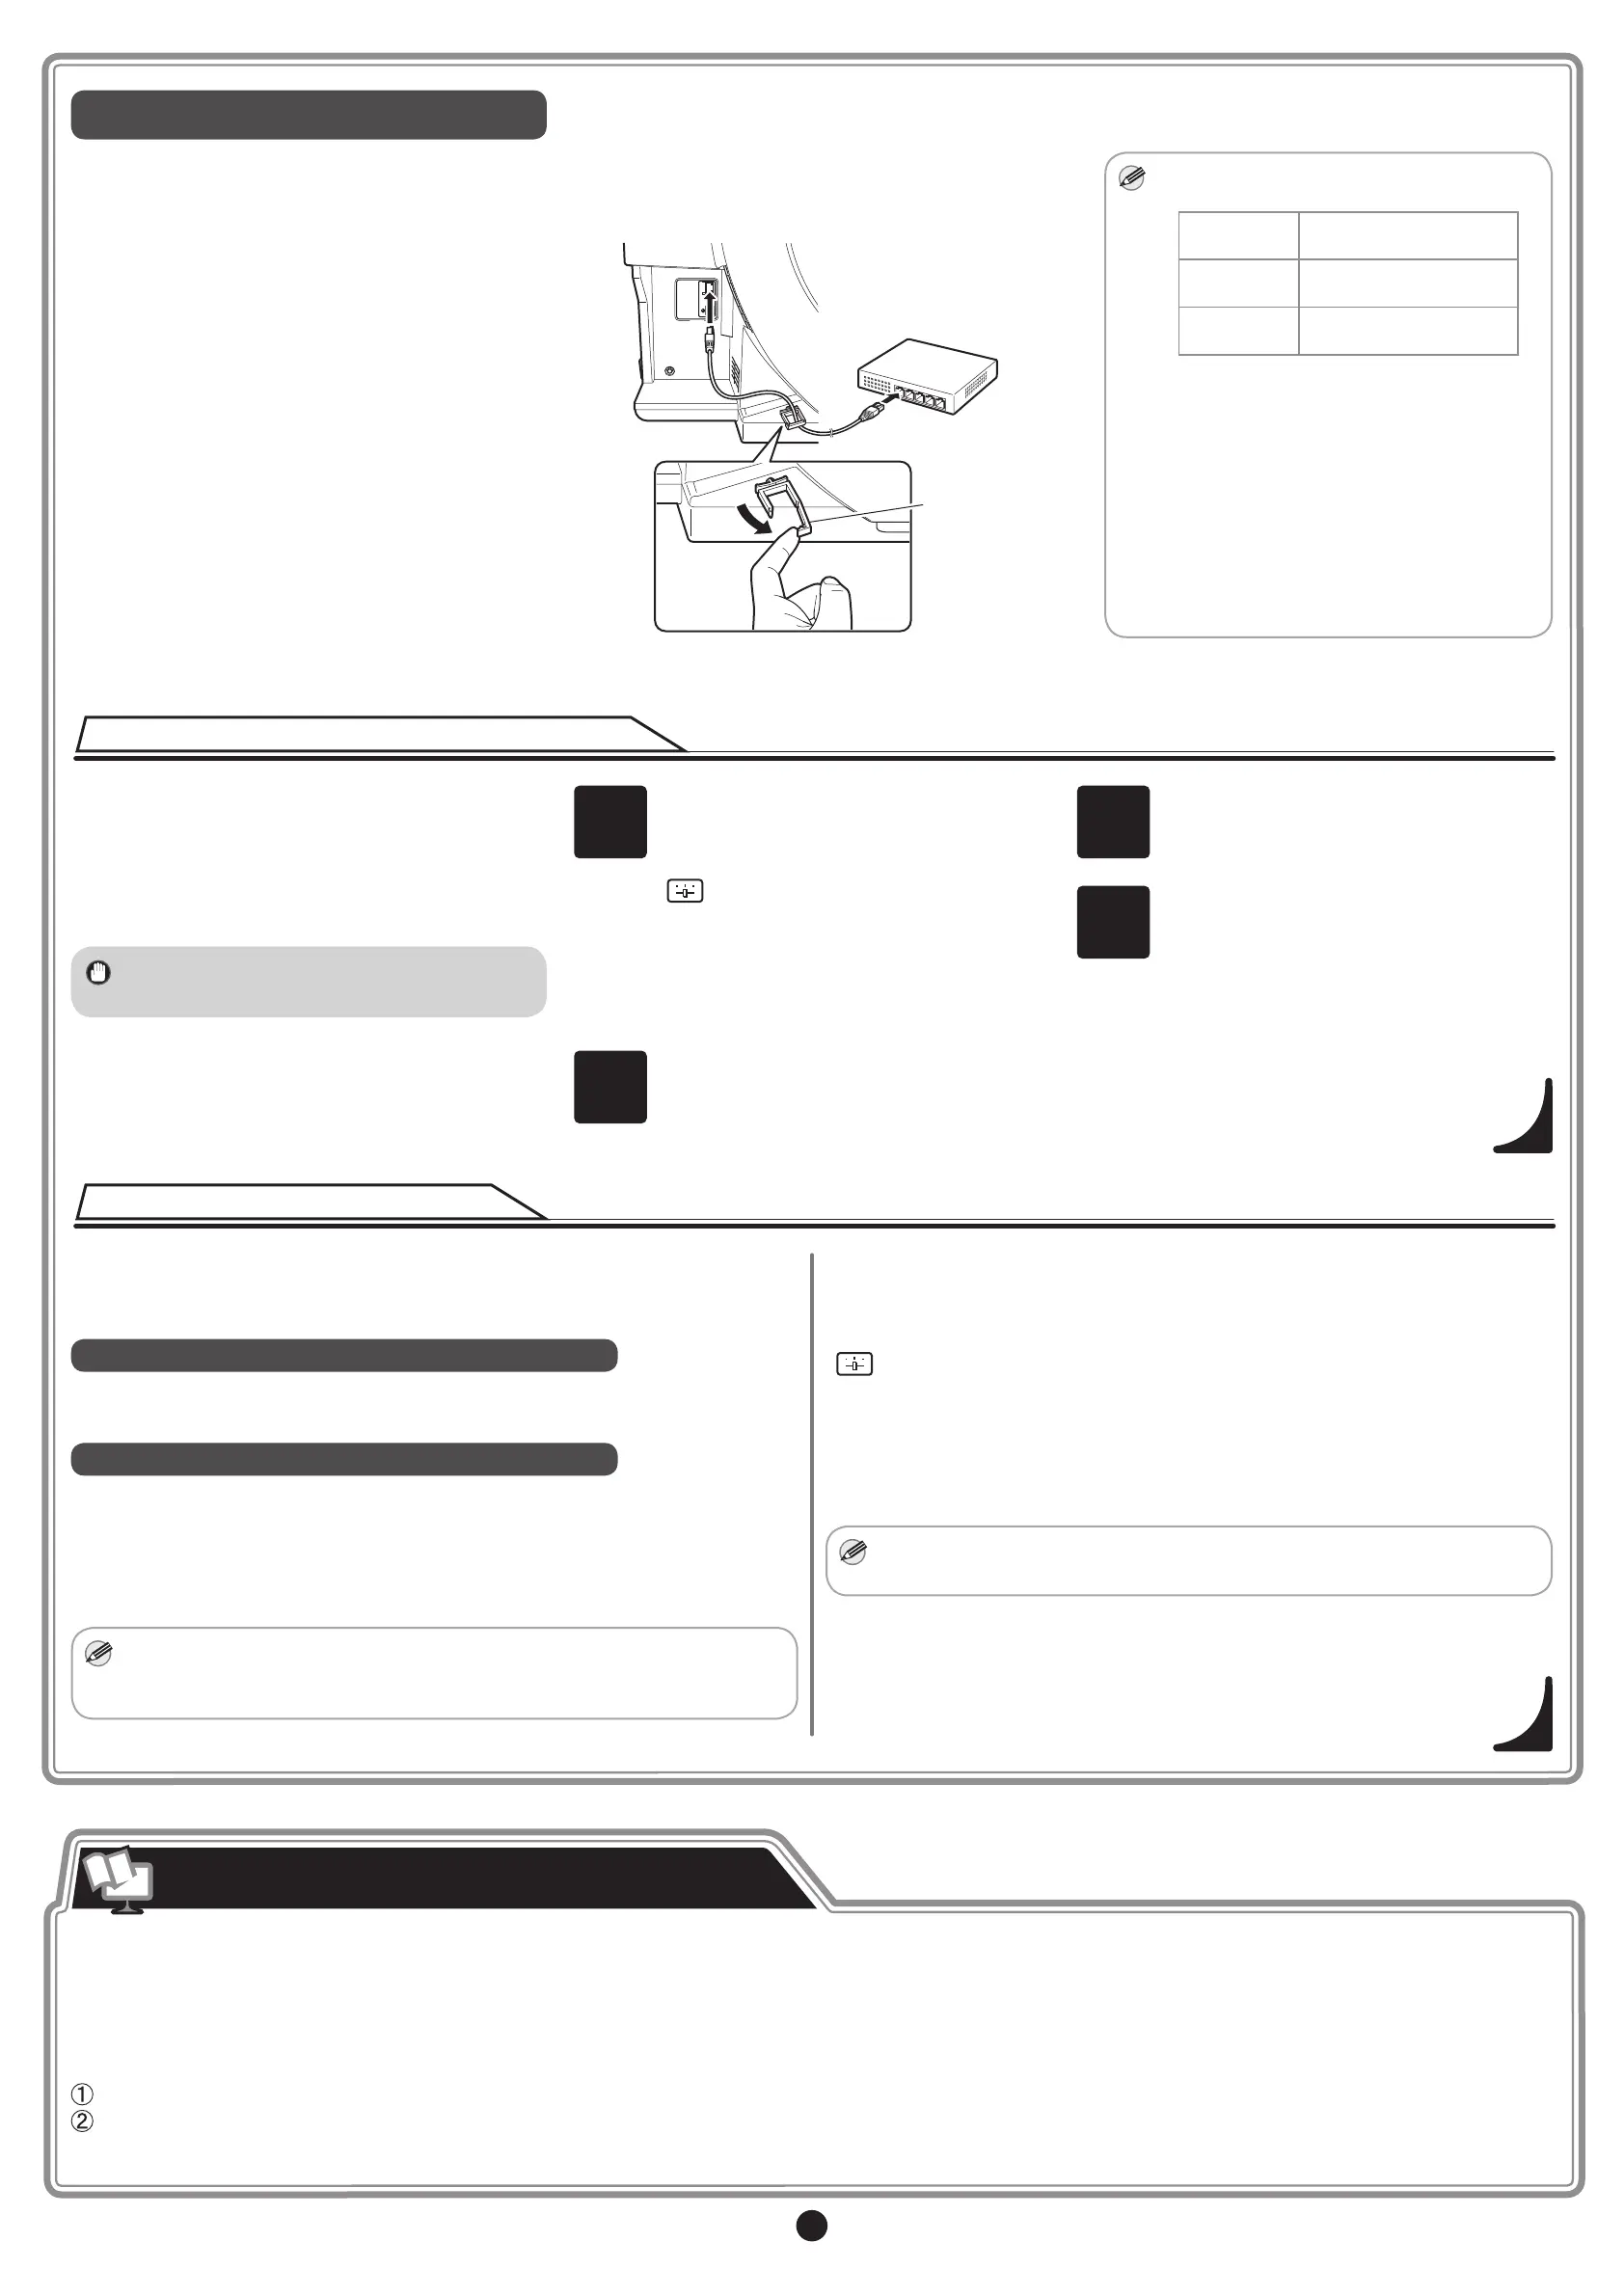
• When connecting the LAN cable to the LAN port
on the back of the printer, feed the network cable
through the wiring retainer (a).
a
• If the printer is on, the Link indicator
under the LAN port lights.
1000Base-T
connection
The LED on the bottom
lights green.
100Base-TX
connection
The LED on the top lights
orange.
10Base-T
connection
The LED on the top lights
green.
• If the printer you want to use is not
displayed in the results of searching for
usable printers on the network, setup
an IP address for the printer and then
congure it on the printer by referring to
"When the printer cannot be found on
the network" on P.5.
• Using the DHCP server function to
automatically assigned IP addresses
requires separate settings. (See "Using
DHCP" on P.5)
When the printer cannot be found on the network
Using DHCP
If your printer cannot be found when connecting to
the network for the rst time, setup an IP address
for the printer and then congure it on the printer.
Once charging the ink has nished, specify the IP
address on the printer's control panel.
• Do not operate the printer until charging the
ink has nished.
1
Select the following menu items in order
from the printer control panel to display
the IP address input screen.
Set./Adj. Menu
└ Interface Setup
└ TCP/IP
└ IPv4
└ IPv4 Settings
└ IP Address
2
Enter the IP address.
3
Press Menu.
4
On the registration conrmation message
that appears, select Yes using the ▲ and
▼ keys, and then press OK.
The IP address is set on the printer.
Next, restart installation of the printer
driver.
To use the DHCP server function to automatically allocate an IP address to
the printer, one of the following settings needs to be congured. Check with
your network administrator for the settings that match your system.
When used in an environment with a DNS server
Congure the DNS dynamic update function in the printer and register the
printer DNS host name with the DNS server.
When used in an environment without a DNS server
Congure the DHCP server to always allocate the same IP address to the
printer.
This section describes how to congure the DNS dynamic update function
from the printer control panel.
• The DNS dynamic update function can also be congured using Remote
UI. Refer to "Conguring the Printer's TCP/IP Network Settings With
RemoteUI" in the user guide for details.
■
How to Congure the DNS Dynamic Update Function
Select the following menu items in order from the printer control panel and
change DNS dynamic update to On.
Set./Adj. Menu
└ Interface Setup
└ TCP/IP
└ IPv4/IPv6
└ DNS Settings
└ DNS Dync update
• If Use the same host name and domain name as IPv4? is displayed
when setting IPv6, select Off.
Manuals describing how to use the printer and how to resolve problems are not included.
Refer to the manual published on the website together with the included "Cautions When Using the iPF670E/iPF671E".
The manuals on the website are common to the iPF670 and iPF671.
The following shows how to display the manuals on the website.
Click the User Manual button in the Support sheet of software such as the printer driver (User's Guide, Paper Reference Guide only)
Download from the Canon website (excluding Paper Reference Guide)
How to Display the Electronic Manuals
 Loading...