I
Expoc~~~r
S~ttine 2
-
F
Stop
Priority
Method
q]
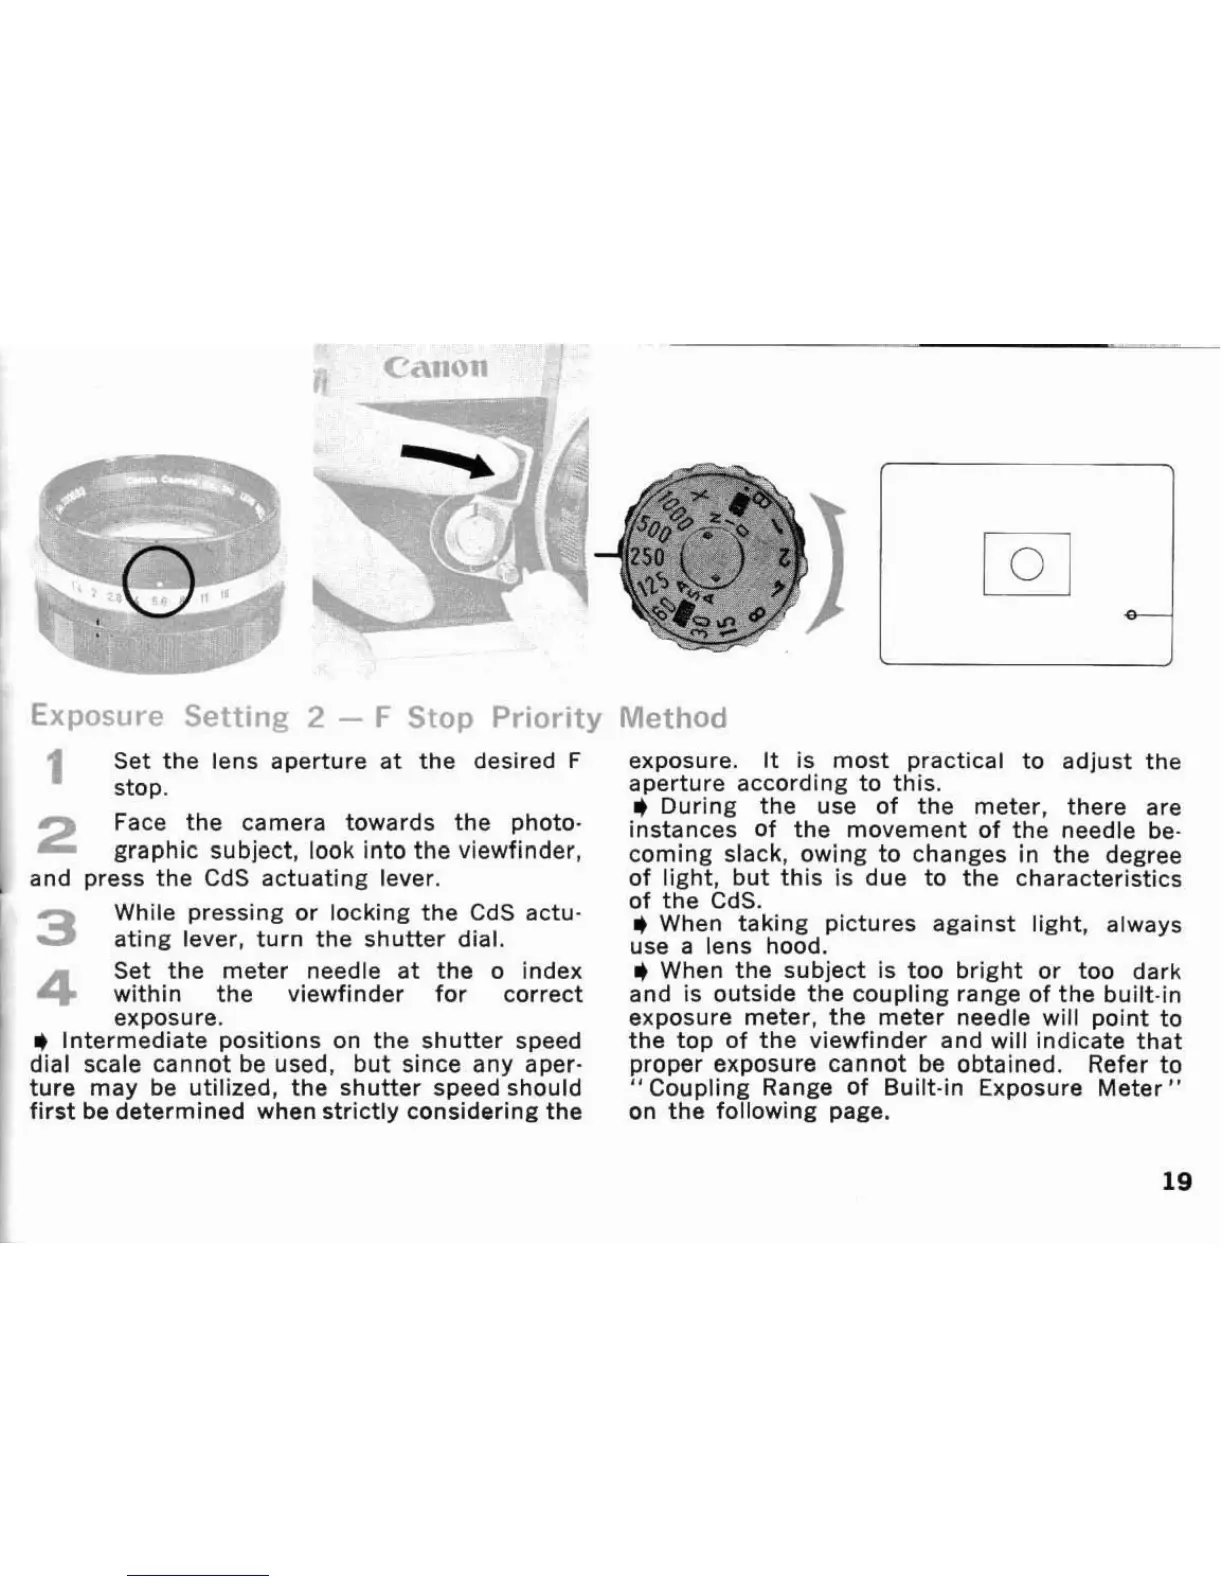
Set the lens aperture at the deslred
F
stop.
Face the camera towards the photo-
graphic subject.
look into the viewfinder,
and press the
CdS actuating lever.
While pressing or locking the
CdS actu-
3
ating lever, turn the shutter dial.
Set the meter needle at the o index
4
within the
viewfinder
for correct
exposure.
*
Intermediate positions on the shutter speed
dial scale cannot be used, but since any aper-
ture may be utilized, the shutter speed should
first be determined when strictly considering the
exposure.
It
is most practical to adjust the
aperture according to this.
i
During the use of the meter, there are
instances Of the movement of the needle be-
coming slack, owing to changes in the degree
of
light, but this is due to the characteristics
of tKe
C~S.
*
When taking pictures against light, always
use a lens hood.
*
When the subject is too bright or too dark
and is outside the coupling range of the built-in
exposure meter, the meter needle will point to
the top of the viewfinder and will indicate that
proper exposure cannot be obtained. Refer to
"Coupling Range of Built-in Exposure Meter"
on the following page.
 Loading...