17
Before Use
Basic Guide
Advanced Guide
Camera Basics
Index
Auto Mode /
Hybrid Auto Mode
Other Shooting Modes
P Mode
Tv, Av, and M Mode
Playback Mode
Wi-Fi Functions
Setting Menu
Accessories
Appendix
● For details on charging time and the number of shots and
recording time possible with a fully charged battery pack, see
“Number of Shots/Recording Time, Playback Time” (
=
170).
● Charged battery packs gradually lose their charge, even when
they are not used. Charge the battery pack on (or immediately
before) the day of use.
● The charger can be used in areas with 100 – 240 V AC power
(50/60 Hz). For power outlets in a different format, use a
commercially available adapter for the plug. Never use an
electrical transformer designed for traveling, which may damage
the battery pack.
Inserting the Battery Pack and Your Memory Card
Insert the included battery pack and a memory card (sold separately).
Note that before using a memory card that is new or has been formatted
in another device, you should format the memory card with this camera
(
=
136).
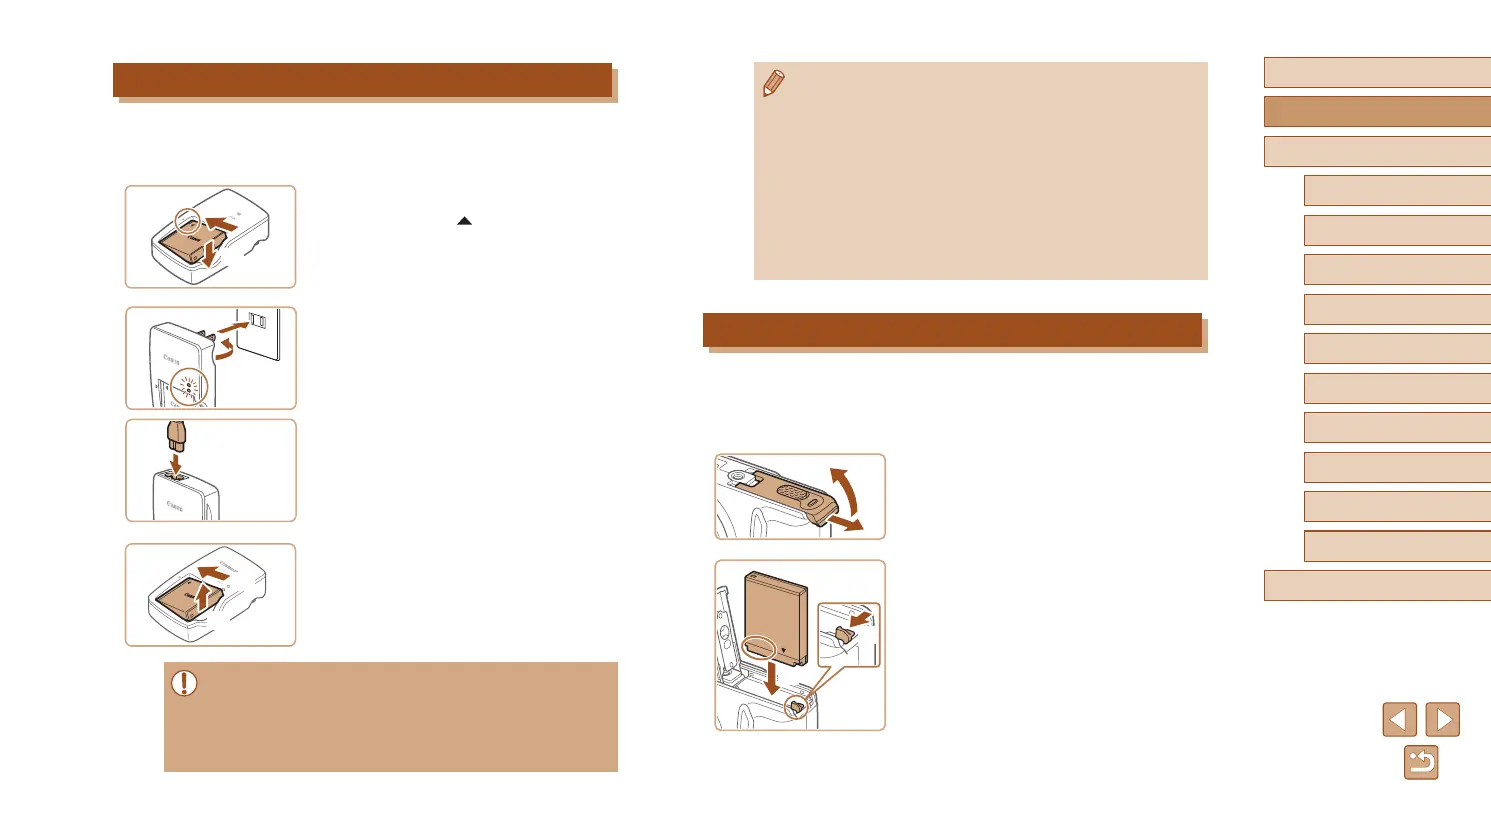
1
Open the cover.
● Slide the cover (1) and open it (2).
2
Insert the battery pack.
● Holding the battery pack with the
terminals in the position shown, hold
the battery lock toward (1) and insert
the battery pack toward (2) until the lock
clicks shut.
● If you insert the battery pack facing the
wrong way, it cannot be locked into the
correct position. Always conrm that the
battery pack is facing the right way and
locks when inserted.
(
1
)
(
2
)
(
2
)
(
1
)
Charging the Battery Pack
Before use, charge the battery pack with the included charger. Be sure to
charge the battery pack initially, because the camera is not sold with the
battery pack charged.
1
Insert the battery pack.
● After aligning the marks on the battery
pack and charger, insert the battery pack
by pushing it in (1) and down (2).
2
Charge the battery pack.
● CB-2LY: Flip out the plug (1) and plug the
charger into a power outlet (2).
● CB-2LYE: Plug the power cord into the
charger, then plug the other end into a
power outlet.
● The charging lamp turns orange, and
charging begins.
● When charging is nished, the lamp turns
green.
3
Remove the battery pack.
● After unplugging the battery charger,
remove the battery pack by pushing it in
(1) and up (2).
● To protect the battery pack and keep it in optimal condition, do not
charge it continuously for more than 24 hours.
● For battery chargers that use a power cord, do not attach
the charger or cord to other objects. Doing so could result in
malfunction or damage to the product.
(
1
)
(
2
)
(
1
)
2
CB-2LY
CB-2LYE
(
1
)
(
2
)
 Loading...