5
Reviewing an Image Right After Shooting
After a shot is taken, the image appears in the LCD monitor for
approximately 2 seconds.
To override this time limit and continue displaying the image, use one of
the following methods:
z
Keep the shutter button fully depressed after taking the shot.
z
Pressing the FUNC./SET button while the image is displayed in the LCD
monitor.*
Press the shutter button halfway again to stop displaying it.
* This operation is not available in the stitch assist mode (p. 6)
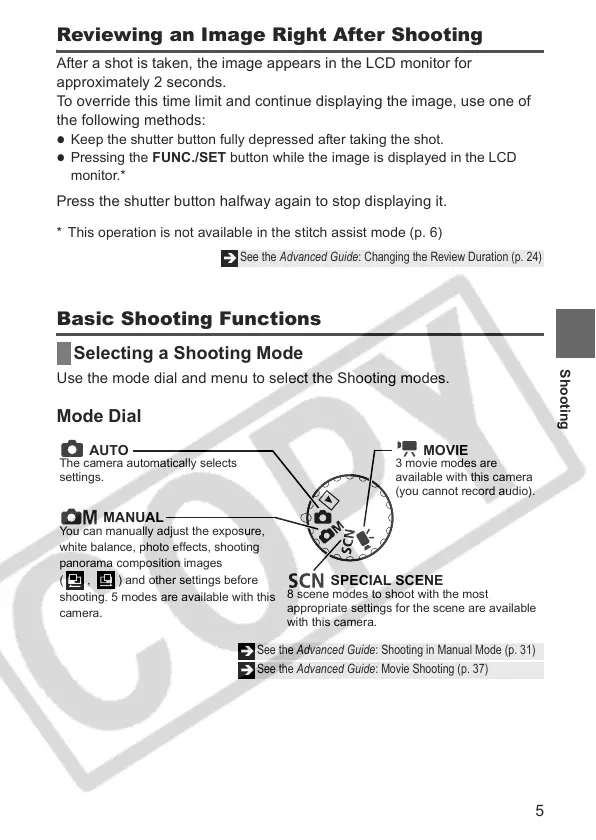
Basic Shooting Functions
Selecting a Shooting Mode
Use the mode dial and menu to select the Shooting modes.
Mode Dial
Î
See the Advanced Guide: Changing the Review Duration (p. 24)
Î
See the Advanced Guide: Shooting in Manual Mode (p. 31)
Î
See the Advanced Guide: Movie Shooting (p. 37)
AUTO
The camera automatically selects
settings.
MANUAL
You can manually adjust the exposure,
white balance, photo effects, shooting
panorama composition images
( , ) and other settings before
shooting. 5 modes are available with this
camera.
SPECIAL SCENE
8 scene modes to shoot with the most
appropriate settings for the scene are available
with this camera.
MOVIE
3 movie modes are
available with this camera
(you cannot record audio).
Shooting