14 15
ASSEMBLY FROM THE BIKEGUARD ASSEMBLY FROM THE BIKEGUARD
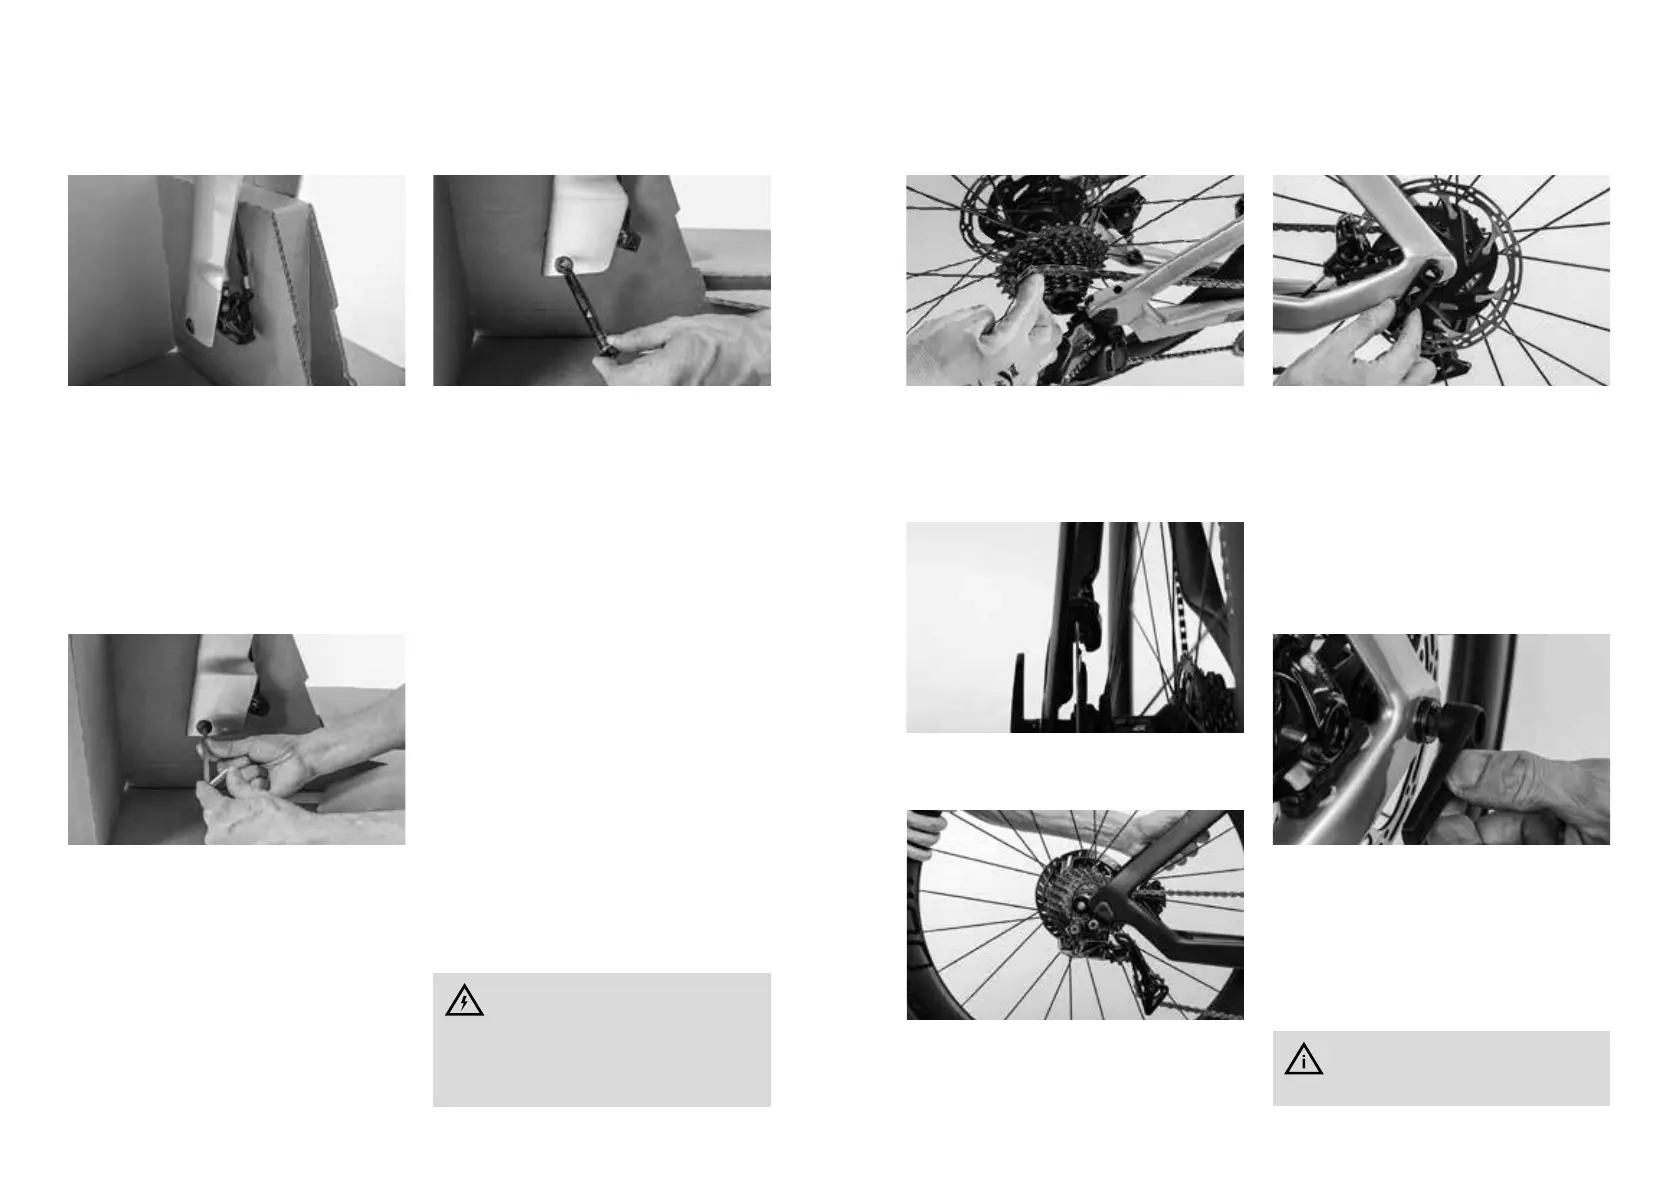
Align the rear wheel between the rear stays and
push the thru axle from the le through the wheel
mount and the hub. Turn the thru axle by hand a
few turns clockwise.
Remove the transport locks, if available, from the
disc brake. Pull the chain to the rear and posi‑
tion the chain on the smallest sprocket. Slide the
wheel then from the rear into the drop‑outs (the
Speedmax has horizontal drop‑outs).
Insert the rotor at the same time into the brake
calliper.
When the axle thread engages with the thread
of the right rear stay, continue turning the thru
axle clockwise. During the rst turns the thru axle
should be able to turn easily.
Grip the thru axle lever at the outer end and turn
the lever until the force you need to turn it in‑
creases strongly and the lever cannot be turned
any further even with signicantly increased man‑
ual force. However, do not use any tools.
Pull the lever outwards against the preload. While
holding the lever in this position, you can turn the
lever and align it in the desired position.
The lever must not stand out to the rear. Release
the lever and it will remain in the latest position.
You nd more details in the chapter
“The wheels” in your bicycle manual
road bike.
Do not clamp carbon frames or seat
posts in the holding jaws of a work‑
stand! This can damage the components. Be
sure to use a workstand which holds the
frame inside at three points or the fork and
bottom bracket shell.
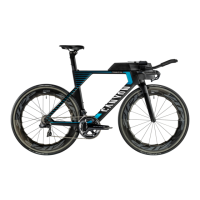
The fork is attached with the thru axle to the pro‑
tective cardboard carton.
Hold your Speedmax tight so that it does not top‑
ple over. Loosen the thru axle of the front wheel
with an Allen key and turn the thru axle anti‑
clockwise.
Rear wheel mounting
When the thru axle thread no longer engages, re‑
move the thru axle from the fork. Take the frame
o the protective cardboard carton to mount the
wheels in the next step.
The easiest and safest way to carry out the
mounting is when you have a workstand or a
helper.