28
INSTALLATION INSTRUCTIONS
The installation comes under the exclusive responsibility of specialists.
The installer is held to respect the legislation and the standards enforced in their country.
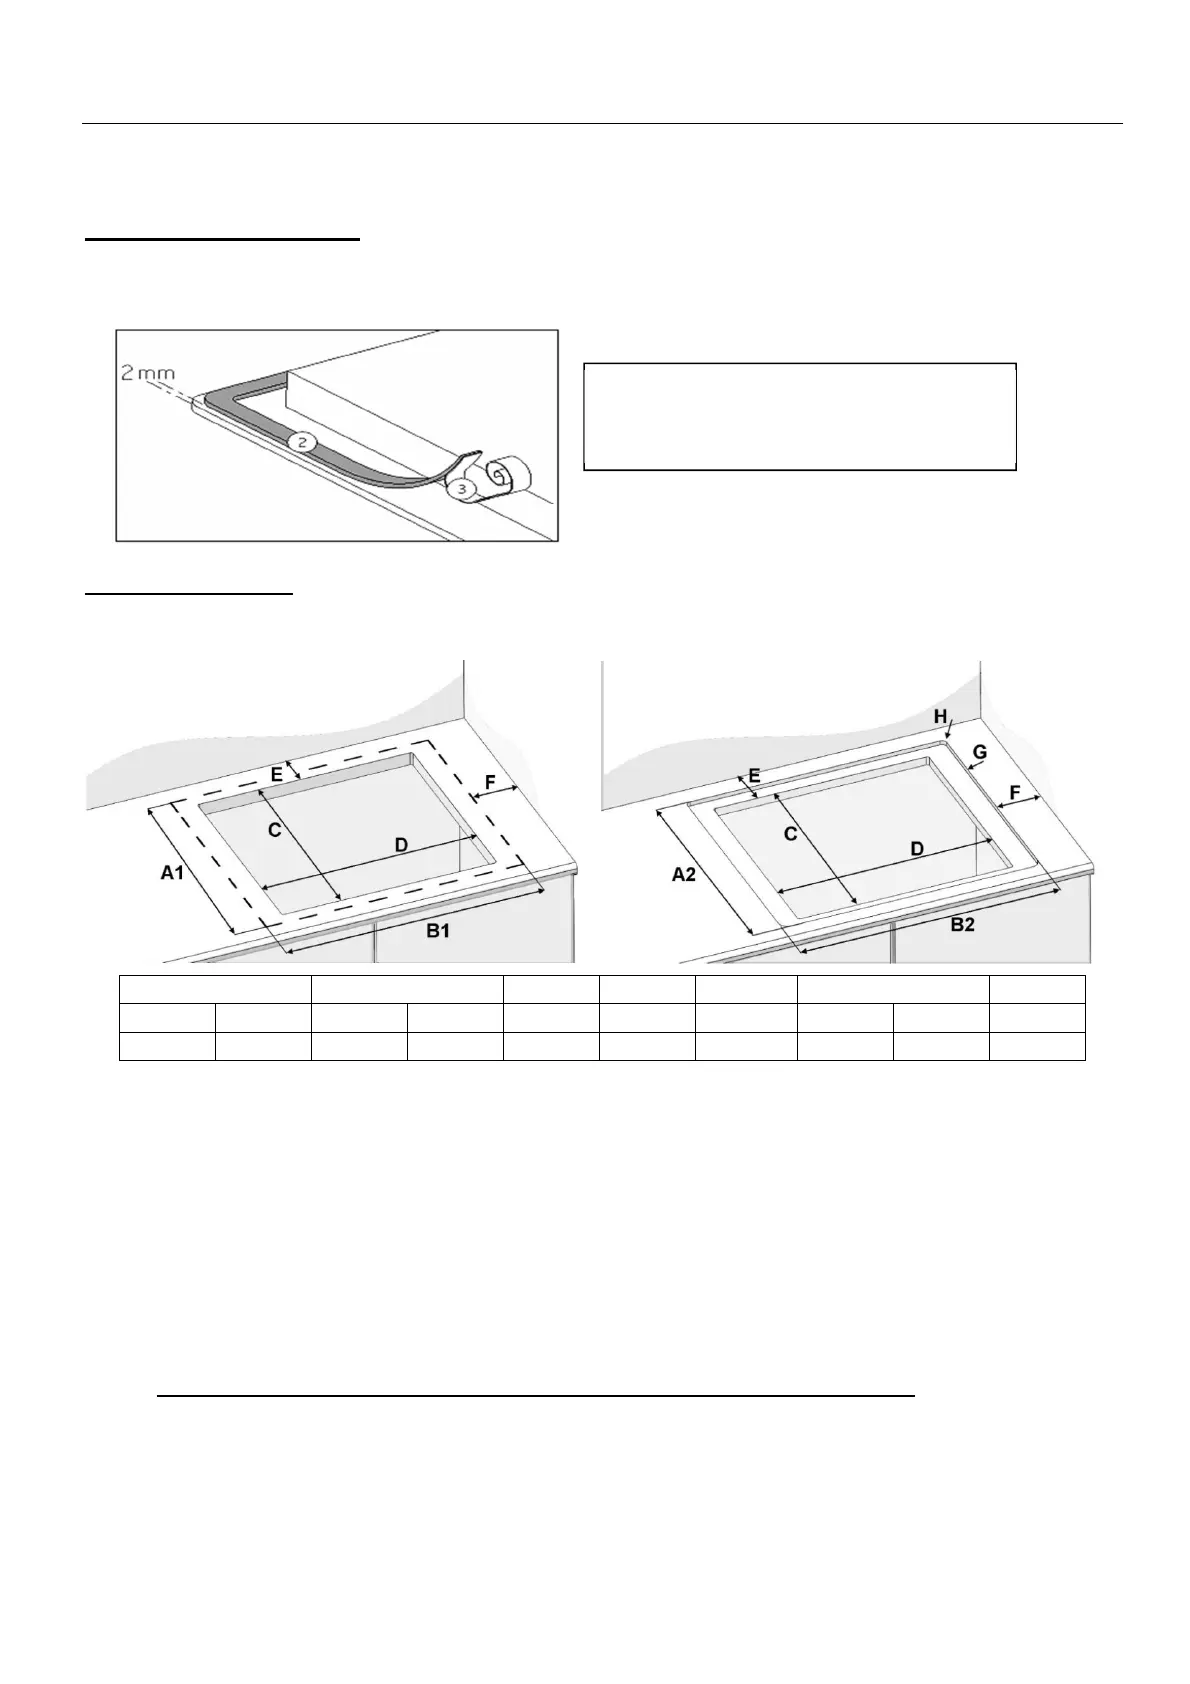
How to stick the gasket:
The gasket supplied with the hob avoids all infiltration of liquids in the cabinet.
His installation has to be done carefully, in conformity of the following drawing.
Fitting - installing:
• Cut-out size:
• Ensure that there is a distance of 50mm between the hob and the wall or sides.
• The hobs are classified as “Y” class for heat protection. Ideally the hob should be installed
with plenty of space on either side. There may be a wall at the rear and tall units or a wall
at one side. On the other side, however, no unit or divider must stand higher than
the hob.
• The piece of furniture or the support in which the hob is to be fitted, as well as the edges of
furniture, the laminate coatings and the glue used to fix them, must be able to resist
temperatures of up to 100°C.
• The wall or splashback behind the hob must be heat-resisting.
• Not to install the hob to the top of a not ventilated oven or a dishwasher.
• There must be a space of 20mm beneath the bottom of the hob casing to ensure a good
air circulation of the electronic device. (See page 29 for full ventilation information)
• If a drawer is placed under the worktop, avoid placing flammable objects (for example:
sprays) or not heat-resistant objects inside.
Stick the gasket (2) two millimeters
from the external edge of the glass,
after removing the protection sheet (3).