Note
• If the unit is unplugged, power is lost, or turned off you must wait 3 to 5 minutes before restarting
the unit. If you attempt to restart before this time delay, the wine cabinet will not start.
• When you use the wine cabinet for the first time or restart the cabinet after having been shut off
for a long time, there could be a few degrees variance between the temperature you select and
the one indicated on the LED readout. This is normal and it is due to the length of the activation
time. Once the wine cabinet is running for a few hours everything will be back to normal.
Internal light
In order to reduce energy consumption, the LED light within this wine cabinet will automatically
switch off after 10 minutes. If you would prefer the LED light to remain on continuously, this is
possible. Please press and hold the "LIGHT" button for 5 seconds, the display will show "LP".
After 4 seconds the display will revert back to normal and the light will remain on until manually
switched off.
If you would like to revert back and conserve energy (recommended), press and hold the "LIGHT"
button for 5 seconds, the display will show "LF". After 4 seconds the display will revert back to
normal, and the light will automatically switch off after 10 minutes.
!
Using the shelves
• To prevent damaging the door gasket, make sure you have the door opened fully when pulling
shelves out of the rail compartment.
• For easy access to the storage content, you must pull the shelves approximately 1/3 out of the rail
compartment, however this unit was designed with a notch on each sides of the shelf tracks to
prevent bottles from falling.
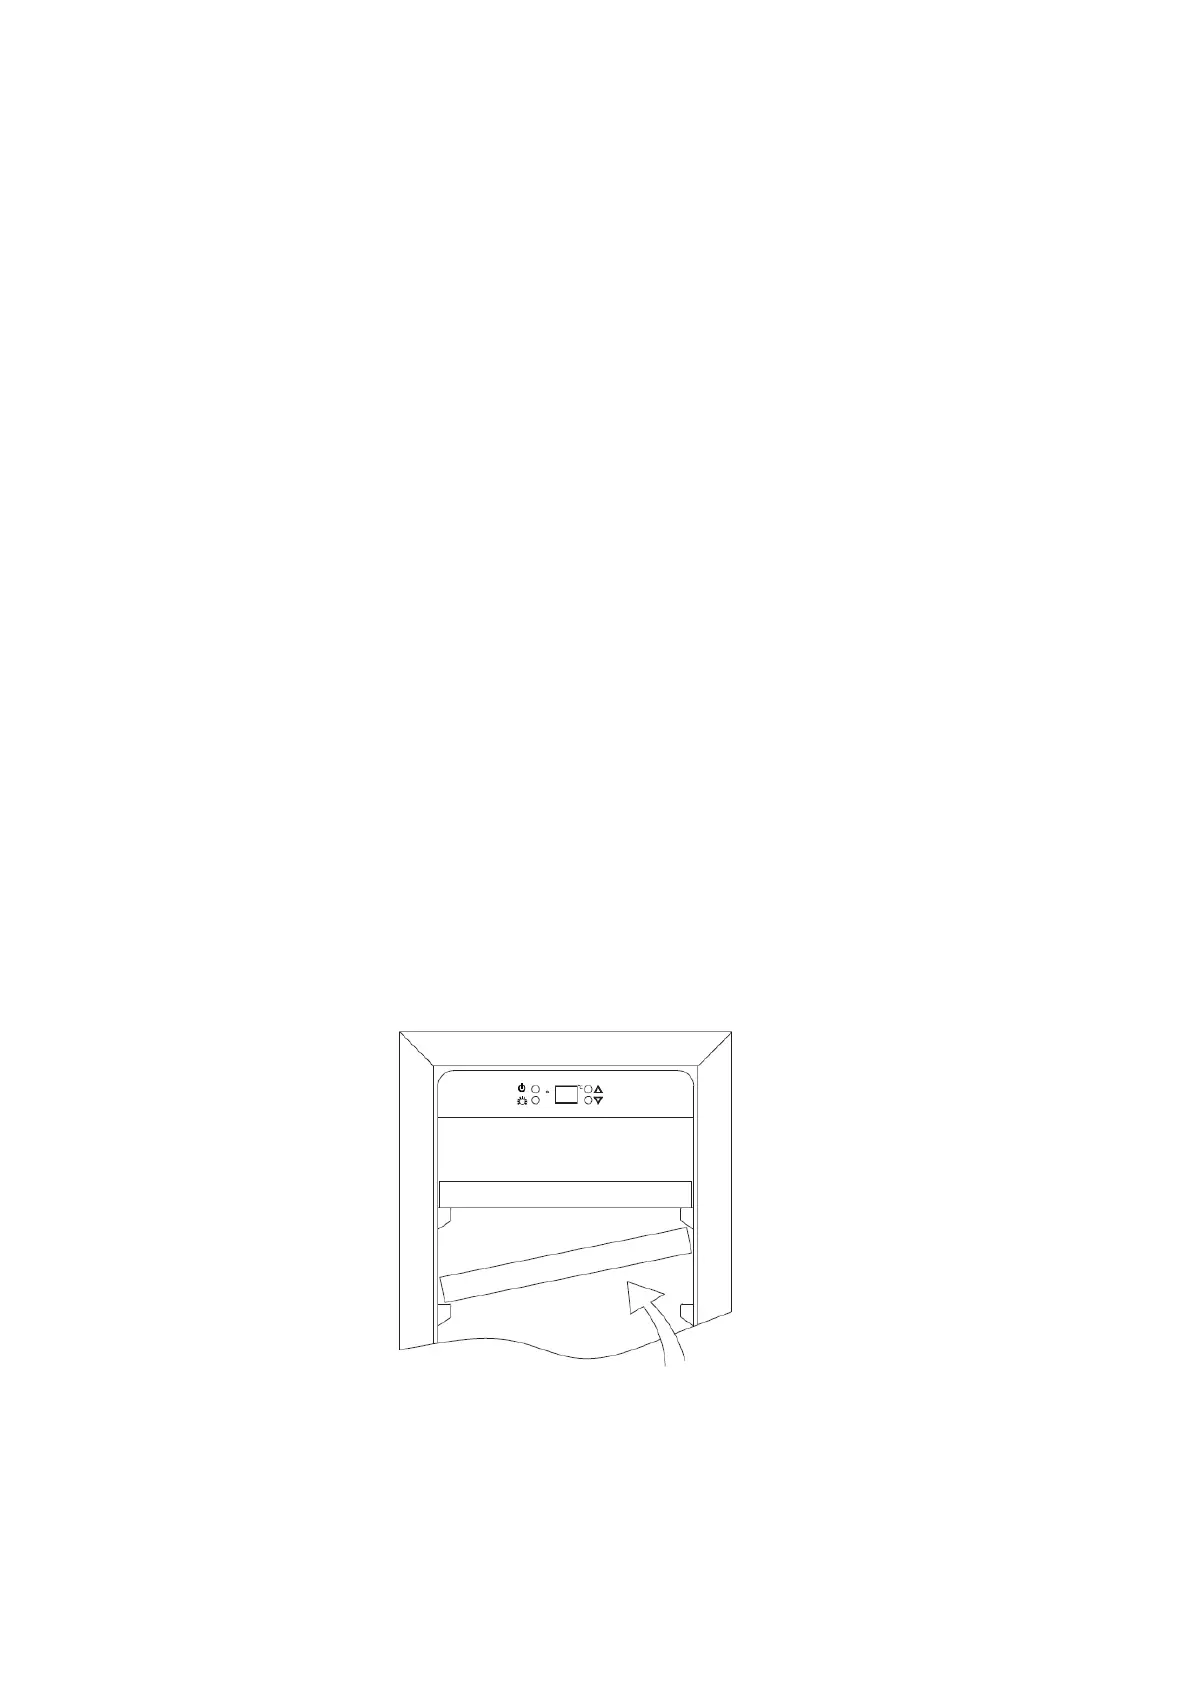
Removing or installing shelves
• When removing any of the shelves out from rail compartment, tilt the shelf as per the diagram and
simply pull out, or when installing push the shelf in until it sits on the support brackets securely.
6