9
Wall Mounting Cleat
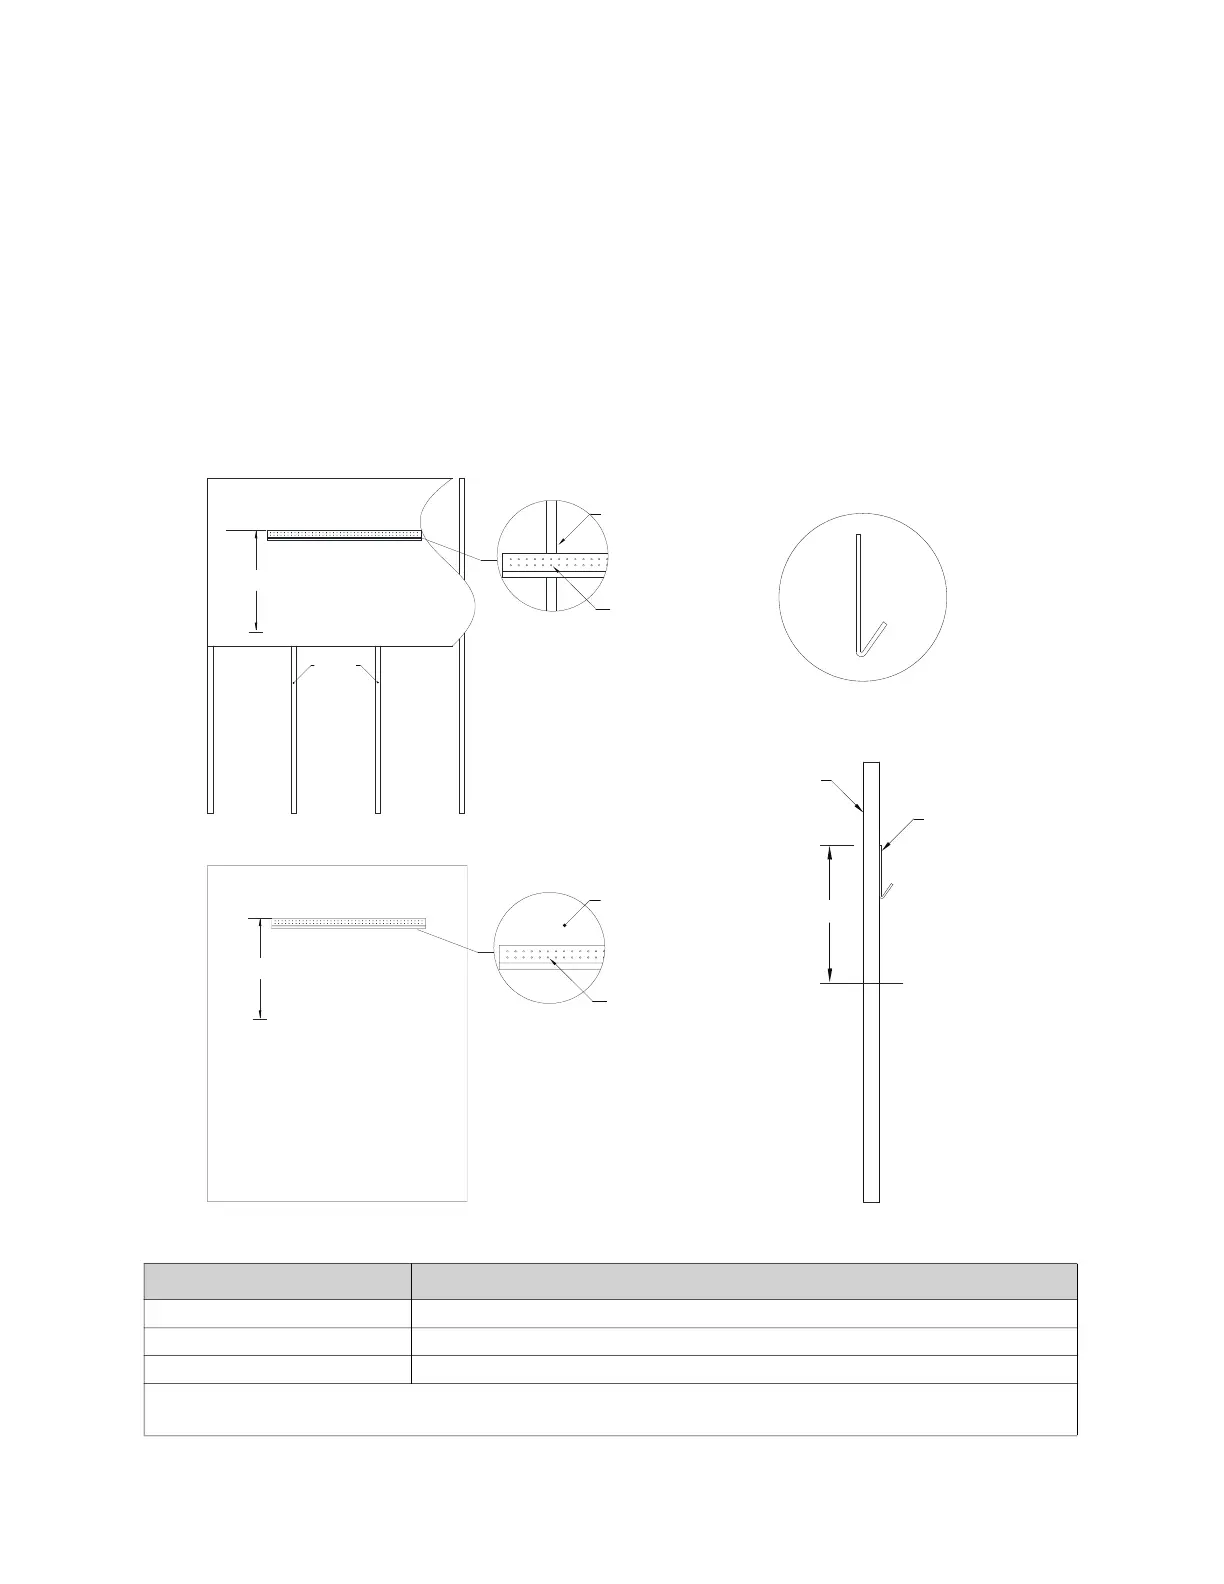
Locate where the wall mount cleat will be installed on the wall. Refer to Table 2 for hardware required to
secure wall mount cleat to type of wall construction. Kitchen wall cabinet heights may vary. Place the
wall cleat so the distance from the top of the cleat to the bottom of the cabinets is 14-1/4”. Verify
the bottom of the hood will be flush to the bottom of the wall cabinets. Secure the cleat to the wall
with at least 2 screws per column of holes every 24”. The cleat must be installed in the orientation as
shown in Figure 5 Detail A.
If installing the cleat into studs, the manufacturer recommends the following: Verify stud location and
spacing. If a stud is not available in a location, use toggle bolts to secure cleat to the wall. For hood lengths
30” and 36”, the manufacturer recommends to secure the cleat to minimum 2 wall studs. For hood
lengths 48” to 72”, the manufacturer recommends to secure the cleat to minimum 3 wall studs.
Figure 5 - Installing Wall Mount Cleat
Table 2 - WRH Installation Kit
Material WRH Installation Kit includes:
Wood 90252A234 - Quantity 16
Brick/Concrete 90161A631 - Quantity 16
Steel 90064A464 - Quantity 16
Toggle bolts are included with kit for instances where a stud is not found. Refer to above for minimum
stud requirements for hood lengths.
Stud
Hardware
Qty -2
Studs
Wood/Steel/Gypsum
Masonry
Material
Hardware
Qty -2
Concrete/Brick
14-1/4”
14-1/4”
Bottom of Cabinet
Bottom of Cabinet
Detail A
Detail B
Wall
Wall Mount
Cleat
14-1/4”
Bottom of
Cabinet
 Loading...