14 my.carbide3d.com support@carbide3d.com 15
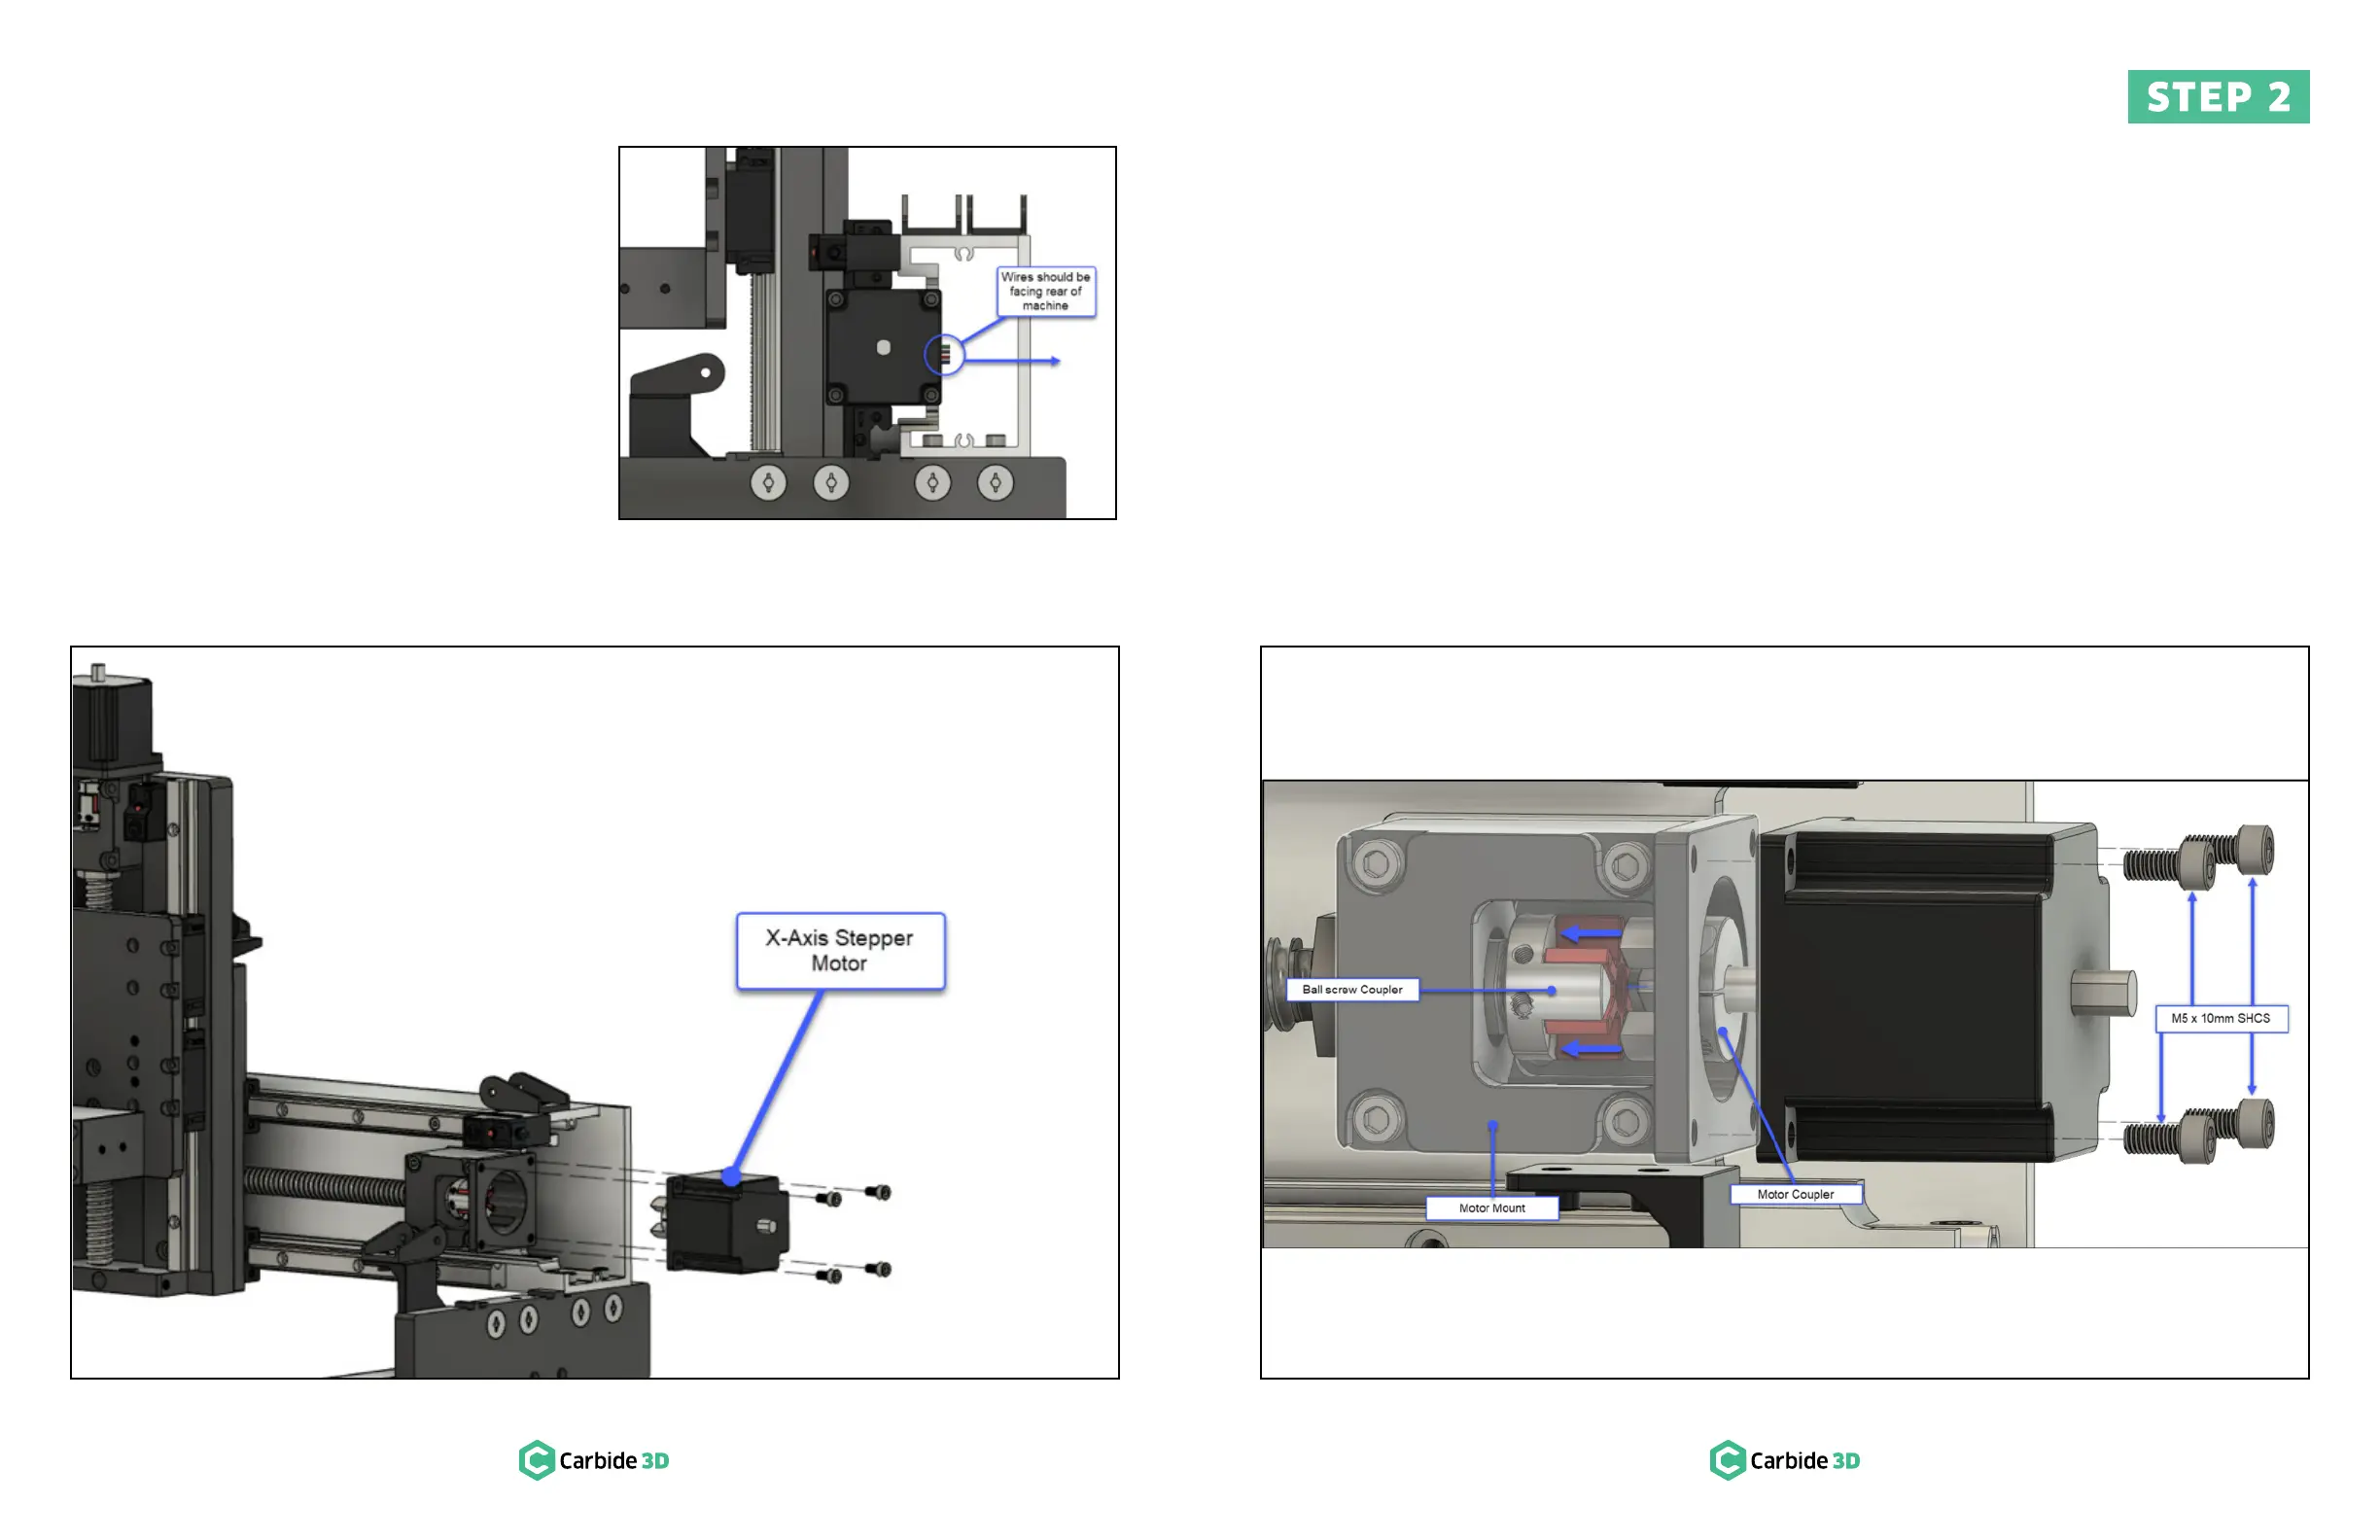
2.2 Install X-Axis Stepper
Motor
1. Locate the X-motor in the HDZ box.
2. Orient the X-motor with the motor coupler facing
toward the mount. See Fig.2-2.
a. Motor wires face the rear of the machine.
See Fig.2-3.
3. Rotate the motor shaft until the motor coupler is
lined up with the ball-screw coupler inside the
mount.
Figure 2-2 Figure 2-4
4. Press the couplers together until fully seated
and the motor is flush with the motor mount. See
Fig.2-4.
5. Use a 4mm hex key and four (4) M5×10mm
SHCS to secure the X-motor to the motor mount.
Fully tighten.
Figure 2-3
 Loading...

