EasyManuals Logo

Carbide 3D Shapeoko Proximity Switch Kit User Manual

Default Icon
42 pages
To Next Page IconTo Next Page
To Previous Page IconTo Previous Page
Page #39 background imageLoading...
Page #39 background image
support@carbide3d.com docs.carbide3d.com 10/02/2020 Version 1.0
39
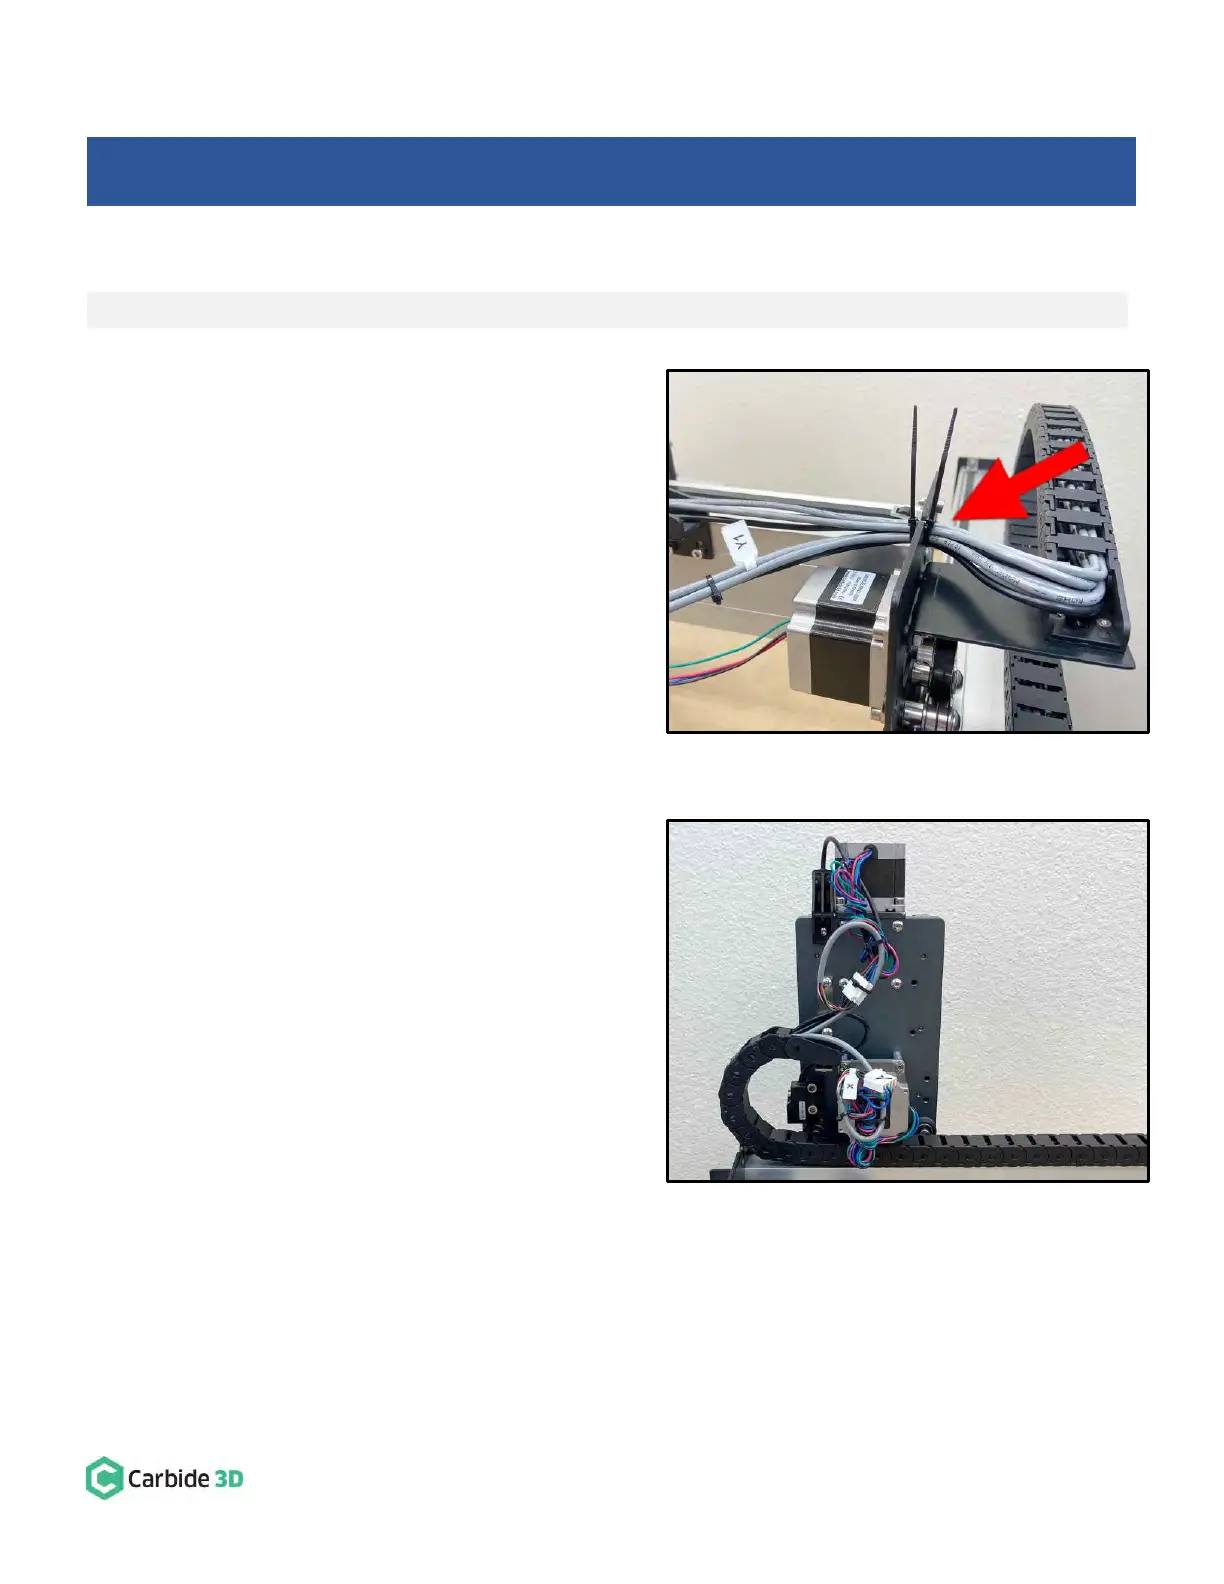
Secure Cables at Y1-Carriage and HDZ
Required Components:
Item
Description
Qty
T
4” Cable Ties
Several
1. Secure the cables crossing the Y1-carriage plate. See
Fig. 41.
a. Tuck all seven cables, one at a time, into the
cutout at the top of the Y1-carriage plate.
b. Use two (2) cable ties, one on each side of
the cutout, to secure the cables in place.
2. Secure the cables at the rear of the HDZ. See
Fig. 42.
a. Bundle the X- and Z-cables at the rear of the
HDZ.
b. Use a few cable ties to secure the cables.
Figure 41
Figure 42
Shapeoko 3 Machines: Skip ahead to the “Secure Cables Along the X-Rail” section on page 40.

Questions and Answers:

Question and Answer IconNeed help?

Do you have a question about the Carbide 3D Shapeoko Proximity Switch Kit and is the answer not in the manual?

Carbide 3D Shapeoko Proximity Switch Kit Specifications

General IconGeneral
BrandCarbide 3D
ModelShapeoko Proximity Switch Kit
CategorySwitch
LanguageEnglish