J2
S1
S2Y2
Y1ID1
ID2
NTCNTC
NTC
S5
S3
5V
将控制器放到开孔中,轻轻按下侧面的卡扣,然后是前盖板,直到
控制器完全插入(侧面卡扣将弯曲,卡钩将控制器固定在面板上)。重
要:前盖板防护等级
IP65仅当下列条件满足后才能达到:
• 矩形开孔与水平面最大偏差:≤ 0,5 mm;
• 电控板金属片厚度:0.8 …2 mm;
• 应用垫圈的表面的粗糙度:≤ 120 μm。
注意:用于制造电控板的金属片厚度(或材料)必须足够确保安全和稳
定的安装产品。
Place the controller in the opening, press lightly on the side tabs and then on the front until fully inserted
(the side tabs will bend, and the catches will attach the controller to the panel). Important: IP65 front pro-
tection is guaranteed only if the following conditions are met:
•
maximum deviation of the rectangular opening from at surface: ≤ 0.5 mm;
•
thickness of the electrical panel sheet metal: 0.8-2 mm;
•
maximum roughness of the surface where the gasket is applied: ≤ 120 μm.
Note: the thickness of the sheet metal (or material) used to make the electrical panel must be adequate to
ensure safe and stable mounting of the product.
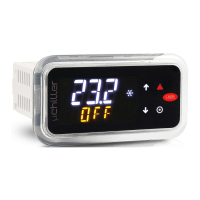
面板安装型 /
PANEL MOUNTIG MODEL
从后面打开盖板然后按住卡扣然后取
下控制器
重要:此操作无需使用螺丝
刀或其它工具
尺寸/ Dimensions - mm (in)
安装 / Mounting
尺寸/ Dimensions-
mm(in)
安装 / Mounting
装配 /Disassembly
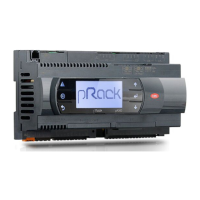
DIN导轨安装型 / DIN RAIL MOUNTIG
接线 / WIRING CONNECTION
连接:面板安装型 / Connection: panel mounting
连接:DIN导轨安装型 / Connection: DIN rail mounting
传感器连接(所有型号) / Probe connection (all mod.)
NTC传感器连接
NTCprobe connection
公制比率式传感器连接/Ratiometric probe connection
4-20mA传感器连接/4-20mA probe connection
0-10 Vdc NTC传感器连接
0-10 Vdc NTCprobe connection
Important: during the rst connection, Applica aligns itself with the soft-
ware version on the µChiller controller via a cloud connection; this means a
mobile data connection is needed at least for this rst connection.
Fig. 2
COMMISSIONING
The procedure for initial commissioning is described below.
PREPARATION
Before conguring the unit the rst time, access KSA (ksa.carel.com), select
the “Congurations” folder and:
1. for the Chiller Standard and Enhanced models (with On/O compressor)
select the “Refrigerants” section and then the refrigerant charged in the unit;
2. for HE models (with BLDC compressor), import the BLDC conguration, se-
lecting the “BLDC compressors” section and then the brand and model of
compressor installed on the unit (this already includes the refrigerant setting)
3. import the downloaded conguration into the mobile device.
CONFIGURATION
1. start Applica and access the Manufacturer and Service proles;
2. select Set-up -> Conguration and click the + icon (see image)
3. use the menu (Fig. a) to select and apply the desired conguration;
4. select Unit Set-up (Fig. b) to proceed with the complete conguration (Fig c).
a
b
c
ALARM TABLE
Code Description
A001 Unit: no. permanent memory writes
A002 Unit: permanent memory writes
A003 Unit: remote alarm from digital input
A004 Unit: remote set point probe
A005 Unit: user return water temperature probe
A006 Unit: user delivery water temperature probe
A008 Unit: user pump 1 overload
A009 Unit: user pump 2 overload
A10 Unit: ow switch (with user pump 1 active)
A11 Unit: ow switch (with user pump 2 active)
A12 Unit: user pump group
A13 Unit: user pump 1 maintenance
A14 Unit: user pump 2 maintenance
A15 Unit: high chilled water temperature
A16 Unit: source return water/air temperature probe
A17 Unit: source pump 1 maintenance
A18 Unit: free cooling warning
A19 Circuit 1: discharge pressure probe
A20 Circuit 1: condensing temperature probe
A21 Circuit 1: suction pressure probe
A22 Circuit 1: evaporation temperature probe
A23 Circuit 1: discharge temperature probe
A24 Circuit 1: suction temperature probe
A25 Circuit 1: high pressure switch
A26 Circuit 1: high pressure transducer
A27 Circuit 1: low pressure transducer
A28 Circuit 1: frost protection evaporation temperature
A30 Circuit 1: compressor 1 overload
A31 Circuit 1: compressor 2 overload
A32 Circuit 1: compressor 1 maintenance
A33 Circuit 1: compressor 2 maintenance
Code Description
A34 Circuit 1: source fan maintenance
A35 EVD circuit 1: LowSH
A36 EVD circuit 1: LOP
A37 EVD circuit 1: MOP
A38 EVD circuit 1: motor error
A39 EVD circuit 1: emergency closing
A40 EVD circuit 1: incomplete valve closing
A41 EVD circuit 1: oine
A42 Circuit 1: envelope alarm + zone alarm
A43 BLDC circuit 1: high pressure dierential at start-up
A44 BLDC circuit 1: failed start-up
A45 BLDC circuit 1: low pressure dierential
A46 BLDC circuit 1: high gas discharge temp.
A47 Speed drive 1: oine
A48 Speed drive 1: alarm + error code
A49 Unit: slave oine
A50 Slave unit: no. permanent memory writes
A51 Slave unit: permanent memory writes
A52 Circuit 2: discharge pressure probe
A53 Circuit 2: condensing temperature probe
A54 Circuit 2: suction pressure probe
A55 Circuit 2: evaporation temperature probe
A56 Circuit 2: discharge temperature probe
A57 Circuit 2: suction temperature probe
A58 Circuit 2: high pressure switch
A59 Circuit 2: high pressure transducer
A60 Circuit 2: low pressure transducer
A61 Circuit 2: frost protection evaporation temperature
A63 Circuit 2: compressor 1 overload
A64 Circuit 2: compressor 2 overload
A65 Circuit 2: compressor 1 maintenance
A66 Circuit 2: compressor 2 maintenance
A67 Circuit 2: source fan maintenance
A68 EVD circuit 2: LowSH
A69 EVD circuit 2: LOP
A70 EVD circuit 2: MOP
A71 EVD circuit 2: motor error
A72 EVD circuit 2: emergency closing
A73 EVD circuit 2: incomplete valve closing
A74 EVD circuit 2: oine
A75 Circuit 2: envelope alarm + zone alarm
A76 BLDC circuit 2: high pressure dierential at start-up
A77 BLDC circuit 2: failed start-up
A78 BLDC circuit 2: low pressure dierential
A79 BLDC circuit 2: high gas discharge temp.
A80 Speed drive circuit 2: oine
A81 Speed drive circuit 2: alarm + error code
TECHNICAL SPECIFICATIONS (for both models)
Technical specications, μChiller PANEL and DIN
Physical specications
Dimensions See gures
Case Polycarbonate
Assembly UCHBP*: panel models;
UCHBD*: DIN rail models
Ball test temp. 125°C
Ingress protection IP20 (rear,panel model)
IP65 (front, panel model)
IP00 (DIN version)
Front cleaning Use soft, non-abrasive cloth and neutral detergent or water
Environmental conditions
Operating conditions -20T60°C, <90% RH non-condensing.
Storage conditions -40T85°C, <90% RH non-condensing.
Electrical characteristics
Rated power supply voltage Provided by SELV or PELV Class 2 power supply
Oper. power supply voltage 24 Vac/dc, +10% -15%;
Input frequency 50/60Hz
Max current draw 600 mArms
Min power consumption 400mW
Clock precision ± 50ppm; date/time retention after
shutdown: 72h
Software class and structure A
Environmental pollution
Class of protection against
electric shock
To be incorporated into class I or II appliances
Type of action and discon. 1.C
Rated impulse voltage relay output: 4kV; 24 V input: 0.5 kV
Surge immunity category relay output: III; 24 V input: II
Control device construction Device to be incorporated
Terminal block Plug-in male-female.
Wire sizes: see the connector table
Purpose of the control Electrical operating control
User interface
Buzzer
Panel: integrated
DIN: not included on the controller, integrated on the user terminal
Display LED 2 rows, decimal point, and multi-function icons
Open the electrical panel from the rear and press the anchor-
ing tabs and then the controller to remove it.
Important: The operation does not require
the use of a screwdriver or other tools.
备注/Note: = GND
Connectivity
NFC Max distance 10mm, variable according to the
mobile device used
Bluetooth Low Energy Max distance 10m, variable according to the
mobile device used
BMS serial interface Modbus over RS485, not opto-isolated
FieldBUS serial interface Modbus over RS485, not opto-isolated
HMI interface Modbus over RS485, not opto-isolated
Analogue inputs (Lmax=10m)
Ref.
J2
S1, S2, S3: NTC
NTC: resolution 0.1° C; 10k @ 25°C;
error: ±1°C in the range -50T50°C,
±3°C in the range 50T90°C
0-10 V: error 2% fs, typical 1%
4-20mA: error 5% fs, typical 1%
0-10 V: error 2% fs, typical 1%
S5: 0-5V rat /4-20 mA / NTC
J3
S4: 0-5V rat /4-20 mA / NTC
S6: NTC / 0-5 Vrat / 0-10 V /
4-20 mA
J9
S7: NTC -
available only on
DIN version
Digital inputs
Ref.
J2 ID1
(*)
Voltage-free contact, not opto-isolated, typical
closing current 6 mA,
open contact voltage 13 V,
contact resistance max 50 .
(*)
Fast digital input: 0-2 kHz; error 2% fs
J2 ID2
J3 ID3 (*), ID4, ID5,
J9
ID6
-
available only
on DIN version
Valve output
Ref.
J14
available only on DIN
version
CAREL E*V unipolar valve power supply: 13
Vdc, min. winding resistance 40
Analogue outputs
Ref.
J2 Y1, Y2 0-10V: 10 mA max
Digital outputs
Ref.
J6
NO1 (5A), NO2 (5A),
NO3 (5A), NO4 (5A)
5A: EN60730: 5 A resistive, 250 Vac, 50k
cycles; 4(1), 230 Vac, 100k cycles; 3 (1), 230
Vac, 100k cycles
UL60730: 5 A resistive, 250 Vac, 30k cycles;
1 FLA, 6 LRA, 250 Vac, 30k cycles; Pilot Duty
C300, 30k cycles
J7 NO5 (5A)
J11
NO6 (5A)-
available
only on DIN version
Note: the sum of the current drawn by NO1, NO2, NO3 and N04 must not
exceed 8A.
Emergency power supply
Ref.
J10 Ultracap module (optional, only available on
the DIN versions)
13 Vdc +/-10%
Probe and terminal power supply
5V
5 Vdc ± 2% to power the 0 to 5 V ratiometric probes. Maximum
current delivered: 10 mA protected against short-circuits
+V
8-11 V to power the 4-20 mA current probes. Max current
delivered: 25 mA protected against short-circuits
J8 13 Vdc ± 10% to power the user terminal
VL not used
Cable lengths
Analogue inputs/outputs,
digital inputs/outputs, probe
power
<10m (*) (**)
(*) in the panel version, if using the VL power
supply in household environments, the maxi-
mum cable length is 2 m.
(**) in the DIN version powered at 115 Vac,
if using +V in household environments, the
maximum cable length is 2 m.
Valve < 2 m, < 6 m with shielded cable
BMS and Fieldbus serial cables <500m with shielded cable
Conformity
Electrical safety EN/UL 60730-1, EN/UL 60335-1
Electromagnetic compatibility
EN 61000-6-1, EN 61000-6-2, EN 61000-6-3,
EN 61000-6-4
Applications with ammable
refrigerant gases
EN/UL 60079-15, EN/UL 60335-2-34,
EN/UL 60335-2-40, EN/UL 60335-2-89
Wireless RED, FCC, IC
 Loading...