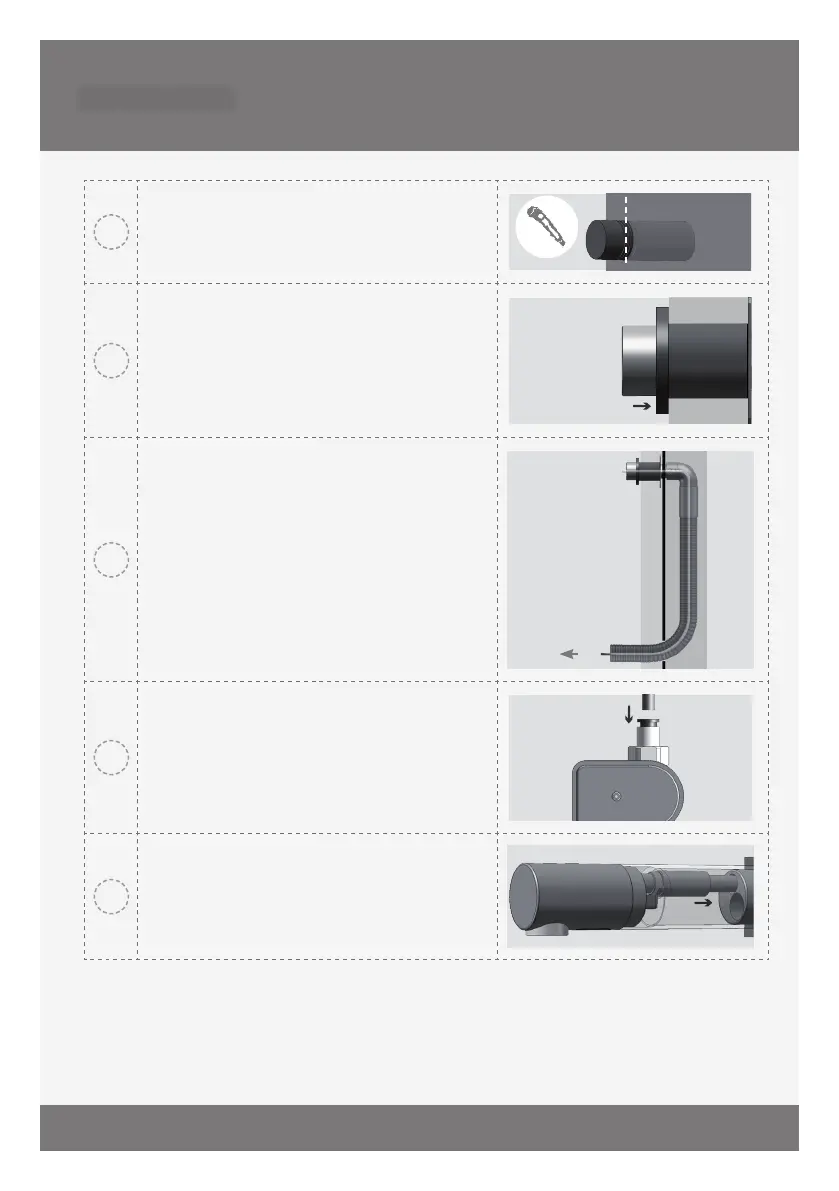
EasyManuals Logo

Caroma G Series Installation And Maintenance Guide

Caroma G Series
16 pages
To Next Page IconTo Next Page
To Previous Page IconTo Previous Page
Page #8 background imageLoading...
Page #8 background image
6
INSTALLATION
8
Cut the temporary outlet base cover.
9
Once the works on electricity, plumbing and tiles have
been nished, assemble the wall rosette through the
outlet base.
WALL ROSETTE
10
Carefully tie the flexible leads (power and sensor)
with string to the water tube and feed it through the
corrugated tubing.
FLEXIBLE
TUBE
11
Connect the flexible tube to the dual power input box
outlet.
12
Fix the product spout by inserting the nipple into the
outlet base and tighten the screw.

Other manuals for Caroma G Series

Questions and Answers:

Question and Answer IconNeed help?

Do you have a question about the Caroma G Series and is the answer not in the manual?

Caroma G Series Specifications

General IconGeneral
BrandCaroma
ModelG Series
CategoryKitchen & Bath Fixtures
LanguageEnglish

Related product manuals