66
How to Change the Vacuum Bag
How to Replace the Headlight Bulb
How to Remove/Install the Bottom Plate
CAUTION: First, unplug the vacuum cleaner from the electrical outlet�
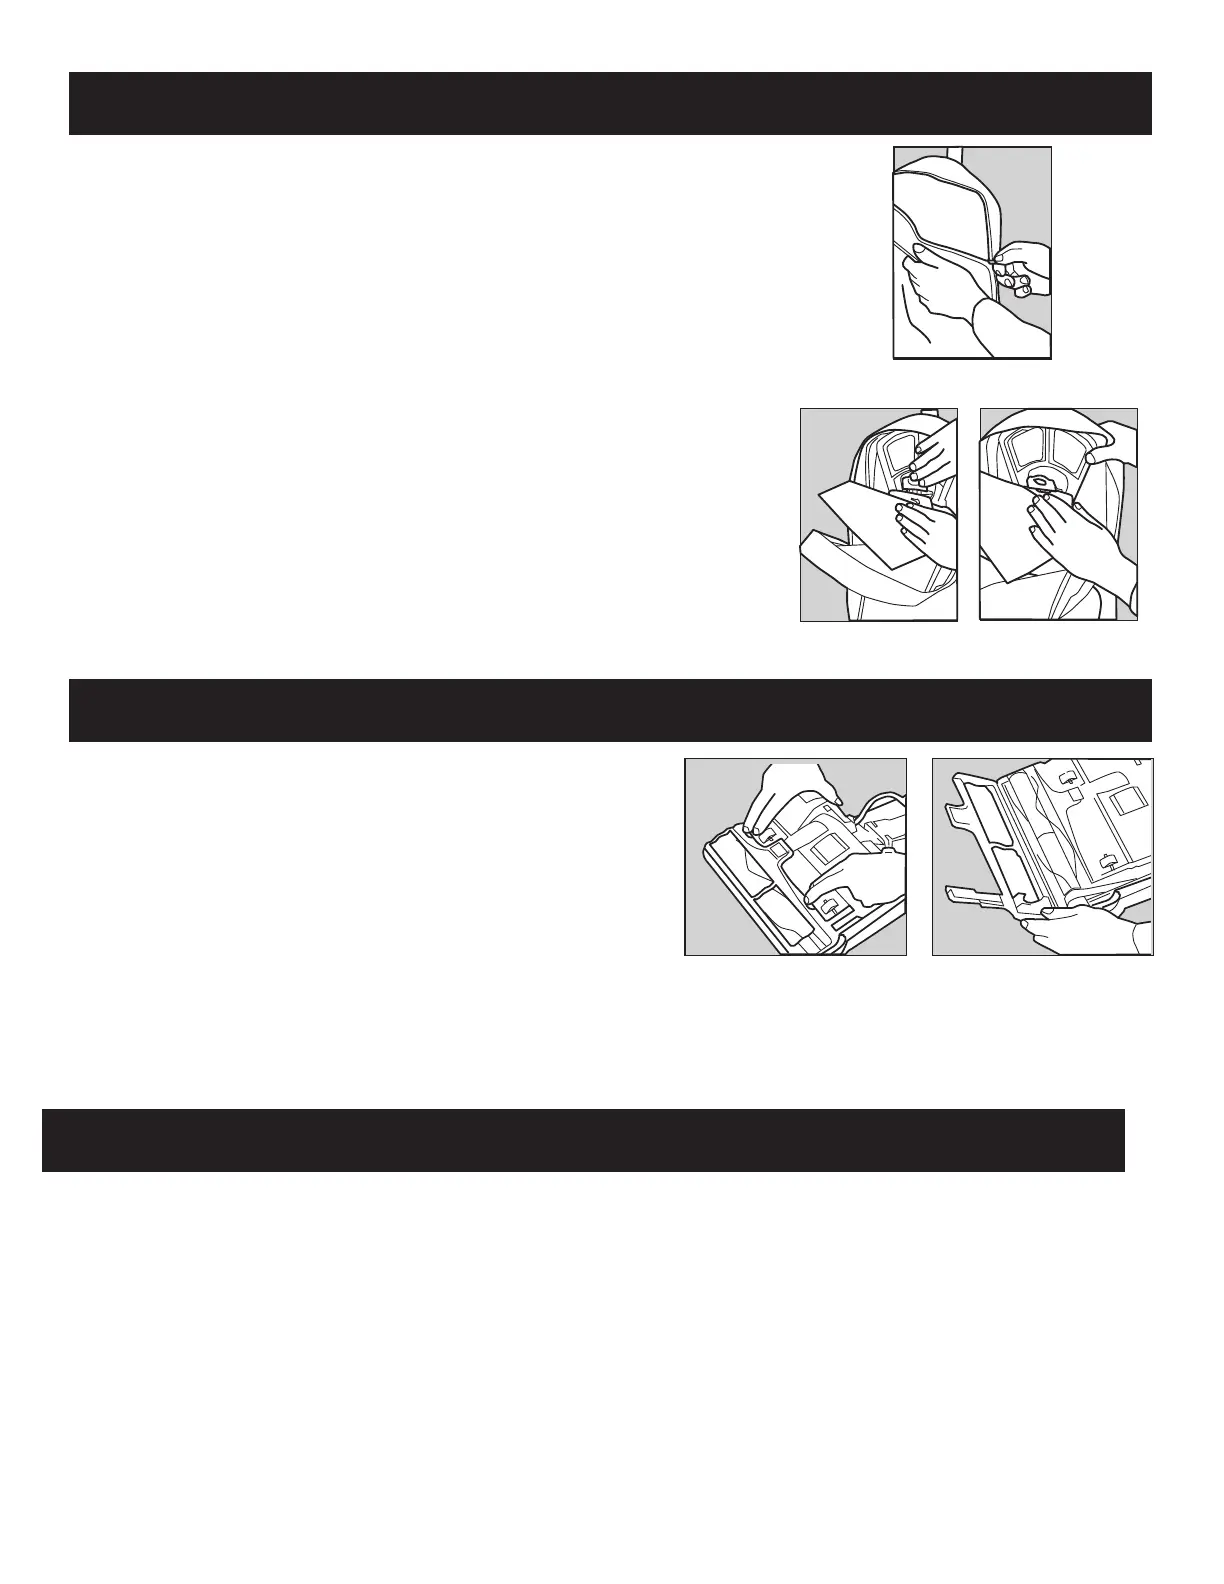
1� Unzip the outer cloth bag (figure 7)�
2� Remove the used bag by pressing the bag holder tab and pulling the bag off the
vacuum (figure 8)� Discard used bag�
3� To install the new bag, position the bottom of the bag collar into the bag collar
holder (figure 9)�
4� Push the top of the bag collar inward and secure it under the bag holder tab�
5� Zip the outer cloth bag closed�
CAUTION: First, unplug the vacuum cleaner from the electrical outlet�
To remove the bottom plate:
1� After unplugging the power cord, turn the vacuum cleaner over, exposing
the underside�
2� Press the two holding tabs inward (figure 10) releasing the bottom plate�
Remove the bottom plate�
To install the bottom plate:
1� Align the bottom plate hinges with the corresponding grooves (figure 11)�
2� Press plate into position until the plate “clicks” on both sides�
Fig. 11
Fig. 9
Fig. 8
Fig. 10
Household Model
CAUTION: First, unplug the vacuum cleaner from the electrical outlet�
1� First remove the nozzle housing� Turn the unit over to expose the underside� Locate the two main nozzle screws and remove both� Turn
the unit right side up� Locate the two nozzle tabs on the back of the unit and unlatch the nozzle housing� (Note: It is easier to remove
the nozzle when the vacuum is lying flat on its back�) Lift the nozzle housing off the unit to expose the light bulb�
2� Remove bulb by pulling it straight out of the light socket�
3� To install new bulb, simply reinsert the bulb into the light socket�
4� Place nozzle housing back onto unit with the front side of the nozzle set into place first then press the nozzle downward until nozzle
“clicks” into place on both sides� Turn unit over and reinsert main nozzle screws�
Fig. 7


 To Next Page