7
How to Change the Belt
How to Replace the Squeegee
How to Reset the Circuit Breaker
CAUTION: First, unplug the vacuum cleaner from the electrical outlet�
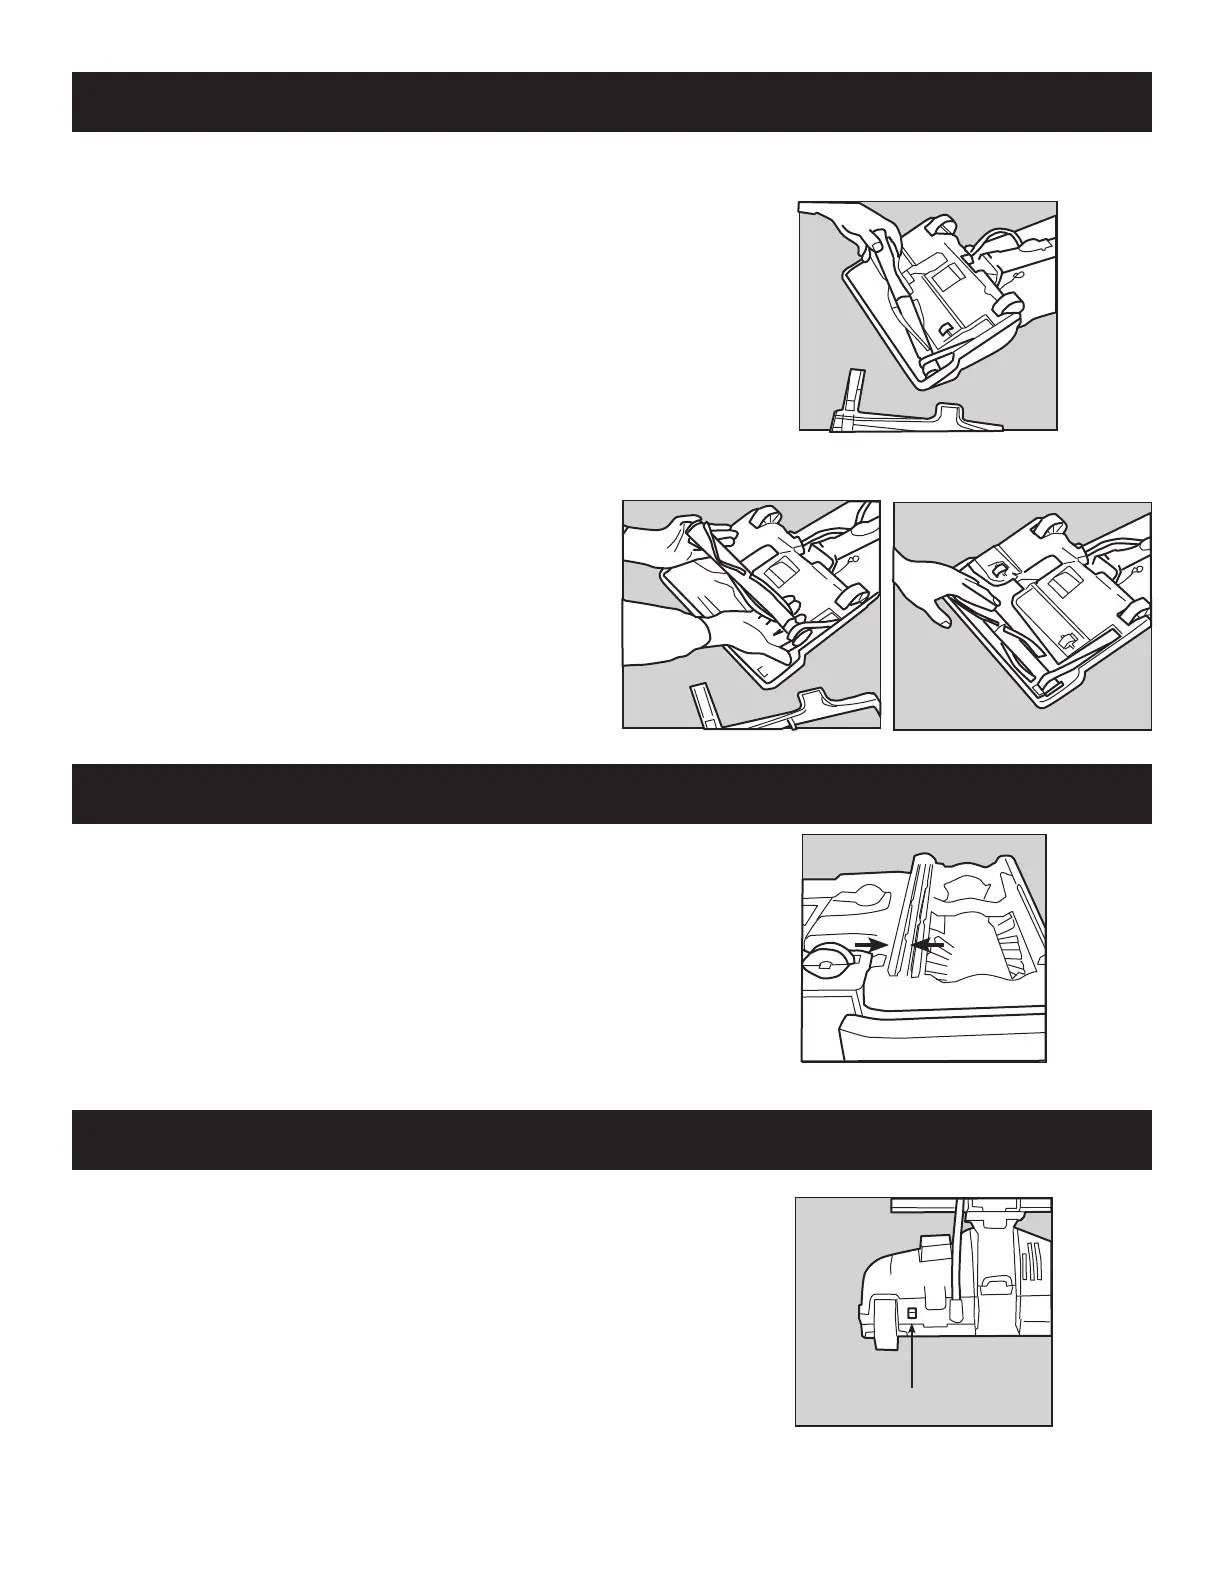
1� Turn the unit over and remove the bottom plate (see “How to
Remove the Bottom Plate”)�
2� Remove the brushroll and the worn or broken belt from the brushroll
pulley and the motor drive shaft (figure 12)�
3� Loop the new belt around the motor drive shaft and the brushroll
(figure 13)�
4� Reinstall the brushroll back into the nozzle� Turn the brushroll by
hand, making sure the belt is not twisted and all rotating parts
move smoothly (figure 14)�
5� Reinstall the bottom plate (see “How to Install the Bottom Plate”)�
NOTE: To ensure maximum cleaning efficiency, the belt should be
checked regularly to be sure it is in good condition� Check to see
if the belt is stretched, cracked, or if excessive slipping is occurring�
Replace if needed�
Commercial Model
If your squeegee splits or begins to look worn, simply remove the
worn squeegee from its track and slide a new one into the track
(figure 15)� If you have trouble installing the new squeegee, please
visit a Carpet Pro vacuum service center�
Your vacuum features a circuit breaker to protect the machine against
damage due to a surge in the electrical current� Electrical surging
can be a result of, though not limited to, a jammed brushroll (i�e�
vacuuming up a sock or throw rug) or a jammed motor fan�
Should your Carpet Pro vacuum cleaner experience a jammed
brushroll with the circuit breaker tripping, first press the On/Off
button to the Off position and unplug the unit� Inspect the brushroll by
removing the bottom plate (see “How to Remove the Bottom Plate”)
and remove any debris that may be causing the jam� Reinstall the
bottom plate (see “How to Install the Bottom Plate”), reset the circuit
breaker by pressing the Circuit Breaker Reset Button (figure 16), plug
in the power cord, and turn the unit on� If the unit fails to turn on, visit
a Carpet Pro vacuum service center�
Fig. 16
Circuit breaker
reset button
Fig. 15
Fig. 12
Fig. 13
Fig. 14

 Loading...