Electronic Sensor
1. Install sensor in
1
⁄
2
in. (13 mm) coupling located in the
leaving chilled water nozzle.
2. Uncoil sensor wire in bottom of control panel and run it
to sensor assembly. Refer to control panel wiring dia-
gram for electrical connections.
Pneumatic Sensor
1. Install separable thermometer well in the leaving chilled
water nozzle.
2. Insert chilled water sensor in separable well.
3. Slide bracket into groove on head of separable well and
tighten mounting screws.
4. Install
1
⁄
4
-in. (6 mm) plastic tubing from control panel to
sensor bulkhead fittings (connections are labeled oncon-
trol panel). Refer to diagram inside control panel door.
The
1
⁄
4
-in. (6 mm) tubing is furnished and will be found,
coiled, inside the control panel.
INSTALL LOW-TEMPERATURE CUTOUT — A low-
temperature control is mounted inside control panel. Refer
to component arrangement diagram inside panel door for
location.
1. Uncoil capillary tubing and run it through a convenient
panel knockout and along absorber shell. Use tape or grom-
met to protect capillary where it goes through the panel.
2. Run tubing to well on refrigerant pump sump.
3. Secure sensing element in well. Apply heat-conductive
compound to sensing element after control has been cali-
brated at initial start-up.
INSTALL THERMOSWITCHES — Two switches are
mounted inside the control panel. Refer to the component
arrangement diagram inside panel door for location.
1. Uncoil capillary tubing and run it through a convenient
panel knockout and along absorber shell. Use tape or grom-
met to protect capillary where it goes through the panel.
2. Run tubing to 2 wells in strong solution line between heat
exchanger and spray header.
3. Secure sensing elements in wells. Heat-conductive com-
pound will be applied to sensing element after controls
have been calibrated at initial start-up.
Step 7 — Initial Solution and Refrigerant Charg-
ing —
Lithium bromide solution and refrigerant (water)
will be placed in the machine at initial start-up.Do not charge
solution into the machine until the unit is ready for
operation.
Do not start any pump motors until the machine has been
charged with solution and refrigerant. The hermetic pumps
can be seriously damaged by dry operations.
Refer to 16JB 010-068 Start-up, Operation, and Mainte-
nance Instructions for charging procedures.
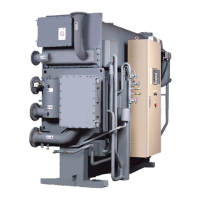
Fig. 8 — Electronic and Pneumatic
Chilled Water Sensor Assemblies
7
 Loading...