6
Outdoor Unit Connected to Factory Approved Indoor
Unit
These outdoor units are carefully evaluated and listed with
specific indoor coils for proper system performance.
Install Adapter T
ube
1. Remove plastic retainer holding outdoor piston in liquid
service valve.
2. Check outdoor piston size with matching number listed on
unit rating plate.
3. Locate plastic bag taped to unit containing adapter tube.
4. Remove Teflon seal from bag and install on open end of
liquid service valve. (See Fig. 5.)
5. Remove adapter tube from bag and connect threaded nut
to liquid service valve. Tighten nut finger-- tight and then
with wrence an additional 1/2 turn (15 ft--lb). DO NOT
OVER TIGHTEN!
TEFLONr SEAL
SWEAT / FLARE
ADAPTER
PISTON
BODY
PISTON
A05226
Fig. 5 --- Liquid Service Valve with Sweat Adapter Tube
Refrigerant Tubing and Sweat
Connections
Co n n ect v ap o r tu b e to fittin g o n outdoor unit vapor service
valves (see Table 2). Connect liquid tubing to adapter tube on
liquid service valve. Use refrigerant grade tubing.
CAUTION
!
UNIT DAMAGE HAZARD
Failure to follow this caution may result in equipment
damage or improper operation.
Service valves must be wrapped in a heat-- sinking
material such as a wet cloth while brazing.
CAUTION
!
UNIT DAMAGE HAZARD
Failure to follow this caution may result in equipment
damage or improper operation.
Installation of filter drier in liquid line is required.
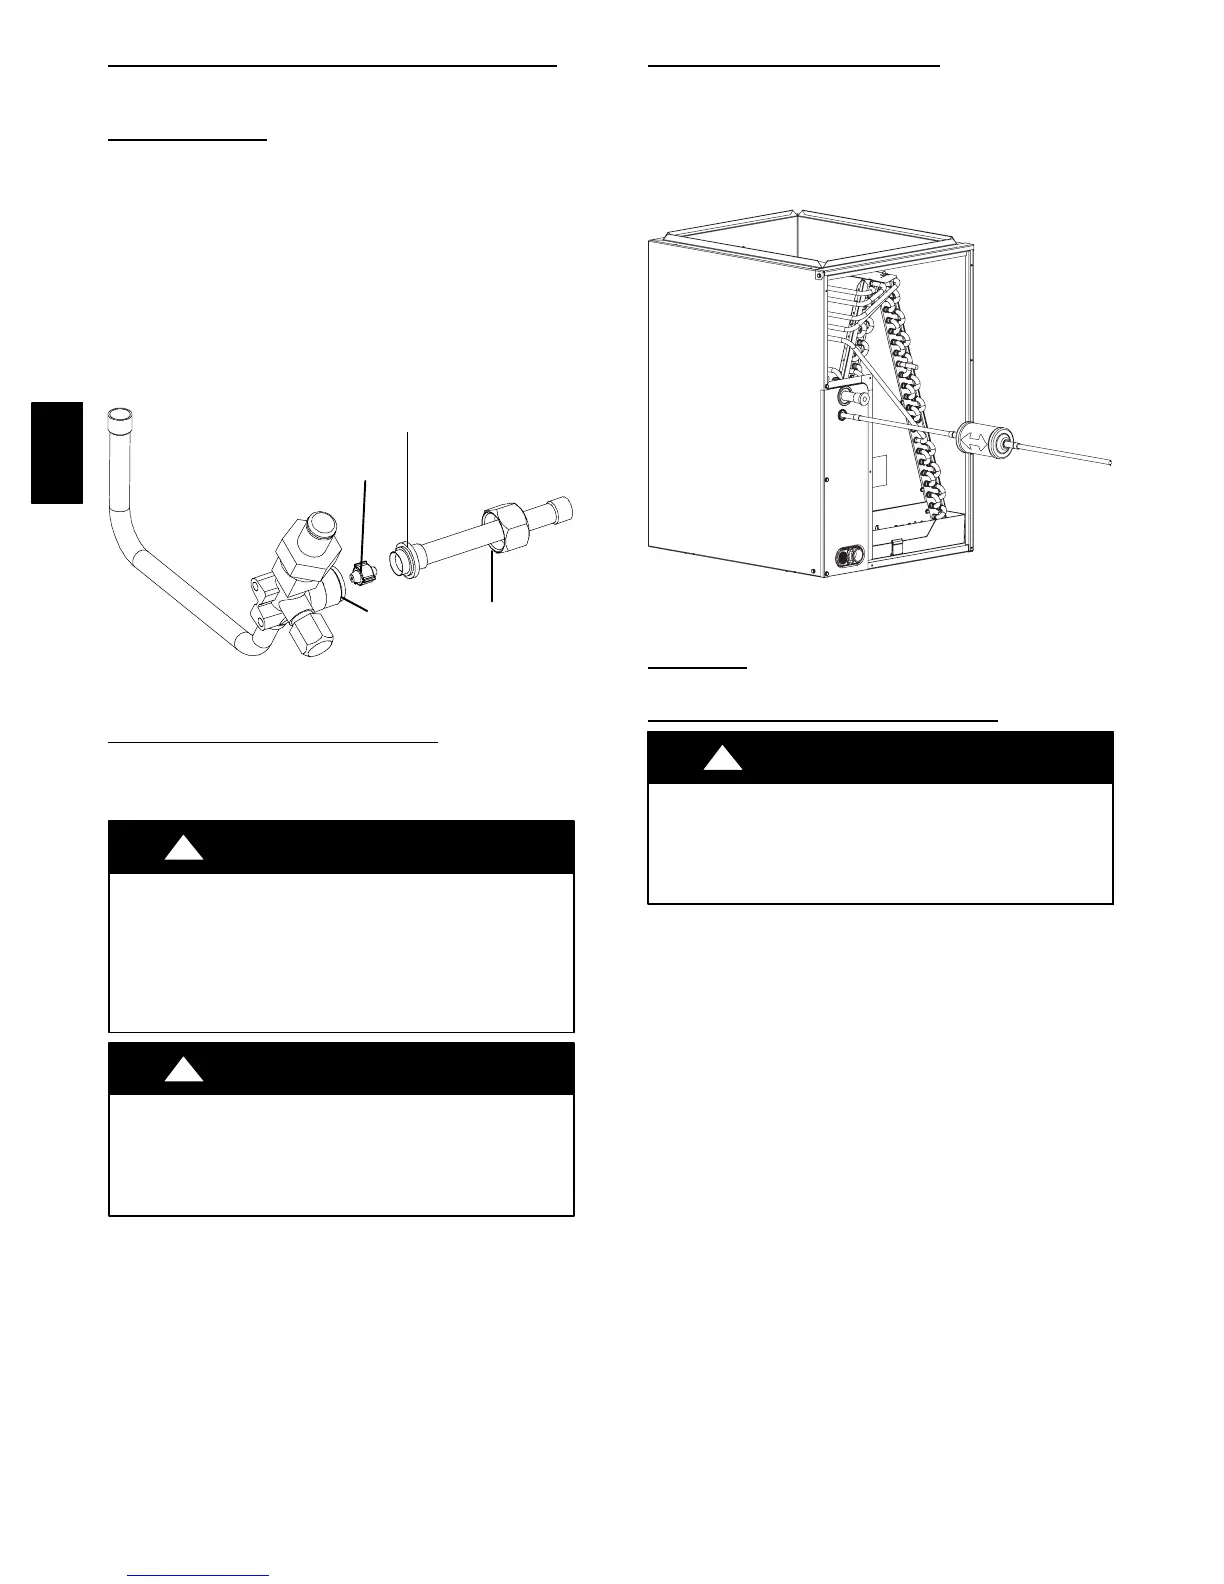
Install Liquid Line Filter Drier
Indoor
Refer to Fig. 6 and install filter drier as follows:
1. Braze 5 in. liquid tube to the indoor coil.
2. Wrap filter drier with damp cloth.
3. Braze filter drier to 5 in. long liquid tube from step 1.
4. Connect and braze liquid refrigerant tube to the filter drier.
A05227
Fig. 6 --- Liquid Line Filter Drier
Leak T
esting
Leak test all joints; indoors, outdoors, and refrigerant tubing.
Evacuate Refrigerant Tubing and Indoor Coil
CAUTION
!
UNIT DAMAGE HAZARD
Failure to follow this caution may result in equipment
damage or improper operation.
Never use the system compressor as a vacuum pump.
Refrigerant tubes and indoor coil should be evacuated using the
recommended deep vacuum method of 500 microns. An alternate
triple evacuation method may also be used if the deep vacuum
procedure is not followed.
IMPORTANT: Always break a vacuum with dry nitrogen.
25HPA
 Loading...