EasyManua.ls Logo

Carrier 25HPA Performance Series User Manual

Carrier 25HPA Performance Series
18 pages
To Next Page IconTo Next Page
Page #1 background imageLoading...
Page #1 background image
Installation Instructions
25HPA
Performancet Series Heat Pump
with Puronr Refrige rant
Size s 18 to 60
1--1/2 to 5 Nominal Tons
A05341
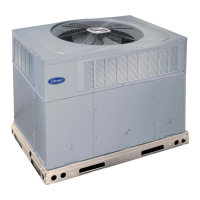
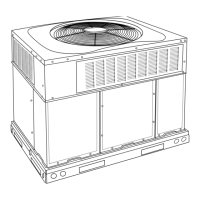
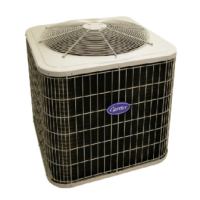
Fig. 1 --- 25HPA
TABLE OF CONTENTS
PAGE
SAFETY CONSIDERATIONS 2.......................
INSTALLATION RECOMMENDATIONS 2.............
INSTALLATION 3 -- 10, 17...........................
Step 1 -- Check Equipment & Jobsite 3...............
Step 2 -- Install on Solid Pad 3......................
Step 3 -- Clearance Requirements 3..................
Step 4 -- Operating Ambient 3......................
Step 5 -- Elevate Unit 3...........................
Step 6 -- Install TXV 3 -- 4.........................
Step 7 -- Make Piping Connections 5 -- 7..............
Step 8 -- Make Electrical Connections 7 -- 8............
Step 9 -- Compressor Crankcase Heater 8.............
Step 10 -- Install Electrical Accessories 8..............
Step 11 -- Check Defrost Thermistor and OAT Thermistor
Attachments 8...........................
Step 12 -- Start--Up 9..............................
Step 13 -- Check Charge 10, 17......................
GENERAL SEQUENCE OF OPERATION 11...........
HP SYSTEM FUNCTIONS AND SEQUENCE OF
OPERATION 11 -- 14................................
TROUBLESHOOTING 15 -- 16........................
FINAL CHECKS 18.................................
CARE AND MAINTENANCE 18......................
PURONR REFRIGERANT QUICK REF. GUIDE 18.....
Question and Answer IconNeed help?

Do you have a question about the Carrier 25HPA Performance Series and is the answer not in the manual?

Carrier 25HPA Performance Series Specifications

General IconGeneral
BrandCarrier
Model25HPA Performance Series
CategoryHeat Pump
LanguageEnglish

Summary

SAFETY CONSIDERATIONS

INSTALLATION RECOMMENDATIONS

STEP 1 - Check Equipment and Job Site

STEP 2 - Install on a Solid, Level Mounting Pad

STEP 3 - Clearance Requirements

STEP 6 - Install Thermostatic Expansion Valve (TXV)

Installing TXV in Place of Piston

Procedure for replacing a piston with a TXV in specific indoor units.

Replacing TXV on R-22 Indoor Coil

Steps for replacing an R-22 TXV with a Puron TXV on indoor coils.

STEP 7 - Make Piping Connections

Install Adapter Tube

Connecting the adapter tube to the liquid service valve properly.

Install Liquid Line Filter Drier Indoor

Installing the required liquid-line filter drier indoors for system protection.

STEP 8 - Make Electrical Connections

Connect Ground and Power Wires

Establishing proper ground and power connections for the unit.

Connect Control Wiring

Routing and connecting 24v control wires for system operation.

STEP 12 - Start-Up

STEP 13 - Check Charge

HEAT PUMP SYSTEM FUNCTIONS AND SEQUENCE OF OPERATION

Low Ambient Cooling

Infinity Controlled low ambient cooling

How the Infinity control manages low ambient cooling without a kit.

DEFROST

LIQUID LINE SOLENOID ACCESSORY

TROUBLESHOOTING

Pressure Switch Protection

Understanding high and low-pressure switch operations.

Temperature Thermistors

Information on thermistors and their function.

Status Codes

FINAL CHECKS

PURONĀ® (R-410A) REFRIGERANT QUICK REFERENCE GUIDE

Related product manuals