EasyManua.ls Logo

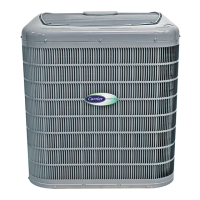
Carrier 25VNA8 User Manual

Carrier 25VNA8
23 pages
To Next Page IconTo Next Page
Page #1 background imageLoading...
Page #1 background image
Installation Instructions
25VNA8
Infinityr 18VS Variable Speed Heat Pump
with Puronr Refrigerant
NOTE: Read the entire instruction manual before starting the installation.
TABLE OF CONTENTS
PAGE NO.
SAFETY CONSIDERATIONS 2......................................................................
INSTALLATION RECOMMENDATIONS 2............................................................
INSTALLATION 3..................................................................................
Step 1 Check Equipment and Job site 3..........................................................
Step 2 Install on Solid, Level Mounting Pad 3....................................................
Step 3 Clearance Requirements 4...............................................................
Step 4 Operating Ambient 4..................................................................
Step 5 Elevate Unit 4........................................................................
Step 6 Making Piping Connections 4............................................................
Step 7 Make Electrical Connections 4...........................................................
Step 8 Compressor Internal Crankcase Heater 8...................................................
Step 9 Install Accessories 8...................................................................
Step 10 Start-- Up 8..........................................................................
Step 11 System Functions and Sequence of Operation 10.............................................
Step 12 Check Charge 11......................................................................
Step 13 Pumpdown & Evacuation 15.............................................................
MAJOR COMPONENTS 16...........................................................................
TROUBLESHOOTING 17.............................................................................
FINAL CHECKS 22..................................................................................
CARE AND MAINTENANCE 22.......................................................................
PURONr REFRIGERANT QUICK REFERENCE GUIDE 22...............................................
Manufacturer reserves the right to change, at any time, specifications and designs without notice and without obligations.
Catalog No: 25
V
N
A
8 --- 5 S I
Replaces: 25VNA8---4SI
Question and Answer IconNeed help?

Do you have a question about the Carrier 25VNA8 and is the answer not in the manual?

Carrier 25VNA8 Specifications

General IconGeneral
SEER RatingUp to 20.5
RefrigerantR-410A
Sound LevelAs low as 56 dB
Voltage208/230V
StagesVariable
TypeHeat Pump
Cooling Capacity18, 000 - 60, 000 BTU/h
Heating Capacity18, 000 - 60, 000 BTU/h
HSPF RatingUp to 10
Compressor TypeVariable Speed

Summary

SAFETY CONSIDERATIONS

Installation Recommendations

Guidance on locating the unit to minimize noise and ensure proper installation around dwellings.

INSTALLATION

Step 1 - Check Equipment and Job site

Verify that the unit matches job specifications and inspect for shipping damage before installation.

Step 2 - Install on Solid, Level Mounting Pad

Mount the outdoor unit on a stable, level pad, ensuring proper support and drainage as per local codes.

Step 3 - Clearance Requirements

Maintain specified clearances around the unit for airflow, service access, and preventing snow or ice accumulation.

Step 6 - Making Piping Connections

Connect refrigerant lines using proper techniques, ensuring correct tube diameters and avoiding unnecessary bends.

Step 7 - Make Electrical Connections

Ensure field wiring complies with all codes, connect ground and power wires safely, and follow wiring diagrams.

Step 10 - Start-Up

Follow procedures to properly start the system, ensuring correct refrigerant charge and system operation.

Step 11 - System Functions and Sequence of Operation

Understand how the unit operates, including time delays, defrost cycles, and communication protocols.

Step 12 - Check Charge

Perform refrigerant charge check using subcooling method or UI calculations for optimal system performance.

Step 13 - Pumpdown & Evacuation

Follow specific procedures for pumpdown and evacuation to safely recover or isolate refrigerant.

TROUBLESHOOTING

Related product manuals