4
All analog control arrangements include a standard linear
inlet flow sensor, 24-v transformer (optional), control enclo-
sure and wall thermostat to match the control type.
2100: Heating control
2101: Cooling control
2102: Cooling with on/off electric heat control
2103: Cooling with on/off hot water heat control
2104: Cooling/heating automatic changeover control
2105: Cooling with proportional hot water heat control
Pneumatic Control Arrangement — All control
packages are pressure independent (unless otherwise noted)
and available with or without hot water heat, dual maximum
airflow, heating and cooling maximum airflow and dual mini-
mum airflow. All control arrangements include a standard
linear inlet flow sensor.
1100 (Actuator only): DA-NC pressure dependent control
1101 (Actuator only): RA-NO pressure dependent control
1102 (Single function controller): DA-NO with or without hot
water or electric heat
1103 (Single function controller): RA-NC with or without hot
water or electric heat
1104 (Multi-function controller): DA-NO with or without hot
water or electric heat
1105 (Multi-function controller): DA-NC with or without hot
water or electric heat
1106 (Multi-function controller): RA-NO with or without hot
water or electric heat
1107 (Multi-function controller): RA-NC with or without hot
water or electric heat
1108 (Dual Maximum Control): DA-NO with or without hot
water or electric heat
1109 (Heating/Cooling Maximum Control): DA-NO with or
without hot water or electric heat
1110 (Dual Minimum Control): DA-NO with or without hot
water or electric heat
PNEUMATIC CONTROL LEGEND
DA: Direct-acting thermostat
RA: Reverse-acting thermostat
NO: Normally open damper position
NC: Normally closed damper position
The single function controller provides single functions, i.e.,
DA-NO. Multi-function controllers are capable of providing
DA-NO, DA-NC, RA-NC or RA-NO functions.
Direct Digital Electronic Control Arrange-
ments (Field-Supplied) — Control packages are field-
supplied for factory mounting, unless otherwise noted. All
DDC control arrangements include a standard linear inlet flow
sensor, transformer to 24 volts and control enclosure.
Contact Carrier for detail about mounting field-supplied
controls.
NO CONTROL
0000: 35E box only
D000: 35E box with control box only (For units without
electric heat requiring a 24 v control transformer: the control
transformer must be ordered from the unit accessories list in
Quote Builder.)
D001: 35E box with control box and 24 v transformer
P000: 35E box without controls (for DA pneumatic controlled
heat unit)
P001: 35E box without controls (for RA pneumatic controlled
electric heat unit)
INSTALLATION
Step 1 — Install Volume Control Box
1. Move unit to installation area. Remove unit from ship-
ping package. Do not handle by controls or damper
extension rod.
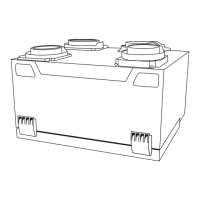
2. The unit has factory-installed brackets on unit as shown
in Fig. 3.
3. Suspend units from building structure with straps, rods,
or hanger wires. Secure the unit and level it in each direc-
tion. Note that reheat coil is in heavy end of unit.
Step 2 — Make Duct Connections
1. Install supply ductwork on unit inlet collar. Check that
air-supply duct connections are airtight and follow all
accepted medium-pressure duct installation procedures.
(Refer to Table 2 for pressure data.)
NOTE: To ensure proper equipment performance, it is
recommended that a length of rigid straight duct equal to
3 times the duct diameter be provided to the inlet.
2. Install the discharge duct. Where a multiple outlet con-
nector is used on the box, connect appropriately sized
ductwork to the outlets. Use adapter caps to seal unused
outlets. Fully open all balancing dampers.
To ensure use of common-diameter air duct, coordinate
diameters of box inlet and multiple outlet collars. Insulate duct
as required.
Ninety degree elbows or tight radius flexible duct immedi-
ately upstream of inlet collar should be avoided.
Step 3 — Install Sensors and Make Field Wir-
ing Connections — Electric Analog or DDC
(Direct Digital Controls) —
Refer to specific unit di-
mensional submittals and control application diagrams for con-
trol specifications. All field wiring must comply with National
Electrical Code (NEC) and local requirements. Refer to the
wiring diagram on the unit for specific wiring connections.
A field-supplied transformer is required if the unit was not
equipped with a factory-installed transformer. See Fig. 4.
Single duct terminal units with electric heat are supplied
with a single point wiring connection in the heater control box.
All unit power is supplied through this connection. Models
with electric heat are factory equipped with a control trans-
former. See Fig. 5.
Wiring and unit ampacities are referenced in Tables 3A and
3B.
NOTE: Refer to wiring diagram attached to each unit for spe-
cific information on that particular unit. Units with 480-3-60
electric heater REQUIRE 4-wire, wye connected power.
units with 208/230 v, 3-phase heater can be connected with
3-wire power.
Unit airflow should not be set outside of the range noted in
Fig. 6. The minimum recommended airflow for units with elec-
tric heat must be at least 75 cfm per kW and not drop below the
minimum values listed in the performance data table. The max-
imum unit discharge temperature should not exceed 120 F.
Prevent air stratification by setting the discharge temperature
no more than 15 degrees above the room temperature.
Example: 90 F discharge in a 75 F room.
LOCK OUT AND TAG heater electrical disconnect before
working on this equipment. Otherwise, one leg of the 3-leg
heater remains energized. Electrical shock or personal
injury could result.