Size of outline dimension mounted
plug
13.2.1.3 Install the pendant bolt
Select the position of installation hooks
according to the hook holes positions showed
in upper picture.
Drill four holes of Ø12mm, 45~50mm deep at
the selected positions on the ceiling. Then
embed the expansible hooks (fittings).
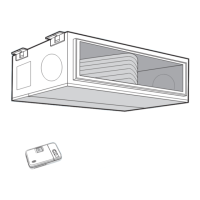
13.2.1.4 Install the main body
Make the 4 suspender through the 4 hanger of
the main body to suspend it. Adjust the
hexangular nuts on the four installation hooks
evenly, to ensure the balance of the body. Use
a leveling instrument to make sure the
levelness of the main body is within ±1°.
13.2.1.5 Install the air filter
Insert the air filter through the filter slot and fix it
with 2 screws.
13.2.1.6 Install the air duct
Please design the air duct as below
recommended picture
13.2.1.7 Change the air inlet direction
① Take off ventilation panel and flange, cut off
the staples at side rail.
② Stick the attached seal sponge as per the
indicating place in the following fig, and then
change the mounting positions of air return
panel and air return flange .
 Loading...