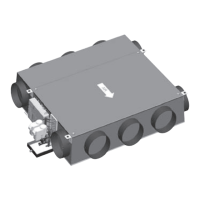
Condensate drain pipe (Fig. 9): Use a exible pipe with an
inside diameter of 17 mm and provide a constant fall of
20 mm/m (9a) over the whole horizontal pipe run. Install a
50 mm (minimum) siphon (9b) to prevent gases and
odours from owing back into the ceiling void.
WARNING: After drain pipe connection, control
clamping of the drain pipe and be sure there is no water
leakage. If needed, screw the nut of the drain part (inside
the drain pan) by a maximum torque of 1 N.m.
If several units are connected to a common collector, a device
must be installed (Fig. 10). Before operating the unit, ensure
that the water ows into the internal condensate drain pan by
pouring some water into it. If problems are detected, check
the drain pipe slope and look for possible obstructions. In
all cases the connection duct(s) at the unit outlet must be
insulated to prevent any condensate formation on the walls.
NOTE: The pressure losses of these ducts must be compa-
tible with the unit performance. The duct must be as smooth
as possible. Avoid sharp bends. Check that there are no
leaks or kinks, and that there is no dirt or installation
debris inside the ducts. Debris within the ducts might
damage the fan wheel and the damper in the air diffusers.
When installation is complete - i.e. when the 42EM is
attached to the ceiling, air ducts are complete, water
mani-folds are in position with stop valves ready on the
connec-tion stubs, and electrical installation is prepared -
then connect the water pipes (Carrier recommends the use
of exible water pipes that can be supplied as an
accessory). Each exible pipe has a 1/2" gas screw
connector, depend-ing on the model. Ensure that a gasket
(not supplied by Carrier) is installed between the screw
connector and the stop valve.
When all units are installed, open the stop valves on the
manifolds, bleed and then pressurize the circuits. To bleed
the coils, slightly loosen the bleed screws. The installation
can then be started.
NOTE: Do not switch on the power until all connections
are made and earthed.
Switch off the unit power supply at the isolator provided
for the purpose during installation (isolator not supplied
by Carrier).
• Disconnect the power supply and connection cables.
• Close the isolating valves on the manifolds.
• Disconnect the exible water pipes by unscrewing the
gas connectors.
WARNING: Since the exible water pipes do not have
drain valves, a receiver must be provided to allow the
cooling coil to be drained.
• Disconnect the supply air ducts.
• Disconnect the exible condensate drain pipe. Drain
the siphon into a suitable vessel.
• Support the unit lightly and release it by unscrewing
the four nuts on the threaded hangers. Lower the unit
carefully.
4.1.1 - Fan assembly removal procedure
WARNING: Disconnect the power supply to the unit before
carrying out any work on the unit.
Identify and note the wired fan speeds. If the fan develops
a fault the whole assembly must be removed and replaced
(Fig. 12).
• Remove the lter.
• Remove the fan access panel (12a).
• Disconnect the fan assembly power supply cables
(power and control wiring for variable-speed motor).
• If necessary remove the controller (xed with screws)
to gain access to the maintenance screws of the panel
supporting the fan.
• The fan assembly and its panel are held in place by
four torx screws (T20) (12b). Remove these screws
and slide the assembly down (12c).
• Remove the fan motor assembly.
NOTE: Be careful not to touch the fan blades during
the removal process to avoid unbalancing the fans.
• For units with the electric heater option, disconnect
the power supply cable to the heater. Withdraw the
cable through the cable gland.
• Unscrew the electric heaters.
• Replacement of the fan motor assembly is by the
reversal of the above procedure.
WARNING: The electrical connections to the fan motor
must be made in accordance with the labels on the
con-nector block.
For the variable-speed motor carefully separate the power
wiring cable from the control wiring cable and pull them
apart as far as possible.
4.1.2 - Capacitor replacement procedure (Fig. 13)
• Disconnect the power supply to the unit before
carrying any work on the unit.
• Remove the lter.
• Remove the fan motor assembly access panel.
• Remove the capacitor that is attached to the motor
chassis assembly.
• Disconnect the capacitor by withdrawing the at spade
connectors from the back of the capacitor.
• Replacement of the capacitor assembly is by the reversal
of the above procedure.
4.1.3 - Fan wiring
4.1.3.1 - Multi-speed unit with bare wires - 3 speeds wired
The fan motor has six speeds, provided by an auto-trans-
former, offering the unit greater ow control exibility.
Three of the six speeds must be selected to allow connection
of the fan motor in accordance with the applicable electronic
regulations (minimum speed = 6, maximum speed = 1). See
Fig. 14.

 Loading...