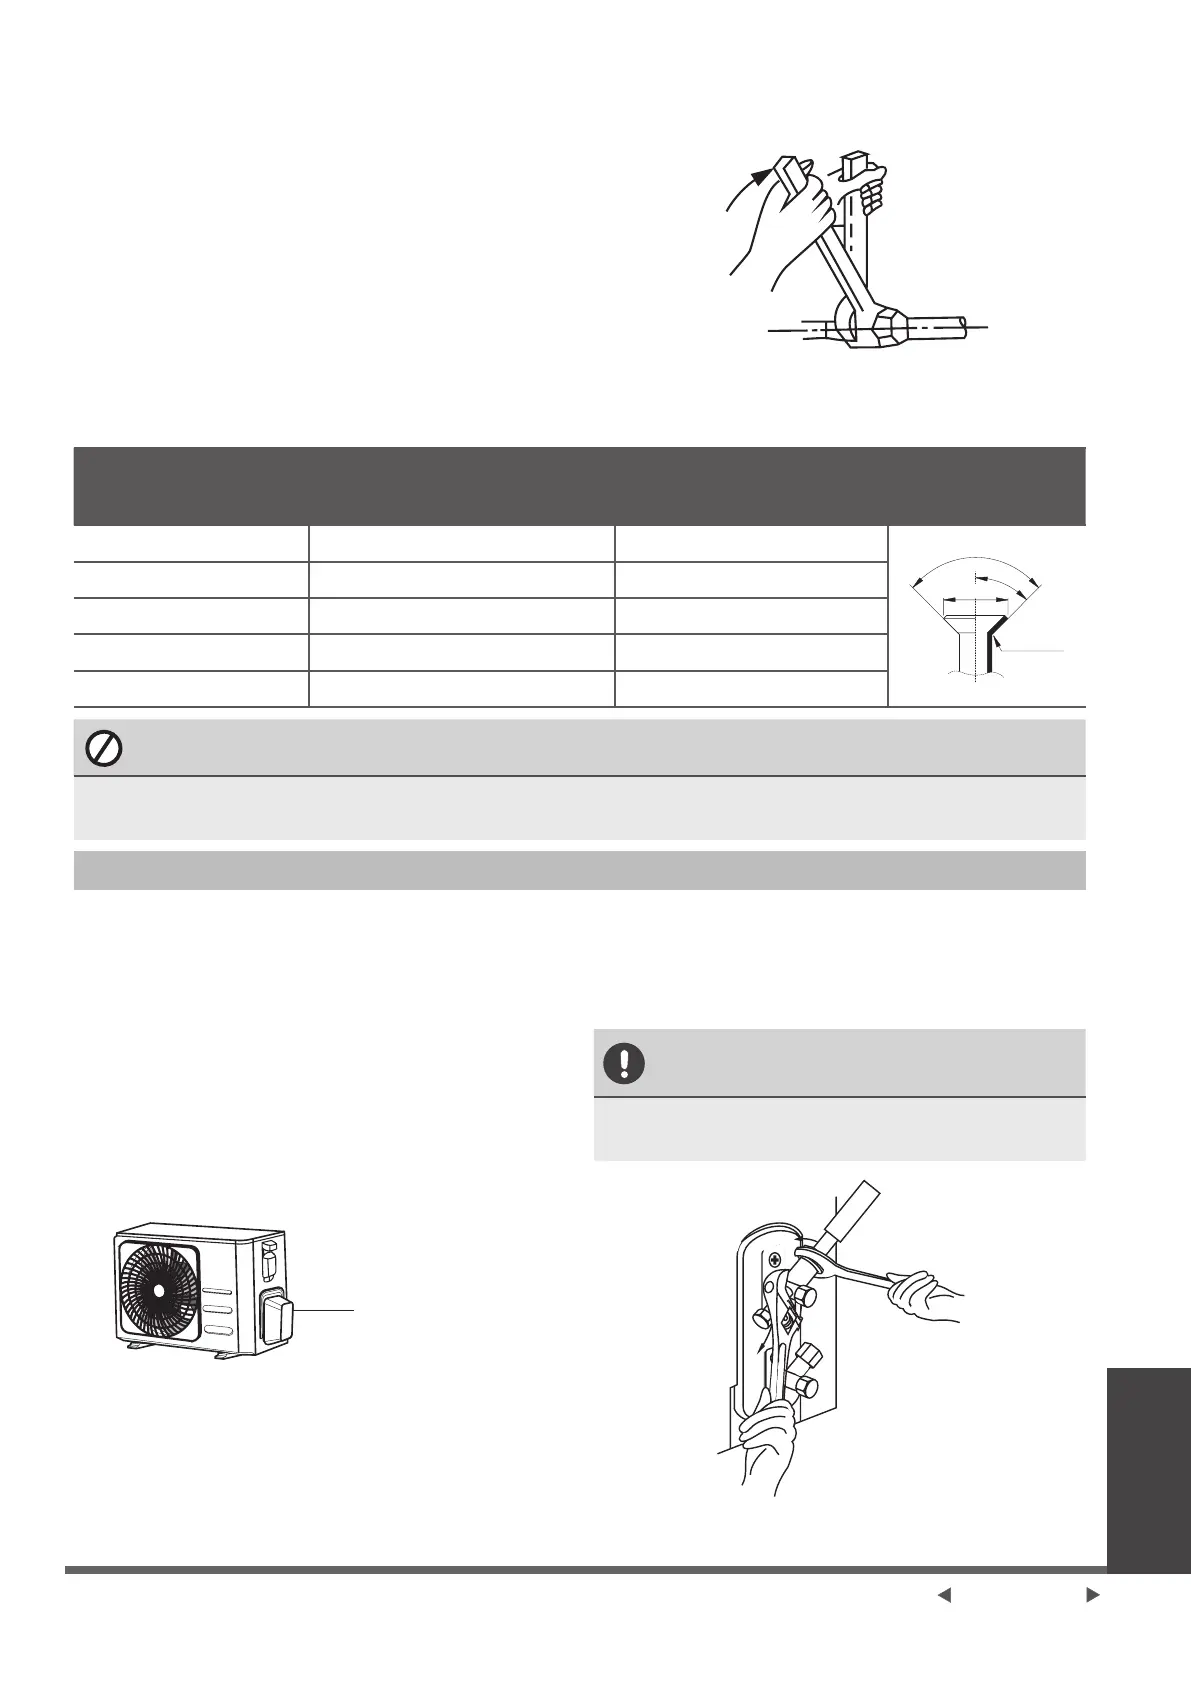
Refrigerant piping
Connection
2. Tighten the are nut as tightly as
possible by hand.
3. Using a spanner, grip the nut on the unit
tubing.
4. While rmly gripping the nut on the unit
tubing, use a torque wrench to tighten
the are nut according to the torque
values in the Torque Requirements
table below. Loosen the aring nut
slightly, then tighten again.
1. Unscrew the cover from the packed
valve on the side of the outdoor unit.
2. Remove protective caps from ends of
valves.
3. Align ared pipe end with each valve,
and tighten the are nut as tightly as
possible by hand.
4. Using a spanner, grip the body of the
valve. Do not grip the nut that seals the
service valve.
Valve cover
5. While rmly gripping the body of the
valve, use a torque wrench to tighten the
are nut according to the correct torque
values.
6. Loosen the aring nut slightly, then
tighten again.
7. Repeat Steps 3 to 6 for the remaining
pipe.
USE SPANNER TO GRIP MAIN
BODY OF VALVE
Torque from tightening the are nut can
snap off other parts of valve.
TORQUE REQUIREMENTS
Outer Diameter of
Pipe (mm)
Tightening Torque
(N•m)
Flare dimension (B)
(mm)
Flare shape
ø6.35 (ø0.25”) 18~20 (180~200kgf.cm) 8.4~8.7 (0.33~0.34”)
R0.4~0.8
45°±2
90°±4
B
R0.4~0.8
ø9.52 (ø0.375”) 32~39 (320~390kgf.cm) 13.2~13.5 (0.52~0.53”)
ø12.7 (ø0.5”) 49~59 (490~590kgf.cm) 16.2~16.5 (0.64~0.65”)
ø16 (ø0.63”) 57~71 (570~710kgf.cm) 19.2~19.7 (0.76~0.78”)
ø19 (ø0.75”) 67~101 (670~1010kgf.cm) 23.2~23.7 (0.91~0.93”)
DO NOT USE EXCESSIVE TORQUE
Excessive force can break the nut or damage the refrigerant piping. You must not exceed
torque requirements shown in the table above.
Instructions for Connecting Piping to Outdoor Unit
Page 17-GB
 Loading...