10
9. Set retaining rings (x3) into composite rotor and install
6 no. 10-32 x 1/2 in. hex head machine screws
(P/N: AD07AB126) through the holes in retaining
rings. Tighten to 23 in.-lb (2.6 Nm). It is recommended
this screw installation be done in a star pattern.
10. Align tabs of composite casing with rectangular cutouts on
top of aluminum stator and snap into place.
11. Final assembly should have a small clearance between top of
plastic rotor and underside of casing lip. Spin rotor by hand
to ensure no contact or rubbing between these 2 parts.
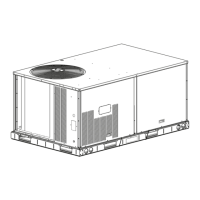
Reinstalling Motor and Fan Assembly
See Fig. 14.
1. Align motor harness/grommet at ~7 o’clock (facing
installer) and align the bottom flats on right and left sides
of fan stator with fan deck ribs. Drop fan assembly down
into fan deck opening and slide back until aluminum stator
is under the rear fan deck brackets.
2. Align (if necessary) 2 front holes and fasten stator to
fan deck with 2 no. 10 x 5/8 in. hex head screws
(P/N: AL48AM217). Tighten to 50 in.-lb (5.65 Nm).
3. Reconnect wires for stator temperature limit switch.
4. Pull motor harness tight through grommet and plug it in to
the control box harness and secure in the corner with snap-
in wire tie.
Fig. 14 — Fan Assembly Install
Staged Air Volume
All 50GCQ units with EcoBlue™ technology come factory set to
automatically adjust the indoor fan motor speed in sequence with
the unit’s ventilation, cooling, and heating operation. When the
first stage of cooling is requested, unit fan will operate at 75% of
the user set full load airflow. When the second stage of cooling is
required, UCB will allow the full design airflow rate for the unit
(100%). During the heating mode, the unit will allow total design
airflow rate (100%). During ventilation mode, the fan will operate
at 75% speed.
See Table 1 on page 5 for 2-Pin DIP switch settings.
COOLING
Condenser Coil (Outdoor)
The condenser coil is fabricated with round tube copper hairpins
and plate fins of various materials and/or coatings (see
Appendix A — Model Number Nomenclature on page 56 to
identify the materials provided in this unit). The coil may be
one-row or composite-type 2-row. Composite 2-row coils are
2 single-row coils fabricated with a single return bend end
tubesheet.
Evaporator Coil (Indoor)
The evaporator coil is traditional round-tube, plate-fin technolo-
gy. Tube and fin construction is of various optional materials and
coatings (see Appendix A — Model Number Nomenclature on
page 56). Coils are multiple-row.
Condenser Coil Maintenance and Cleaning
Recommendation
Routine cleaning of coil surfaces is essential to maintain proper
operation of the unit. Elimination of contamination and removal of
harmful residues will greatly increase the life of the coil and ex-
tend the life of the unit. The following maintenance and cleaning
procedures are recommended as part of the routine maintenance
activities to extend the life of the coil.
REMOVE SURFACE LOADED FIBERS
Surface loaded fibers or dirt should be removed with a vacuum
cleaner. If a vacuum cleaner is not available, a soft non-metallic
bristle brush may be used. In either case, the tool should be ap-
plied in the direction of the fins. Coil surfaces can be easily dam-
aged (fin edges can be easily bent over and damage to the coating
of a protected coil) if the tool is applied across the fins.
NOTE: Use of a water stream, such as a garden hose,
against a surface loaded coil will drive the fibers and dirt
into the coil. This will make cleaning efforts more difficult.
Surface loaded fibers must be completely removed prior to
using low velocity clean water rinse.
PERIODIC CLEAN WATER RINSE
A periodic clean water rinse is very beneficial for coils that are ap-
plied in coastal or industrial environments. However, it is very im-
portant that the water rinse is made with a very low velocity water
stream to avoid damaging the fin edges. Monthly cleaning as de-
scribed below is recommended. Rinsing coils in the opposite di-
rection of airflow is recommended.
ROUTINE CLEANING OF COIL SURFACES
Periodic cleaning with Totaline
®
environmentally balanced coil
cleaner is essential to extend the life of coils. This cleaner is avail-
able from Replacement Components Division as part number
P902-0301 for a one gallon container, and part number P902-0305
for a 5 gallon container. It is recommended that all coils, including
standard aluminum, pre-coated, copper/copper or e-coated coils
be cleaned with the Totaline environmentally balanced coil clean-
er as described below. Coil cleaning should be part of the unit’s
regularly scheduled maintenance procedures to ensure long life of
WARNING
UNIT OPERATION AND SAFETY HAZARD
Failure to follow this warning could cause personal injury,
death and/or equipment damage.
This system uses R-410A refrigerant, which has higher
pressures than R-22 and other refrigerants. No other
refrigerant may be used in this system. Gauge set, hoses, and
recovery system must be designed to handle R-410A
refrigerant. If unsure about equipment, consult the equipment
manufacturer.
 Loading...