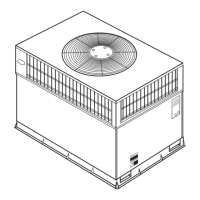
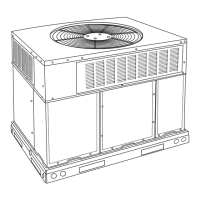
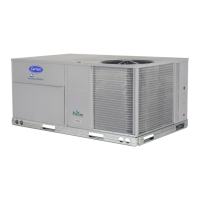
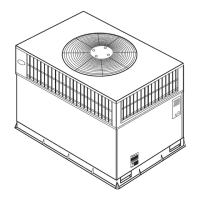
Table 1--Physical Data--Unit 50GS
UNiT SiZE
NOMINAL CAPACITY (ton)
OPERATING WEIGHT (lb.)
COMPRESSOR
REFRIGERANT {R-22)
Quantity {lb.)
REFRIGERANT METERING DEVICE
Orifice ID (in.)
CONDENSER COiL
Rows...Fins/in.
Face Area (sq. ft.)
CONDENSER FAN
Nominal Cfm
Diameter
Motor Hp (Rpm)
EVAPORATOR COIL
Rows...Fins/in.
Face Area (sq. ft.)
EVAPORATOR BLOWER
Nominal Airflow (elm)
Size (in.)
Motor HP (RPM)
RETURN-AIR FILTERS (in.)*
Throwaway
030 036 042 048 060
2-1/2 3 3-1/2 4 5
256 268 294 324 369
Reciprocating Scroll Reciprocating
3.65 4.4 6.4 5.1 7.4
AccuRater®
.034
1...17
9.1
.034 .032 .032 .030
1...17 1...17 1...17 2...17
9.1 10.9 12.3 12.3
2400 3000 3000 3600 3600
22 18 22 22 22
1/8 (825) 1/4 (1100) 1/4 (1100) 1/4 (1100) 1/4 (1100)
2...15 3...15 4...15 3...15 4...15
3.7 3.06 3.06 4.7 4.7
1000 1200 1400 1600 2000
10x10 1lx10 1lx10 1lx10 1lx10
1/4 (1075) 1/2 (1075) 3/4 (1075) 3/4 (1075) 1.0 (1100)
20x20 20x24 20x24 24x30 24x30
* Required filter sizes shown are based on the larger of the ARI (Air Conditioning and Refrigeration Institute) rated cooling airflow or the heating airflow velocity of 300
ft./rnin, for throwaway type or 450 ft./rnin, for high-capacity type. Air filter pressure drop for non-standard filters must not exceed 0.08 in. wg.
condensate connection to prevent the pan from overflowing (See
Fig. 7). When using a gravel apron, make sure it slopes away li"om
tile unit.
Connect a drain tube using a minimum of 3/4 -in. PVC or 314 -in.
copper pipe (all field-supplied) at the outlet end of the 2-in. trap.
Do not undersize the robe. Pitch the drain tube downward at a
slope of at least 1-in. li}r every 10 ft. of horizontal run. Be sure to
check the drain tube %r leaks. Prime trap at the beginning of the
cooling season start-up.
Step 7--install Duct Connections
The unit has duct flanges on the supply- and return-air openings on
the side and bottom of the unit. For downshot applications the
ductwork can be connected to the roof curb. See Fig. 2 & 3 %r
connection sizes and locations.
IMPORTANT: Use flexible connectors between ductwork and
unit to prevent transmission of vibration. Use suitable gaskets to
ensure weatbertight and airtight seal. When electric heat is
installed, use fire proof canvas (or similar heat resistant material)
connector between ductwork and unit discharge connection. If
flexible duct is used, insert a sheet metal sleeve inside duct. Heal
resistant duct connector (or sheet metal sleeve) must extend 24-in.
li"om the unit discharge connection flange into the ductwork.
CONFIGURING UNITS FOR DOWNFLOW (VERTICAL) DIS-
CHARGE
Belbre perlorming service or maintenance operations on the
system, turn off main power to unit and install lockout tag or
electrical shock could result.
1. ()pen all electrical disconnects and install lockout tag belk}re
starting any service work.
2. Remove return duct cover located on duct panel by breaking
lonr (4) connecting tabs with screwdriver and a hammer. (Fig.
sag)
3. To remove supply duct cover, break f_'ont and 1Tightside
connecting tabs with a screwdriver and a hammer. Push louver
down to break rear and left side tabs. (Fig. 8 & 9)
4. If unit ductwork is to be attached to verflcal opening flanges
on the unit composite base (jaekstand applications only), do so
at this time. Collect ALL screws that were removed. Do not
leave screws on rooftop as pemmnent damage to the roof may
OCCUr.
5. It is recommended that the unit base insuhttion around the
perimeter of the vertical return-air opening be secured to the
unit base with aluminum tape. Applicable local codes muy
require aluminum tape to prevent exposed fiberglass.
6. Cover both horizontal duct openings with the duct covers froll]
the accessory duct cover kit. Ensure opening is air-and
watertight.
7. After completing unit conversion, perlorm all salL'ty checks
and power up unit.
NOTE: The design and installation of the duct system must be in
accordance with the standards of the NFPA lbr installation of
nonresidence-type air eondifioning and ventilating systems, NFPA
90A or residence-type, NFPA 90B; and/or local codes and
ordinances.
Adhere to the fl)llowing criteria when selecting, sizing, and
installing the duct system:
8. Units am shipped lot side shot installation.
9. Select and size ductwork, supply-air registers, and return-air
grilles according to American Society of Heating, Refrigera-
tion and Air Conditioning Engineers (ASHRAE) recommen-
dations.
10. Use flexible transition between rigid ductwork and unit to
prevent transndssion of vibration. The transition may be
screwed or bolted to duct flanges. Use suitable gaskets to
ensure weathertight and airtight seal.
11. All units nmst have field-supplied filters or accessory filter
rack installed ilkthe return-air side of the unit. Recommended
sizes lot filters are shown ilk Tables 1 and 2.
 Loading...