6
■ COMPETITIVE SLEEVE PREPARATION
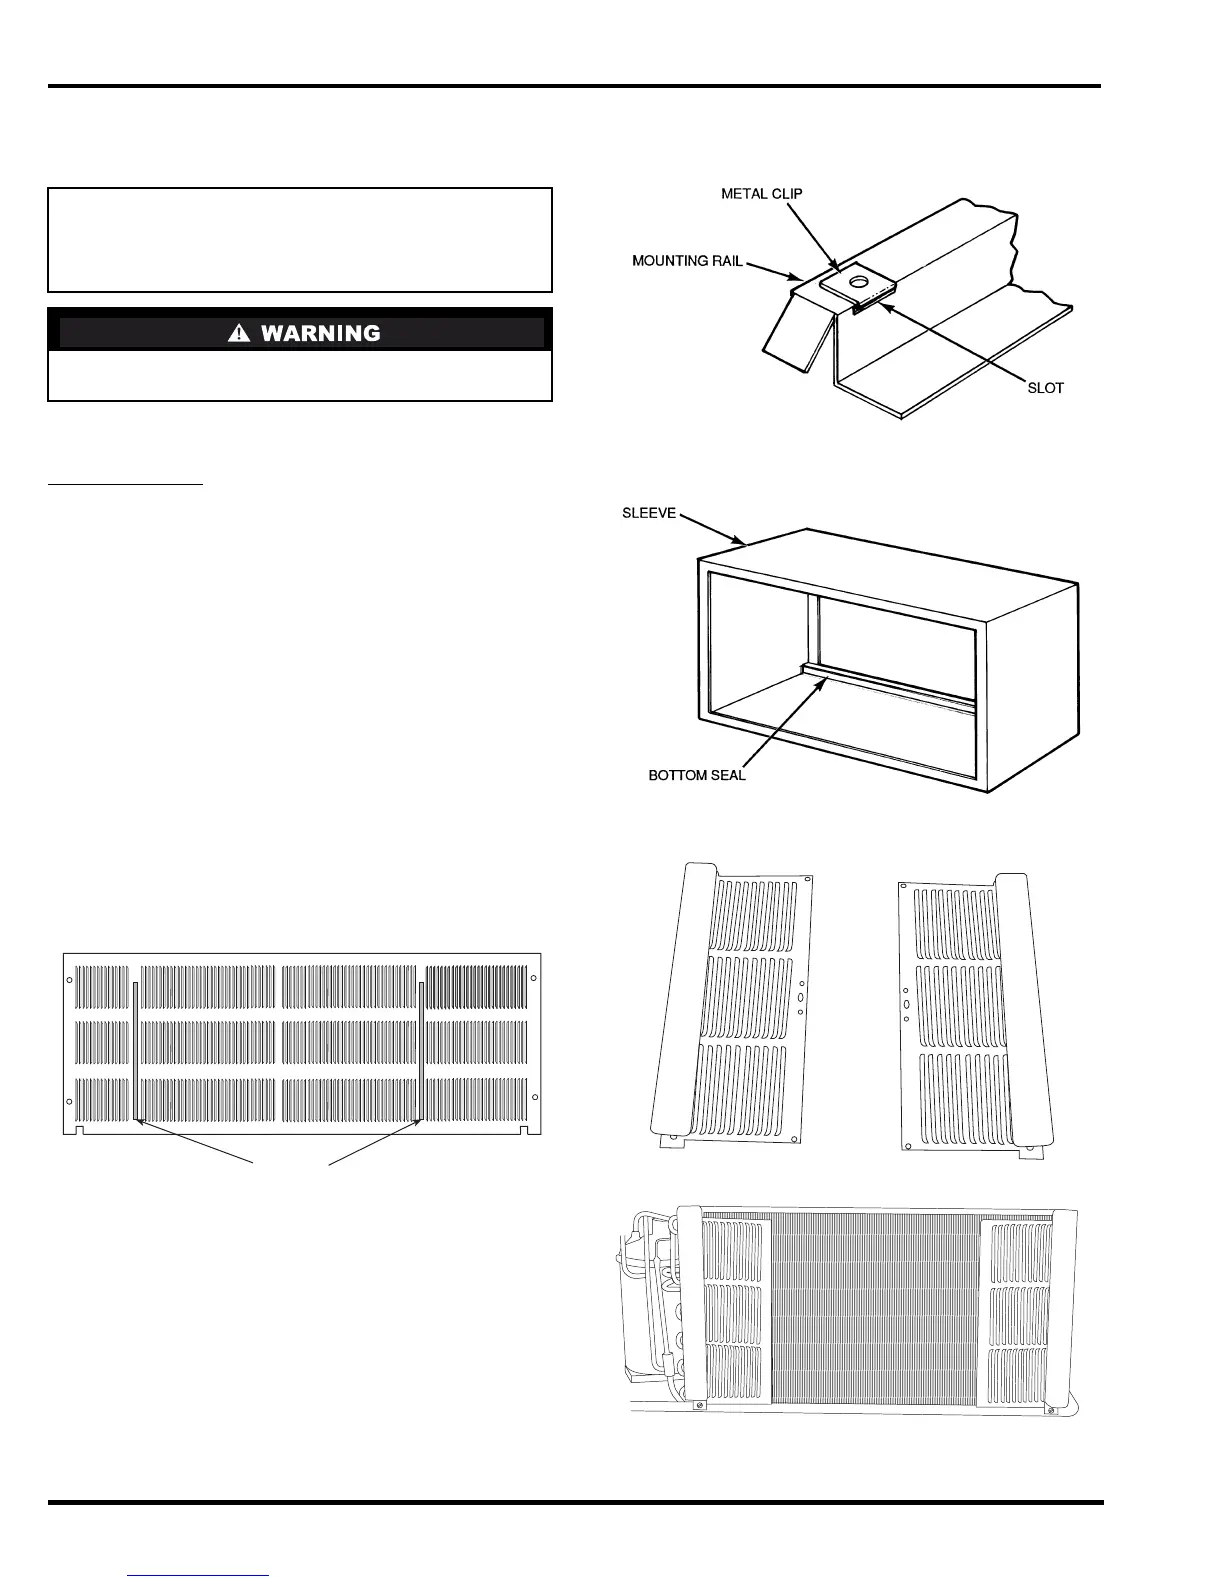
Remove any existing foam baffles that are installed on
the outdoor grille if present. See Figure 6.
GE Sleeves Only
Metal Wall Sleeve — Remove metal clip on mounting
rail located on left, inside bottom of metal sleeve and
discard. See Figure 7.
Plastic Sleeve — Remove bottom seal from plastic
sleeve. See Figure 8.
■ INSTALLATION OF A CARRIER WALL SLEEVE
USING A NON-CARRIER GRILLE
This application has become more common due to
pre-manufactured windows with built-in grilles or ren-
ovations where a Carrier sleeve is used with an exist-
ing non-Carrier grille.
Use of a Carrier wall sleeve with a non-Carrier grille
requires installation of an Accessory Baffle Kit, which
ensures a good seal between the unit and exterior
grille and prevents air recirculation. (See Figures 9
and 10.) Air recirculation is a large contributor to
performance loss and premature damage to major
components.
IMPORTANT: Inspect the wall sleeve thoroughly
prior to installation. Manufacturer does not assume
responsibility for costs or damages due to defects in
the sleeve or improper installation.
Disconnect all power to unit to avoid possible electri-
cal shock during installation.
FIGURE 7 — REMOVE METAL CLIP ON
GE METAL SLEEVE
FIGURE 8 — REMOVE BOTTOM SEAL FROM
GE PLASTIC SLEEVE
FIGURE 9 — ACCESSORY BAFFLE KIT
FIGURE 10 — INSTALLATION COMPLETE
BAFFLES
FIGURE 6 — REMOVE EXISTING BAFFLES ON
COMPETITIVE OUTDOOR GRILLES
 Loading...