EasyManua.ls Logo

Carrier 53QPCT18H-708F - User Manual

Carrier 53QPCT18H-708F
54 pages
To Next Page IconTo Next Page
Loading...
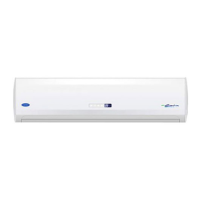
Hi Wall Split Air Conditioners
53QPCT 18C-24C Cool Only
53QPCT 18H-24H
Heat Pump
Rev. (0) - 2013
220-240V ~ 50Hz 1Ph
R
2
2
Quality
Management System
ISO 9001 : 2008
Certicate No.: QS-5519HH
Enviromental
Management System
ISO 14001 : 2004
Certicate No : 12 104 30334 TMS
Safety
Management System
BS OHSAS 18001 : 2007
Certicate No : 12 116 30334 TMS
03502767
Carrier is committed to continuously improving its products according to national and international standards
to ensure the highest quality and reliability standards, and to meet market regulations and requirements.
All specications subject to change without prior notice according to Carrier policy of continuous development.
INSTALLATION MANUAL
Question and Answer IconNeed help?

Do you have a question about the Carrier 53QPCT18H-708F and is the answer not in the manual?

Carrier 53QPCT18H-708F Specifications

General IconGeneral
BrandCarrier
Model53QPCT18H-708F
CategoryAir Conditioner
LanguageEnglish

Summary

General Notes to Installer

Precautions Before Installation

Selecting Installation Location of Indoor Unit

Considerations for Indoor Unit Location

Factors to consider when choosing the optimal indoor unit placement for performance and accessibility.

Selecting Installation Location of Outdoor Unit

Considerations for Outdoor Unit Location

Factors to consider for outdoor unit placement to ensure optimal performance and longevity.

Minimum Clearances for Single Outdoor Unit

Specifies required clearances around the outdoor unit for adequate air circulation and maintenance access.

Installation Location Check List

Installation Accessories

Indoor Unit Installation

Indoor Unit Installation Steps

Step-by-step guide for mounting the indoor unit, including wall hole preparation and bracket installation.

Outdoor Unit Installation

Connecting Refrigerant Piping Lines

Refrigerant Charge Guidelines

Guidelines for calculating and adding refrigerant charge based on piping length.

Steps for Preparing Refrigerant Piping Lines

Detailed steps for cutting, reaming, mounting flare nuts, and flaring refrigerant piping ends.

Connecting Refrigerant Piping Lines to Indoor Unit

Procedure for connecting refrigerant piping lines to the indoor unit's half unions.

Connecting Refrigerant Piping Lines to Outdoor Unit

Procedure for connecting refrigerant piping lines to the outdoor unit's flare valves.

Air Purging of Indoor Unit and Refrigerant Piping Lines

Procedures for purging air using refrigerant contained in the outdoor unit to ensure system integrity.

Air Purging Using Vacuum Pump

Procedure for purging air using a vacuum pump to ensure system integrity.

Refrigerant Leak Check Methods

Methods for checking refrigerant piping joints for leaks using soapy water or a detector.

Connecting Condensate Drain Line

Connecting Electrical Wiring

Electrical Wiring: Power Supply to Circuit Breaker

Details on wiring the power supply to the circuit breaker, emphasizing safety and regulations.

Electrical Wiring: Units to Power Supply and Circuit Breaker

Guidelines for connecting the indoor and outdoor units to the power supply and circuit breaker.

Finishing Installation

Test Running

Cooling Test Running Procedure

Procedure for conducting test runs to verify cooling operation and performance.

Heating Test Running Procedure

Procedure for conducting test runs to verify heating operation and performance.

After Installation Check List

Refrigerant Piping Lines Connections Check List

Checklist items for verifying the proper connection and insulation of refrigerant piping.

Electrical Connections Check List

Checklist items for verifying correct electrical connections, voltage, and wiring.

Self Diagnostic Function for Malfunctions Detection

Related product manuals