8
NOTE:
If washable filter that was shipped with the furnace has
been replaced with an electronic air cleaner (EAC), refer to the
EAC Owner’s Manual for maintenance information.
6. If washable filter, wash filter (if dirty) in a sink, bathtub, or
outside with a garden hose. Always use cold tap water. A
mild liquid detergent may be used if necessary. Spray water
through filter in the opposite direction of airflow. Allow filter
to dry.
7. Reinstall clean air filter.
8. Reinstall filter retainer.
9. Replace blower access panel and main furnace door. Be sure
to replace 2 screws in blower access panel. (See Fig. 24 and
25.) Turn on electrical supply to the furnace.
24 25
If your furnace air filter needs to be replaced, be sure to use
the same size that was originally supplied. Use the furnace
filter table and compare your furnace size with the proper
filter size.
* Furnace with a side return-air inlet may have a different filter size. Measure
the filter to obtain the correct size.
COMBUSTION AREA AND VENT SYSTEM
Visually inspect the combustion area and vent system before
each heating season. Make sure that all PVC pipes leading
into the combustion area and vent are free from any cracks
and sags. Check the combustion-air intake adjacent to the
furnace for blockage. Also check vent pipe on the outside of
your home for blockage.
When dirt, soot, scale, or rust is allowed to build up, your
furnace can suffer a loss of efficiency and perform improper-
ly. Accumulations on the main burners can result in firing out
of normal sequence. This delayed ignition creates an alarm-
ingly loud sound.
To inspect the combustion area and vent system, you will
need a flashlight. Refer to Fig. 2, and proceed as follows:
1. Turn off the gas and electrical supplies to the furnace and
remove the main furnace door. (See Fig. 7, 8 and 9.)
2. Remove burner enclosure front. (See Fig. 26 or 27.)
Inspect the gas burners and remainder of furnace and ignitor area
for dirt, rust, soot, or scale.
3. Inspect the combustion-air and vent PVC pipes for sags,
holes, cracks, or disconnections. Horizontal portions of
vent pipe must slope downward toward furnace.
26 27
4. Reinstall burner enclosure front.
5. If your furnace is free of the above conditions, replace
main furnace door and turn on electrical and gas supplies
to the furnace. (See Fig. 12, 13, and 14.)
6. Start the furnace and observe its operation. Watch the
burner flames to see if they are clear blue, almost transpar-
ent. (See Fig. 28.) If you observe a suspected malfunction,
or the burner flames are not clear blue, call your dealer
FURNACE AIR FILTER TABLE
AIR FILTER LOCATED IN BLOWER COMPARTMENT
FURNACE
CASING
WIDTH (IN.)
FILTER SIZE*
(IN)
FILTER
TYPE
17-1/2 (1) 16 x 25 x 1 Cleanable
21 (1) 20 x 25 x 1 Cleanable
24-1/2 (1) 24 x 25 x 1 Cleanable
CAUTION
Use care when cutting support rods in filters to pro-
tect against flying pieces and sharp rod ends. Wear
safety glasses, gloves, and appropriate protective
clothing. Failure to follow this caution could result
in personal injury.
DANGER
If holes are found in the pipes or if any portion has
become disconnected, toxic fumes can escape
into your home. DO NOT OPERATE YOUR FUR-
NACE. Call your dealer for service.
!
!
CAUTION
If your furnace makes an especially loud noise
when the main burners light, shut down your fur-
nace and call your dealer.
CAUTION
If dirt, rust, soot, or scale accumulations are found,
call your dealer. Do not operate your furnace.
!
!
need art
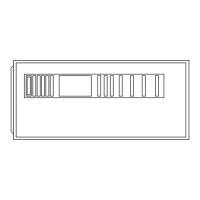
UPFLOW
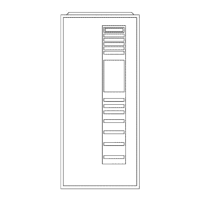
DOWNFLOW
 Loading...