Step 3—Purge Gas Lines
If not previously done, purge lines after all connections have been
made and check for leaks.
Never purge a gas line into a combustion chamber. Never use
matches, candles, flame, or other sources of ignition for
purpose of checking leakage. Use a soap-and-water solution
to check for leakage. Failure to follow this warning could
result in fire, explosion, personal injury, or death.
Step 4—Adjustments
SET GAS INPUT RATE
Furnace gas input rate on rating plate is for installations at altitudes
up to 2000 ft. Furnace input rate must be within ±2 percent of input
on furnace rating plate.
1. Determine natural gas orifice size and manifold pressure for
correct input.
a. Obtain average yearly heat value (at installed altitude) from
local gas supplier.
b. Obtain average yearly specific gravity from local gas
supplier.
c. Verify furnace model. Table 7 can only be used for model
58MXA furnaces.
d. Find installation altitude in Table 7.
NOTE: For Canada altitudes of 2000 to 4500 ft, use U.S.A.
altitudes of 2001 to 3000 ft in Table 7.
e. Find closest natural gas heat value and specific gravity on
Table 7.
f. Follow heat value and specific gravity lines to point of
intersection to find orifice size and manifold pressure
settings for proper operation.
EXAMPLE: (0—2000 ft altitude)
Heating value = 1050 Btu/cu ft
Specific gravity = 0.62
Therefore: Orifice No. 45
Manifold pressure 3.6-in. wc
* Furnace is shipped with No. 45 orifices. In this example
all main burner orifices are the correct size and do not need
to be changed to obtain the proper input rate.
Check and verify burner orifice size in furnace. NEVER ASSUME
ORIFICE SIZE; ALWAYS CHECK AND VERIFY.
2. Adjust manifold pressure to obtain input rate.
NOTE: Manifold pressure must always be measured with burner
enclosure front REMOVED. Gas meter must always be clocked
with burner enclosure front INSTALLED.
a. Remove burner enclosure front.
b. Remove cap that conceals adjustment screw for gas valve
regulator. (See Fig. 45.)
c. Turn adjusting screw, counterclockwise (out) to decrease
manifold pressure or clockwise (in) to increase manifold
pressure.
NOTE: This furnace has been approved for a manifold pressure
of 3.2 in. wc to 3.8 in. wc when installed at altitudes up to 2000 ft.
For altitudes above 2000 ft, the manifold pressure can be adjusted
from 2.0 in. wc to 3.8 in. wc.
DO NOT bottom out gas valve regulator adjusting screw.
This can result in unregulated manifold pressure and result in
excess overfire and heat exchanger failures.
NOTE: If orifice hole appears damaged or it is suspected to have
been redrilled, check orifice hole with a numbered drill bit of
correct size. Never redrill an orifice. A burr-free and squarely
aligned orifice hole is essential for proper flame characteristics.
d. Replace gas valve regulator adjustment screw cap.
e. Replace burner enclosure front and verify adjusted gas
input rate using method outlined in item 3.
f. Look through sight glass in burner enclosure and check
burner flame. Burner flame should be clear blue, almost
transparent. (See Fig. 46.)
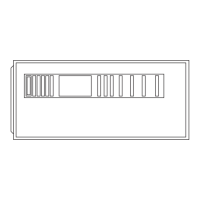
Fig. 45—Redundant Automatic Gas Valve
A95622
MANIFOLD
PRESSURE TAP
GAS
PRESSURE
REGULATOR
ADJUSTMENT
BURNER
ENCLOSURE
REFERENCE
PRESSURE
TAP
INLET
PRESSURE TAP
ON AND
OFF SWITCH
DO NOT redrill orifices. Improper drilling (burrs, out-of-
round holes, etc.) can cause excessive burner noise and
misdirection of burner flames. This can result in flame
impingement of burners and heat exchangers causing failures.
A93059
BURNER
ORIFICE
33
→

 Loading...