PCB
Troubleshooting:
Error is only displayed every 3 minutes, during this time you may
see either “normal display” or “88” on indoor unit or wired control.
E1 is often seen on the day of start up for a new system. Typically due to an electrical issue
with the field installed wire between the Indoor & Outdoor units. There should be no solid wire
installed between the Indoor & Outdoor, if this was done change this out first. Also make sure
all wire stands are landed in the terminal. Repair connections due to over stripped wires.
Is there a Condensate Pump Safety Switch tied in? Check this first, make sure it has not tripped
and opened up it’s normally closed contacts. The switch can break “L1” or “L2”, do not break “S”.
If E1 still present, turn power OFF and disconnect the field supplied “S” or “3” wire from both
ends. Reapply power and check for induced voltage on the communication wire. With a meter
measure the field supplied “S” or “3” wire to ground. Zero voltage on the communication wire is
preferred. If 20 or more volts are measured and Communication Errors persists, fix or replace all
4 wires.
Once all you have verified the above, proceed below.
DO NOT CHECK IN STANDBY, system must be ON and calling for Heat or Cool.
Set your multimeter to DC Volts.
If no error is displayed, wait a minimum of 8 minutes for error to appear or measuring voltage.
Measure DC voltage, making sure Black Lead from Meter is on N/L2/2, Red Lead is on S/3.
This is very important to do as stated, if not followed the flow chart will not point you in the
proper direction.
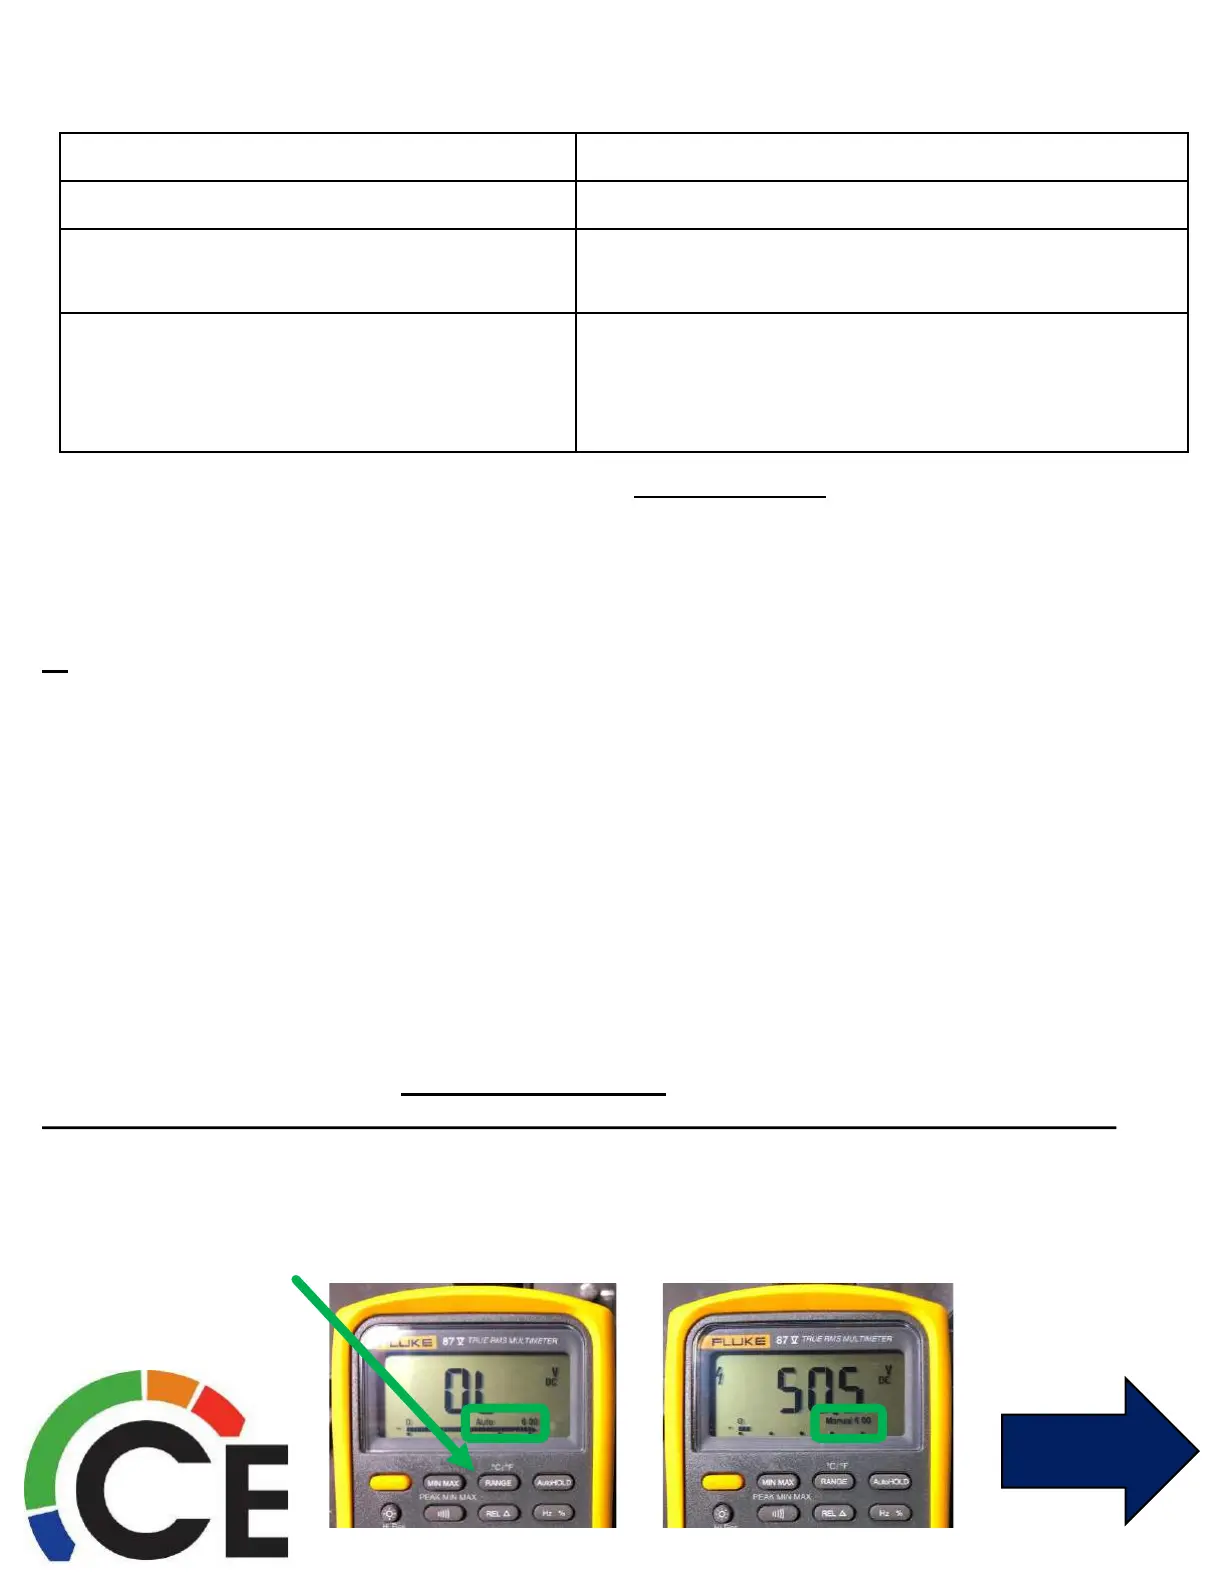
If your meter defaults to an Auto Ranging Scale, change to Manual before proceeding, press your
meter’s Range button to select an appropriate scale.
All Models
Indoor Outdoor Unit Communication Error E1 (page 1 of 3)
Continued on next page
 Loading...