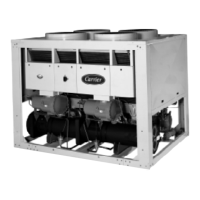
FB, FE, FF1E, FFM, FG, FH, FJ, FMA, FT, FV, FX, FY, FZ, F54, PF: Service and Maintenance Instructions
Manufacturer reserves the right to change, at any time, specifications and designs without notice and without obligations.
11
2. MED – provides 80 percent of Y/Y2 Cool airflow.
3. HI – provides 100 percent of Y/Y2 Cool airflow.
The factory setting is LO.
NOTE: If applied to two-speed unit, do not select continuous fan as HI
since low speed cooling will also run at HIGH airflow and insufficient
dehumidification may result.
Easy Select Board Jumpers
J1 – This jumper must be pulled to activate dehumidification mode. The
jumper connects R to DH. With the jumper in, the DH terminal is always
energized. With the jumper pulled, the DH terminal is de-energized. A
control such as the Thermidistat must be used to supply the 24V signal
when there is no call for dehumidification, and turn off the 24V when
there is a call for dehumidfication.
J2 – This jumper activates heat staging. The jumper connects the W1
and W2 terminals together. If either is energized, W2 airflow is
delivered. With the jumper pulled, there are separate airflows for W1 and
W2.
J4 – This jumper is for InteliSense™ operation (FT4B/FT5). As
shipped, Y1 is connected to Y/Y2 by a field-removable jumper J4. With
the jumper in place, in single stage operation InteliSense™
communication is enabled. For 2-stage application, remove jumper J4.
Airflow Delivery
These units deliver airflow depending on the system size selections and
operating mode. The thermostat energizes a combination of terminals on
the Easy Select Board which tells the motor what CFM to deliver. The
following are typical operating modes and the terminals that should be
energized on the Easy Select Board.
NOTE: The DH terminal on the Easy Select Board is for
dehumidification. It is de-energized on a call for dehumidification.
Variable Speed Motor Logic Sequence:
The ECM motors in these fan coils are programmed to deliver a variety
of airflows. The motor goes through:
COOLING – The nominal cooling airflow for these fan coils is 350
CFM per ton. Selecting the HI adjust tap increases the airflow to 400
CFM per ton. The LO tap decreases airflow to 315 CFM per ton. The
low adjustment is only active during normal cooling mode. Removing
the signal from the DH terminal reduces the airflow to 80 percent of
cooling airflow. Removing the G signal for Superdehumidify reduces the
airflow to 50 percent of cooling.
HEATING – The base heat pump only heating airflow is determined by
the SYSTEM TYPE selection on the Easy Select Board. If
HP-EFFICIENCY is selected, the airflow is the same as Cooling. IF
HP-COMFORT is selected, the airflow is 315 CFM per ton. The airflow
will adjust up if necessary when auxiliary heating is required. When both
the Y/Y2 and W1 or W2 terminals are energized, the motor will run the
higher of the heat pump or electric heat airflows. During Super Comfort
Heat mode, the indoor control removes the G signal from the board. This
slows the motor to 75 percent of heat pump airflow. If the CFM adjust is
set to LO, it will deliver 67.5 percent of heat pump airflow during Super
Comfort Heat mode.
Troubleshooting
Troubleshooting Easy Select Board (FV, FT4)
If Traces Are Overheated on Back of PCB:
Usually whenever there is a trace broken on PCB, it means either there
has been a high-voltage short or high voltage has been applied to
low-voltage circuit. This can be prevented by making sure PCB is wired
correctly before fan coil has power applied to it.
If PCB Fuse Keeps Blowing:
When low-voltage fuse blows, it means transformer would have blown if
fuse had not been in circuit to protect it. The fuse usually blows when
there is a high current drawn on transformer, high voltage applied to
low-voltage circuit, or a direct secondary short. When there is a high
current drawn on transformer, it is most likely because transformer has
been shorted or system is trying to draw more VAC than transformer
rating allows. When fuse blows because of high voltage, the system has
mixed high and low-voltage signals.
1. Check transformer and thermostat wiring (Fig. 8). Be sure
transformer is not shorting out because thermostat wires are
miswired.
2. Check wiring of relays (Fig. 8). Be sure low-voltage and
high-voltage wiring are connected to proper sequencers.
3. Check VA draw on transformer. If VA draw is more than VA rating
of transformer, fuse will blow. If this is the case, replace
transformer with one that has a higher VA rating.
Troubleshooting Common Problems
Airflow Too Low:
– Y1 instead of Y/Y2 on single-speed air conditioner or heat pump
application. Y1 input is only for two-speed applications. Using this
terminal will deliver about 60 percent of full cooling airflow.
– Wrong Easy Select Board selection. Selecting an outdoor unit or
electric heater smaller than actually installed will result in low
airflow for the application.
– G not energized with call for cooling or heating. This triggers Super
Comfort Heat or SuperDehumidify mode which delivers 50 percent
of cooling airflow.
– J1 jumper pulled with no thermidistat or dehumidistat installed. The
J1 jumper ties the DH terminal to R and is installed at the factory.
When pulled, a Thermidistat or dehumidistat supplies a 24V signal
to DH when there is no call for dehumidification (reverse logic).
When there is no signal on DH, the motor reduces airflow to 80
percent for better dehumidification.
Airflow Too High:
– Wrong Easy Select Board selection. Fan coil is factory set for the
largest outdoor unit and largest electric heater. Select sizes that are
actually installed.
– Continuous fan set too high for two-speed applications. Set to MED
or LO.
Motor Will Not Stop:
– Allow time for off delay to time out. In units built before serial
number 0101A, any W call will have a two-minute off delay
independent of delay selection. This is programmed into the motor
and cannot be overridden.
– In units built after 0101A, the off delay on any W call is one minute
and cannot be overridden.
– Some power-stealing thermostats could bleed enough voltage to
cause motor to run slowly when there is no heating or cooling call.
Disconnect thermostat wires and wait two minutes to see if motor
stops. If it stops, replace thermostat, or install resistor per
thermostat installation instructions.
Motor Will Not Start:
– See following section, “Troubleshooting ECM2.3/5.0 Motor and
Controls.”
Troubleshooting ECM2.3/5.0 Motor and Controls
CAUTION
!
ELECTRICAL OPERATIONS HAZARD
Failure to follow this caution may result in equipment damage or
improper operation.
High voltage is always present at motor. Disconnect power to unit
before removing or replacing connectors or servicing motor. Wait at
least five minutes after disconnecting power before opening motor.