4
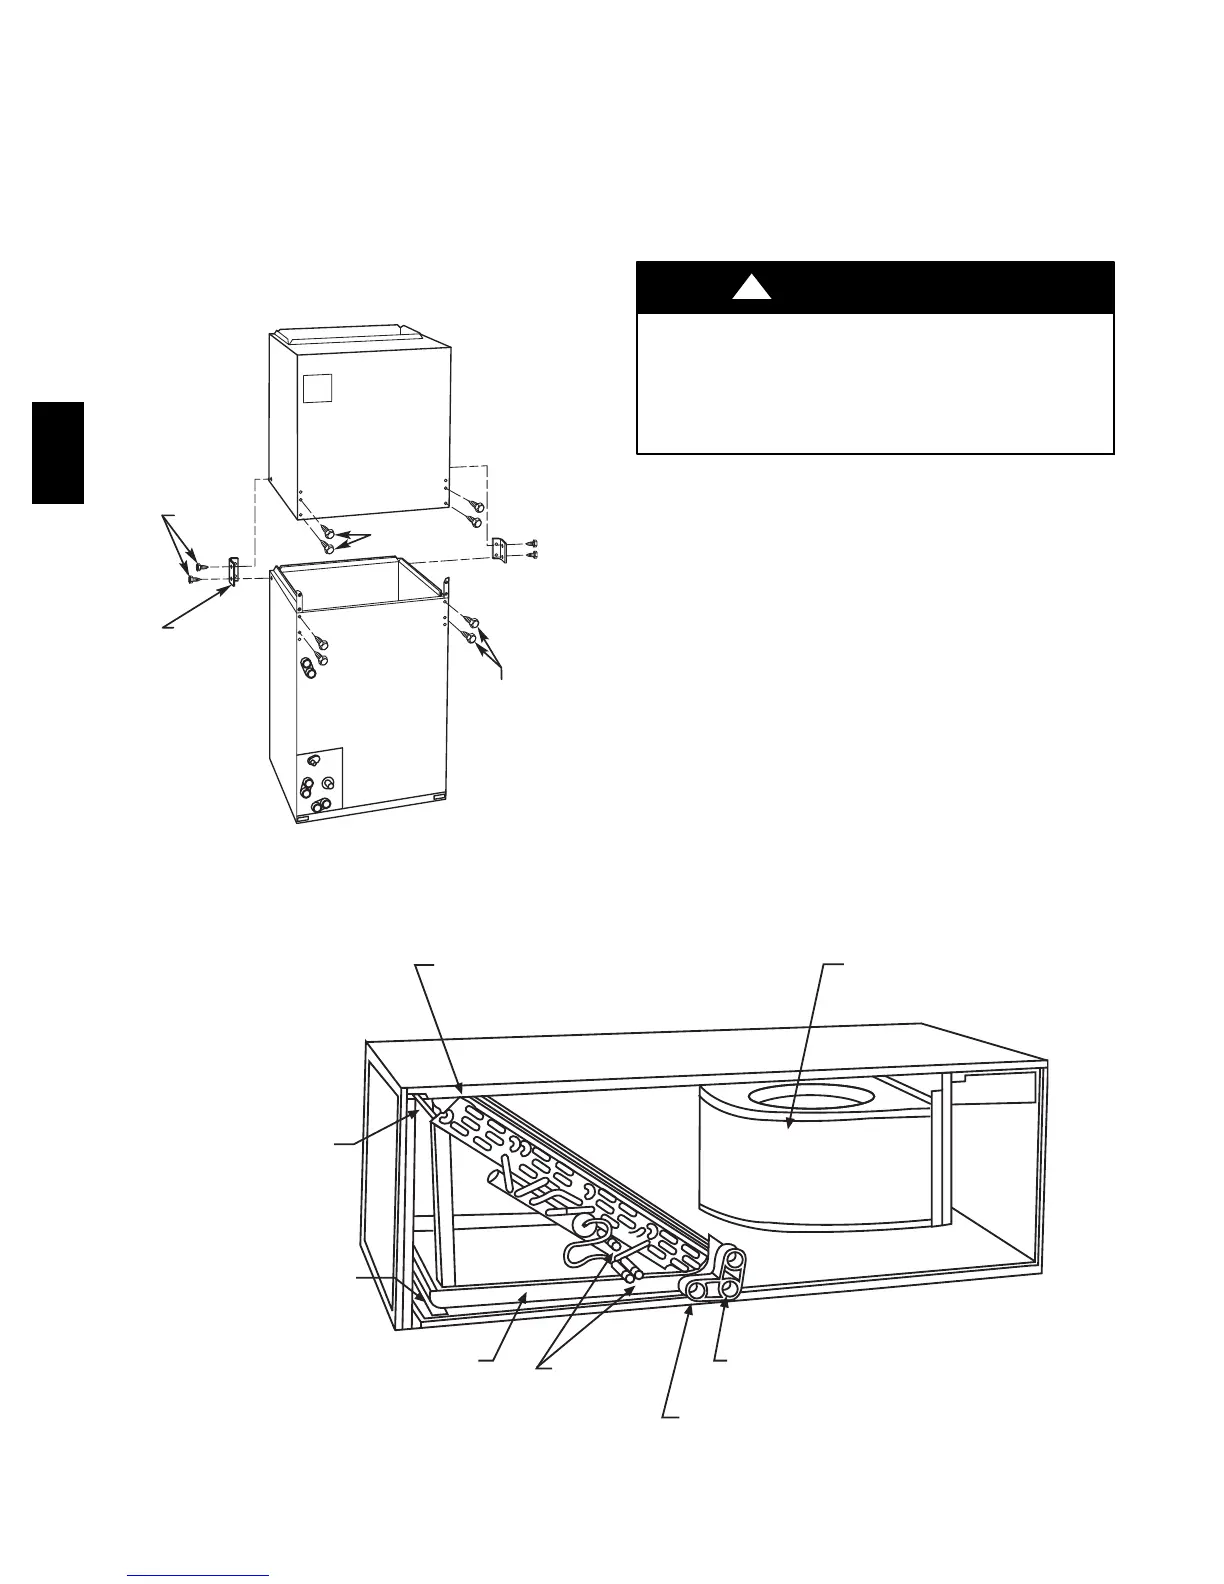
B. Modular Units
The FV4C Fan Coil in sizes 003, 005 and 006 are available in
2--piece modular construction. Modular construction allows
installer to disassemble unit into 2 components, coil box and
blower box, for ease of installation. (See Fig. 3.)
To disassemble unit, remove rear corner brackets by removing 2
screws which secure brackets. Remove either 2 screws in each front
corner of coil box, or 2 screws in blower box. Do not remove all 4
screws in each corner. Sections may now be separated by lifting
top section from lower section.
To reassemble, reverse above procedure. Be certain to reinstall all
fasteners when reassembling.
2 SCREWS
2 SCREWS
REAR CORNER
BRACKET
BLOWER BOX
COIL BOX
2 SCREWS
A95293
Fig. 5 -- Modular Unit Assembly
C. Horizontal Installations
Be sure installation complies with all applicable building codes that
may require installation of a secondary condensate pan.
1. Arrange support for unit by setting it in or above secondary
condensate pan.
2. When suspending unit from ceiling dimples in casing indic-
ate proper location of screws for mounting metal support
straps.(SeeFig.4.)
D. Horizontal--Right Conversion of Units with Slope Coils
PROPERTY DAMAGE HAZARD
Failure to follow this caution may result in property damage.
Gasket kit number KFAHD0101SLP is required for horizontal
slope coil conversion to maintain low air leak/low sweat
performance.
CAUTION
!
1. Remove blower and coil access panels and fitting panel.
(See Fig. 5.)
2. Remove screw securing coil assembly to right side casing
flange.
3. Remove coil assembly.
4. Lay fan coil on its right side and reinstall coil assembly with
condensate pan down. (See Fig. 5.)
5. Attach coil to casing flange using previously removed coil
mounting screw.
6. Make sure the pan cap in the fitting door is properly seated
on the fitting door to retain the low air leak rating of the
unit.
7. Add gaskets from kit KFAHD per kit instructions.
8. Reinstall access panels and fitting panel, aligning holes with
tubing connections and condensate pan connections.
Make sure liquid and suction tube grommets are in place to prevent
air leaks and cabinet sweating. Install grommets after brazing.
COIL MOUNTING
SCREW
BLOWER
ASSEMBLY
REFRIGERANT
CONNECTIONS
SECONDARY DRAIN
PRIMARY DRAIN
DRAINPAN
SLOPE COIL
SKI
COIL
SUPPORT
RAIL
A03001
Fig. 6 -- Slope Coil in Horizontal--Right Application
FV4C