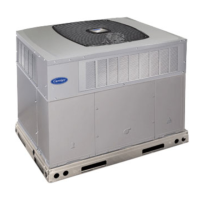
24VNA6: Installation Instructions
Manufacturer reserves the right to change, at any time, specifications and designs without notice and without obligations.
9
5. If the outdoor ambient temperature is between 65°F and 105°F and
the indoor temperature is between 65°F and 80°F then select
"subcool" (See Fig. 13).
6. The next screen will show the target subcooling that should be
attained while charging (see Fig. 14). Before selecting "Start"
verify that the service valves are open.
7. Upon selecting "Start" the system will enter into charging mode.
The outdoor compressor and fan will operate at a fixed speed and
the UI will display a stabilization time (see Fig. 15). Once this
clock reaches zero the charge can be adjusted to meet the target
subcooling.
8. Compare the subcooling taken at the liquid service valve to the
subcooling target listed on the charging screen. Add refrigerant if
the subcooling is low and remove charge if subcooling is high.
Tolerance should be +0 and -2°F.
9. If any adjustment is necessary, add or remove the charge slowly (no
greater than 0.5 lb per minute) and allow system to operate for 15
minutes to stabilize before declaring a properly charged system.
The use of a commercial charge metering device (restrictor) such as
Imperial liquid low side charger model 535-C or Watsco
ChargeFaster model CH200 is recommended when adding
refrigerant to an operating system. This prevents potential damage
of liquid slugging of the compressor and allows the subcooling to
stabilize quicker.
10. If the outdoor ambient is below 65°F or above 105°F then the
refrigerant must be weighed in. Press the "weigh-in" option in the
"refrigerant charge" screen (see Fig. 16).
11. Press the text "line set" and "vapor line" to choose line set length
and vapor line diameter (see Fig. 17 and Fig. 18). After complete,
press "next" to advance to next screen.
12. If this is a new install, i.e. the ODU is factory charged, then select
"new install" in the "charging mode selection" screen (see Fig. 19)
.
13. The "new install charge weigh-in" screen will show the additional
charge that needs to be added to the system to account for the ID
coil and line set (see Fig. 20).
14. If this is a complete re-charge then select "complete recharge" in the
"charging mode selection" screen. This screen will show the total
amount of charge to add for the indoor coil, line set, and outdoor
unit (see Fig. 21). The "charge breakdown" screen shows the
charge required for each component of the system.
15. Add additional required charge for line set and indoor coil size then
fully open liquid and vapor service valves.
Charge level should then be appropriate for the system to achieve
rated capacity. The charge level could then be checked at another
time when both the indoor and outdoor temperatures are in a more
favorable range. This ensures maximum efficiency and reliability.
If lineset is less than 15 feet (4.57 m) in length, charge removal may
be necessary and will be shown as a negative number on UI screen.
UI screen displays charge in lb and oz, while unit rating plate is in
decimal format.
A200031
Fig. 13 – Select Refrigerant Subcooling
A200032
Fig. 14 – Liquid Service Valve Subcooling Target
A200033
Fig. 15 – Charging Mode Information Screen
A200034
Fig. 16 – Weigh-in Option for charging below 65°F OAT and above
105°F OAT
CAUTION
!
UNIT OPERATION HAZARD
Failure to follow this caution may result in improper unit operation.
For new installations only: Add additional refrigerant due to indoor
coil, line set and vapor line settings. Outdoor unit is pre-charged with
weight of refrigerant shown on rating plate.

 Loading...
