Main Burners- For all applications, main burners are
factory set and should require no adjusUnent.
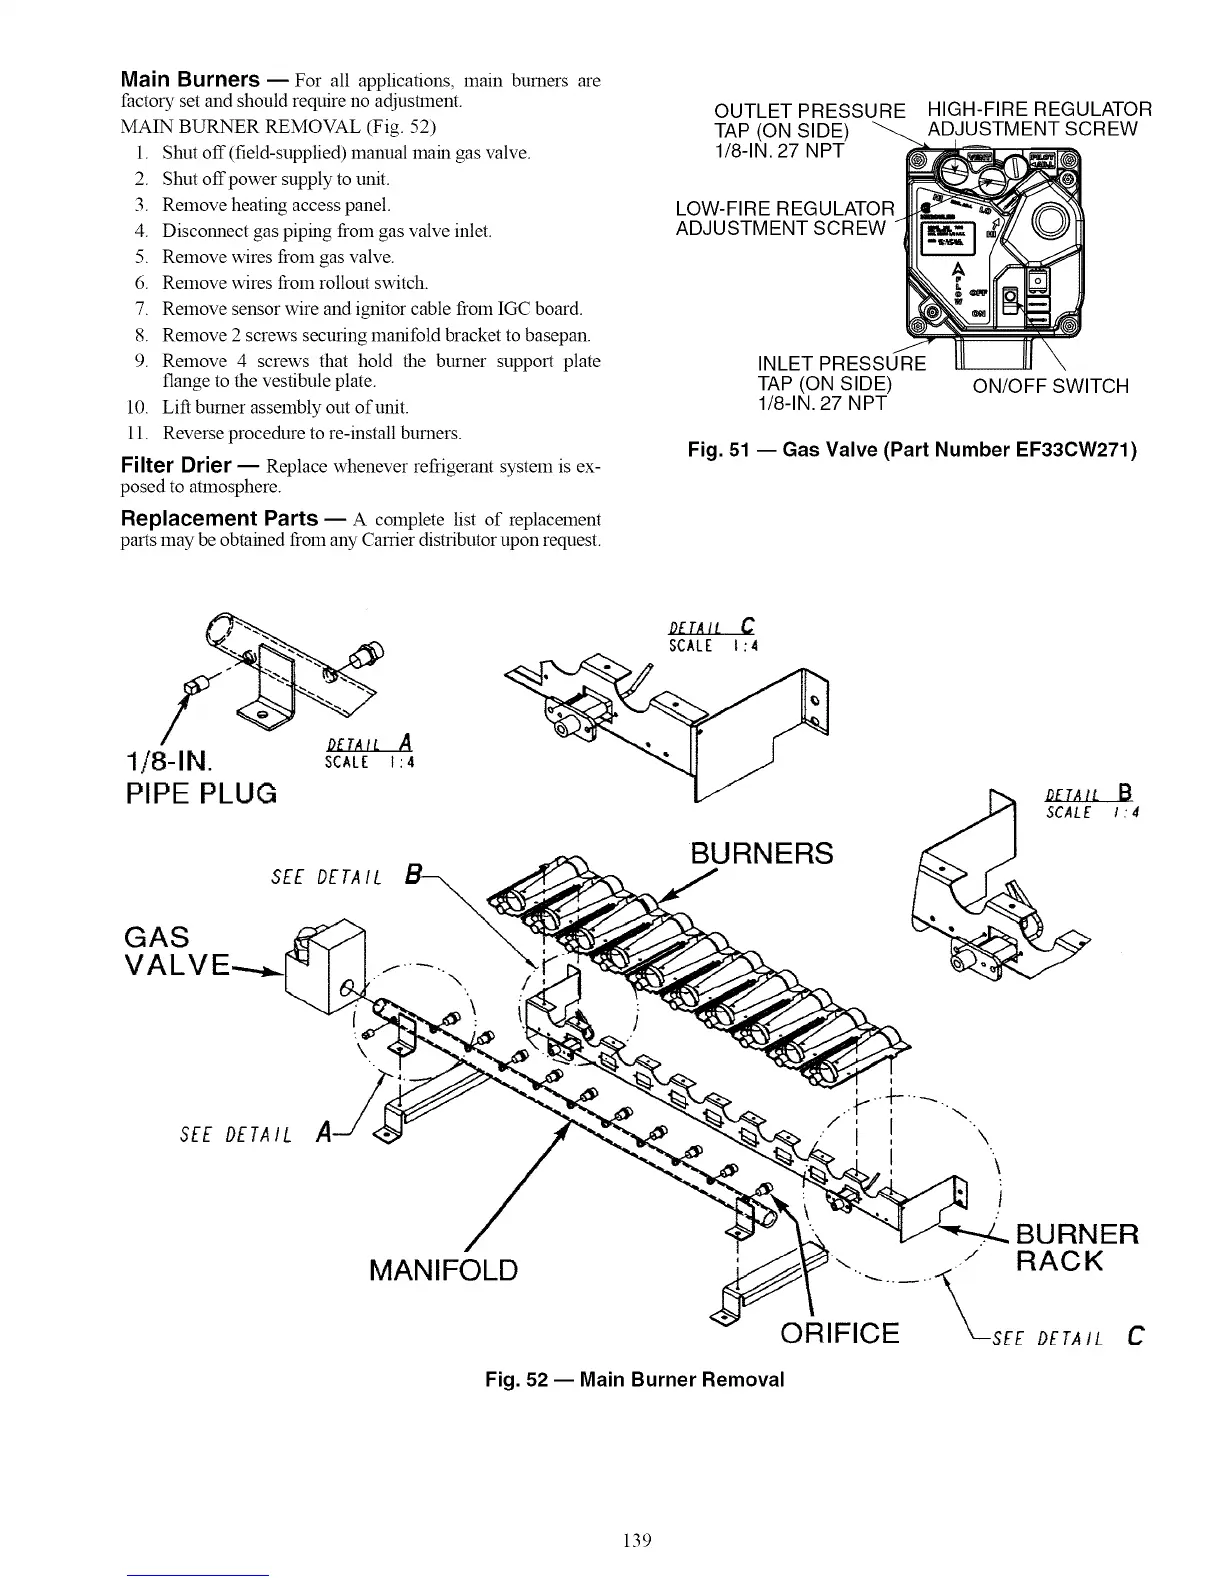
MAIN BURNER REMOVAL (Fig. 52)
1. Shut off (field-supplied) manual main gas valve.
2. Shut offpower supply to unit.
3. Remove heating access panel.
4. Disconnect gas piping from gas valve inlet.
5. Remove wires from gas valve.
6. Remove wires from rollout switch.
7. Remove sensor wire and ignitor cable from IGC board.
8. Remove 2 screws securing manifold bracket to basepan.
9. Remove 4 screws that hold the burner support plate
flange to the vestibule plate.
10. Lift burner assembly out of unit.
11. Reverse procedure to re-install burners.
Filter Drier -- Replace whenever refrigerant system is ex-
posed to atmosphere.
Replacement Parts -- A complete list of replacement
parts may be obtained from any Carrier distributor upon request.
OUTLET PRESSURE HIGH-FIRE REGULATOR
TAP (ON SIDE) ADJUSTMENT SCREW
1/8-1N.27 NPT
LOW-FIRE REGULATOR
ADJUSTMENT SCREW
INLET PRESSURE
TAP (ON SIDE)
1/8-1N.27 NPT
ON/OFF SWITCH
Fig. 51 -- Gas Valve (Part Number EF33CW271)
1/8-1N. SCALE
PIPE PLUG
SEE DETA IL
GAS
VALV
SEE DETAIL
OETAIt C
SCALE t :4
A
1:4
BURNERS
\
\
MANIFOLD
\
\
i
t
BURNER
Fig. 52 -- Main Burner Removal
139
 Loading...


