6
STAGED AIR VOLUME (SAV) CONTROL: 2-
SPEED FAN WITH VARIABLE FREQUENCY
DRIVE (VFD)
Staged Air Volume (SAV) Indoor Fan Speed
System
NOTE: The SAV option is not available on units with Humidi-
MiZer adaptive humidification system.
The SAV system utilizes a Fan Speed control board and Variable
Frequency Drive (VFD) to automatically adjust the indoor fan
motor speed in sequence with the unit’s ventilation, cooling and
heating operation. Conforming to ASHRAE 90.1 2010 Standard
Section 6.4.3.10.b, during the first stage of cooling operation the
SAV system will adjust the fan motor to provide 66% of the de-
sign airflow rate for the unit. When the call for the second stage of
cooling is required, the SAV system will allow the design airflow
rate for the unit established (100%). During the heating mode, the
SAV system will allow total design airflow rate (100%) operation.
During ventilation mode, the SAV system will operate the fan mo-
tor at 66% speed.
Identifying Factory Option
This section only applies to units that meet the criteria detailed in
Table 1.
NOTE: See Appendix A for a complete model number nomencla-
ture display.
Unit Installation with SAV Option
ROOFTOP
Refer to the base unit installation instructions for standard required
operating and service clearances.
NOTE: The Remote VFD Keypad is a field-installed option. It is
not included as part of the factory-installed VFD option. See
“Variable Frequency Drive (VFD) Installation, Setup and Trouble-
shooting Supplement” for wiring schematics and performance
charts and configuration. See Fig. 9 for location of the VFD as
mounted on the various 48TC models.
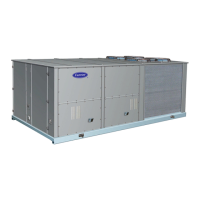
Fig. 9 — VFD Location for 48TC 15-27.5 Units
ADDITIONAL VFD INSTALLATION AND
TROUBLESHOOTING
Additional installation, wiring and troubleshooting information
for the VFD can be found in the following manuals: “Variable
Frequency Drive (VFD) Installation, Setup and Troubleshooting
Supplement.”
MOTOR
When replacing the motor, use the following steps. See Fig. 10.
Fig. 10 — Replacing Belt Driven Motor
Replacing the Motor
1. Turn off all electrical power to the unit. Use approved lock-
out/tag-out procedures on all electrical power sources.
2. Remove the cover on the motor connection box.
3. Disconnect all electrical leads to the motor.
4. Loosen the two jack bolt jamnuts on the motor mounting
bracket.
5. Turn the two jack bolts counterclockwise until the motor
assembly moves closer to the blower pulley.
6. Remove the V-belt from the blower pulley and motor pulley.
7. Loosen the four mounting bracket bolts and lock washers.
8. Remove four bolts, four flat washers, four lock washers and
four nuts attaching the motor mounting plate to the unit. Dis-
card all lock washers.
9. Remove the motor and motor mounting bracket from the unit.
10. Remove four bolts, flat washers, lock washers and single
external-tooth lock washer attaching the motor to the motor
mounting plate. Discard all lock washers and external-tooth
lock washer.
11. Lift the motor from the motor mounting plate and set aside.
12. Slide the motor mounting band from the old motor.
1
3. Slide the motor mounting band onto the new motor and set
the motor onto the motor mounting plate.
Table 1 — Model-Size / VFD Option Indicator
MODEL / SIZES
POSITION IN MODEL
NUMBER
VDP FIOP
INDICATOR
48TC 17-28 17 G, J
VARIABLE
FREQUENCY
DRIVE (VFD)
CAUTION
EQUIPMENT DAMAGE HAZARD
Failure to follow this CAUTION can result in premature wear
and damage to equipment.
Do not use a screwdriver or a pry bar to place the new V-belt in
the pulley groove. This can cause stress on the V-belt and the
pulley resulting in premature wear on the V-belt and damage
to the pulley.
BLOWER PULLEY
V-BELT
MOTOR PULLEY
MOTOR
MOTOR MOUNTING
BRACKET BOLTS (4)
MOTOR MOUNTING
BRACKET (2)
JACK BOLT JAM NUT (2)
JACK BOLT (2)

 Loading...


