Manufacturer reserves the right to discontinue, or change at any time, specifications or designs without notice and without incurring obligations.
Catalog No. 04-53500233-01 Printed in U.S.A. Form 50A-17SI Pg 1 3-19 Replaces: 50A-16SI
Installation Instructions
CONTENTS
Page
SAFETY CONSIDERATIONS. . . . . . . . . . . . . . . . . . . . . . 1
ACOUSTICAL CONSIDERATIONS . . . . . . . . . . . . . . . . 2
Location . . . . . . . . . . . . . . . . . . . . . . . . . . . . . . . . . . . . . . 2
Ductwork . . . . . . . . . . . . . . . . . . . . . . . . . . . . . . . . . . . . . 2
Acoustic Insulation . . . . . . . . . . . . . . . . . . . . . . . . . . . . 2
INSTALLATION . . . . . . . . . . . . . . . . . . . . . . . . . . . . . . . 3-35
Step 1 — Provide Unit Support . . . . . . . . . . . . . . . . . . . 3
• ROOF CURB
• ALTERNATE UNIT SUPPORT
Step 2 — Rig and Place Unit . . . . . . . . . . . . . . . . . . . . . 3
• POSITIONING
• ROOF MOUNT
Step 3 — Field Fabricate Ductwork. . . . . . . . . . . . . . . 3
Step 4 — Make Unit Duct Connections . . . . . . . . . . . 3
• 50A2,A3,A6, AND A7 UNITS
• 50A4, A5, A8, AND A9 UNITS
Step 5 — Trap Condensate Drain. . . . . . . . . . . . . . . . 21
Step 6 — Make Electrical Connections . . . . . . . . . . 21
•POWER WIRING
• FIELD POWER SUPPLY
• FIELD CONTROL WIRING
Step 7 — Make Outdoor-Air Inlet
Adjustments . . . . . . . . . . . . . . . . . . . . . . . . . . . . . . . . . . 26
• ECONOMIZER AND MIXED OUTDOOR
AIR DAMPER
Step 8 — Position Power Exhaust/Barometric
Relief Damper Hood . . . . . . . . . . . . . . . . . . . . . . . . . . 28
Step 9 — Route Static Pressure Sensors. . . . . . . . 28
• VAV DUCT PRESSURE TRANSDUCER
• BUILDING PRESSURE TRANSDUCER
Step 10 — Install All Accessories/Options . . . . . . 30
• FIELD-FABRICATED WIND BAFFLES
Step 11 — Perform Field Modifications. . . . . . . . . . 32
• DUCTWORK
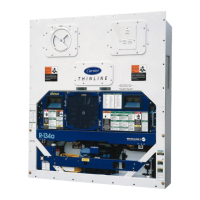
BACnet Communication Option Wiring. . . . . . . . . 32
• WIRING THE UPC OPEN CONTROLLER TO THE
MS/TP NETWORK
• MS/TP WIRING RECOMMENDATIONS
SAFETY CONSIDERATIONS
Installation and servicing of air-conditioning equipment can
be hazardous due to system pressure and electrical compo-
nents. Only trained and qualified service personnel should in-
stall, repair, or service air-conditioning equipment.
Untrained personnel can perform the basic maintenance
functions of cleaning coils and filters and replacing filters. All
other operations should be performed by trained service per-
sonnel. When working on air-conditioning equipment, observe
precautions in the literature, tags, and labels attached to the
unit, and other safety precautions that may apply.
Follow all safety codes. Wear safety glasses and work
gloves. Use quenching cloth for unbrazing operations. Have
fire extinguishers available for all brazing operations.
WARNING
Before performing service or maintenance operations on
unit, turn off main power switch to unit. Electrical shock
could cause personal injury.
CAUTION
Puron refrigerant (R-410A) systems operate at higher pres-
sures than standard R-22 systems. Do not use R-22 service
equipment or components on Puron refrigerant equipment.
If service equipment is not rated for Puron refrigerant,
equipment damage or personal injury may result.
WARNING
1. Improper installation, adjustment, alteration, service,
or maintenance can cause property damage, personal
injury, or loss of life. Refer to the User’s Information
Manual provided with this unit for more details.
2. Do not store or use gasoline or other flammable va-
pors and liquids in the vicinity of this or any other
appliance.
WARNING
DO NOT USE TORCH to remove any component. System
contains oil and refrigerant under pressure.
To remove a component, wear protective gloves and gog-
gles and proceed as follows:
a. Shut off electrical power to unit.
b. Recover refrigerant to relieve all pressure from system
using both high-pressure and low pressure ports.
c. Traces of vapor should be displaced with nitrogen and
the work area should be well ventilated. Refrigerant in
contact with an open flame produces toxic gases.
d. Cut component connection tubing with tubing cutter
and remove component from unit. Use a pan to catch
any oil that may come out of the lines and as a gage
for how much oil to add to the system.
e. Carefully unsweat remaining tubing stubs when nec-
essary. Oil can ignite when exposed to torch flame.
Failure to follow these procedures may result in personal
injury or death.
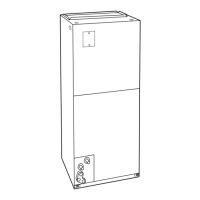
WeatherMaker
®
50A020-060
Single Package Electric Cooling Rooftop Units
with Electric Heat Option, ComfortLink Controls
and Puron
®
Refrigerant (R-410A)