26
GB
CARSON Nitro Buggy CNB 204016
Picture 35
Remove the two CVD drive shaft cups from the diff assembly,
then remove the four screws that hold the diff halves together.
Pull the diff halves apart, then pull the diff assembly (w/ring
gear attached) out of the diff housing.
Remove the four screws that hold the diff case together, then
pull the diff case apart to open up the diff. You can now remove
the grease inside the diff and refill the diff with the differential
oil of your choice. Installation is the reverse of the disassembly
procedure.
p. Maintaining your CNB Buggy
Following a simple maintenance schedule will ensure that
your CARSON CNB Buggy engine and radio control system
operate in top condition every time you use them. lt is strongly
suggested.
Check the foam air filter element for dirt blockage. lf the foam
is dirty, remove it from the filter housing and wash it in liquid
soap and warm water. Dry the foam element with a paper towel,
reinstall it and ”wet“ it with after run oil. See page 15 for more
info.
Check the chassis for any loose screws, especially the engine
and the outdrive cup mounting screws. Tighten them if
necessary.
Any screws that are threaded directly into metal should be
secured into place with Blue Lock-Tite. This will prevent the
screws from loosening during use. Screws threaded into nylon
or composite material do not require Lock-Tite.
Check the steering linkage and the throttle/brake linkage for
any signs of wear or misalignment. Tighten and/or readjust
them if necessary. Double-check that the grub screws in the
steel collars are tight.
Once in a while, remove the wheels and clean the wheel
bearings, using a bearing cleaner. This will remove any dust and
grit that may, over time, damage the bearings. After cleaning
the bearings, reoil them using a good quality bearing oil. Never
run the bearings dry or damage to the bearings will result.
When you clean the wheel bearings as described above, also
remove, clean and reoil the clutch bell bearings.
Check the fuel system, including the fuel tank and fuel tubing,
for any signs of cracking or looseness. Replace any fuel tubing
you suspect may be damaged.
Check the condition of the transmitter and receiver batteries
after each time you drive your Buggy. lf you think they might be
low, replace them with a fresh set.
After a period of time the chassis will accumulate a lot of dirt
and debris, especially around the engine area. This buildup
should be cleaned off using a high-powered spray cleaner
like Nitro Car Cleaner. Some nitro car cleaners will damage
anodized andlor plated parts. Test on an inconspicuous area
first.
After cleaning the chassis and engine with Nitro Car Cleaner,
you should oil the moving parts of the chassis. Do not oil the
clutch bell, spur gears or the brake discs.
Picture 36
Always use new fuel and keep the cap on the fuel tightly
closed. As fuel ages it absorbs water, which degrades the fuels
performance and will cause erratic engine operation.
After you have finished using the engine for the day, remove
the glow plug from the engine and squirt several drops of high-
quality after run oil into the glow plug hole. Pull the pull-start
cord several times to distribute the oil throughout the engine,
then reinstall the glow plug. This will prevent corrosion inside
the engine.
Never leave unused fuel in the fuel tank for more than a
couple of days. The nitromethane and methanol in the fuel will
evaporate, leaving the oil behind. This will eventually turn into a
thick sludge that will require replacement of the fuel tank to fix.
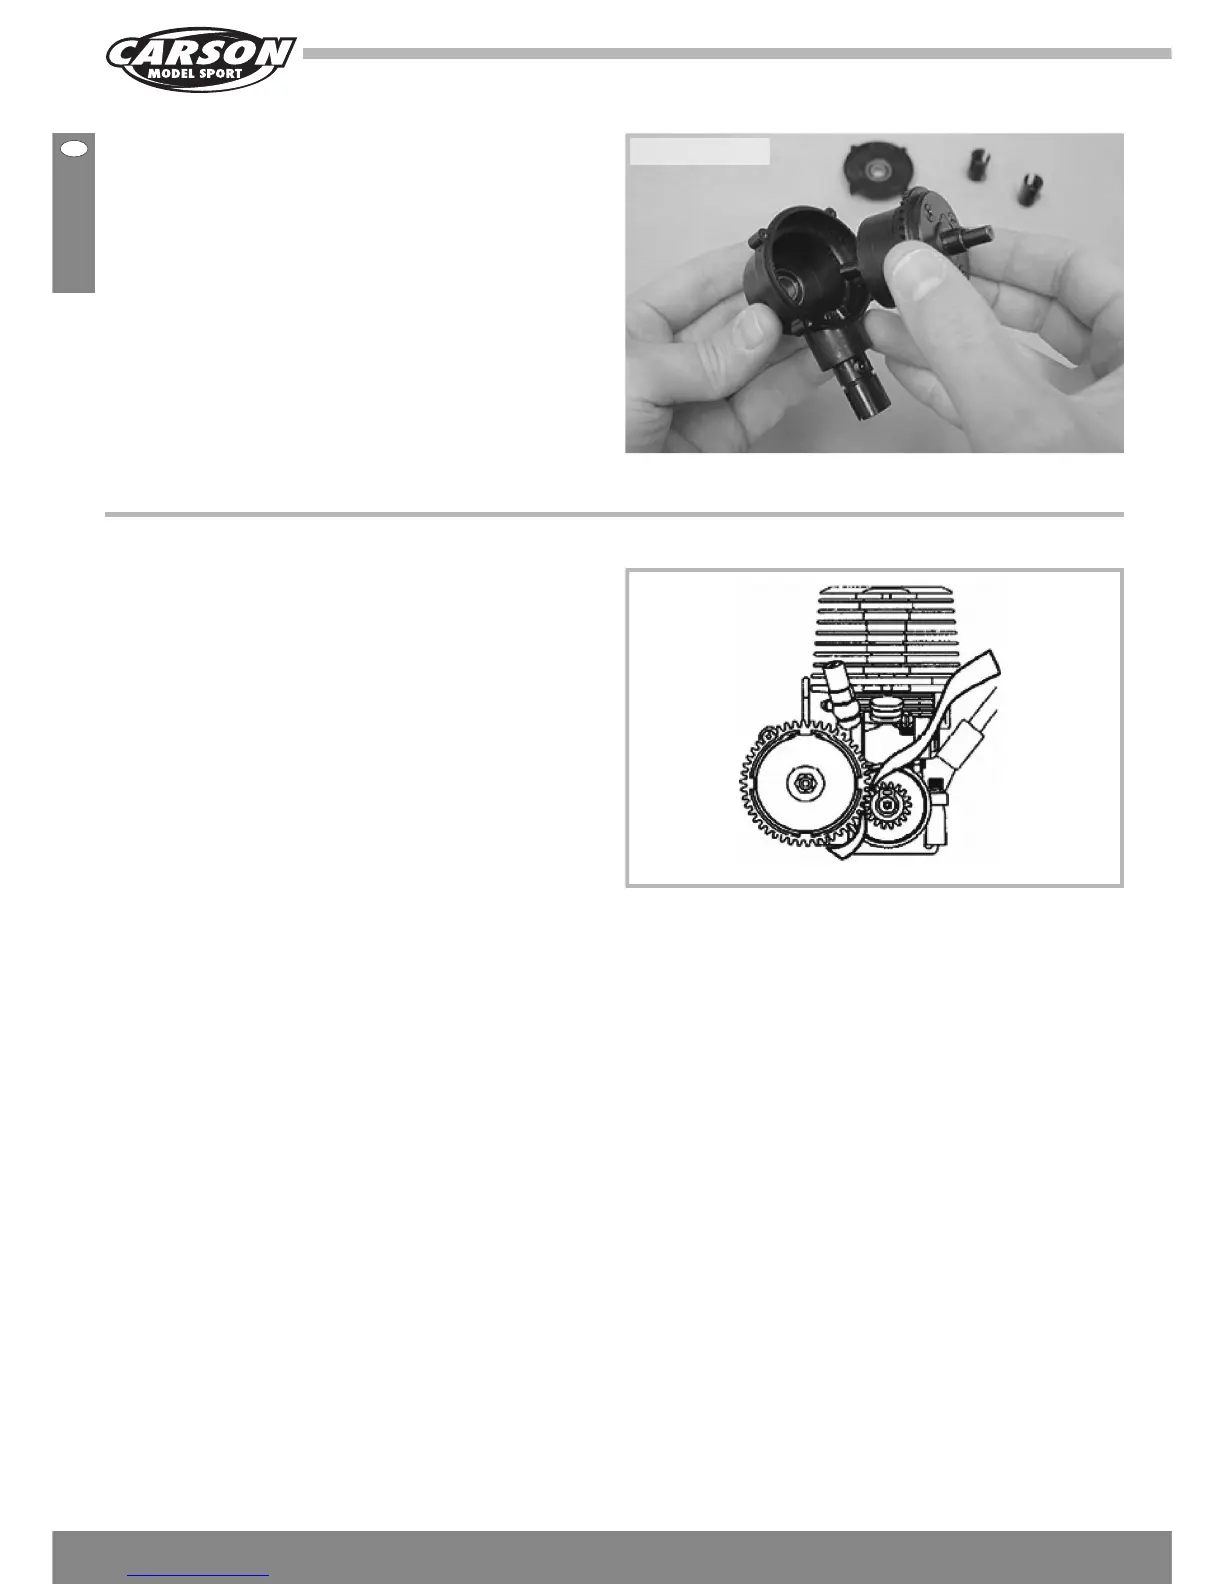
lf you need to remove the engine to clean it or change the
clutch bell, etc., it‘s important that you set the gear mesh
between the clutch bell and spur gears properly when reinstal-
ling the engine; otherwise, the spur gears may be damaged or
the gears may bind. To set the gear mesh, first start by having
the engine mount assembly temporarily in place, then slide the
engine back within the mounts until the teeth on the clutch bell
are even with the spur gears. When satisfied with the alignment,
tighten the four socket-cap screws to secure the engine to the
engine mounts. This will ensure that the clutch bell is lined up
with the spur gears.
Next, place a piece of notebook paper between the clutch bell
and each of the spur gears, and push the engine toward the
spur gears firmly, so that the notebook paper crinkles. When
set properly, there should be very slight play between the gears.