CARVIN
®
SILVER SERIES ABOVE-GROUND POOL | USER MANUAL
12
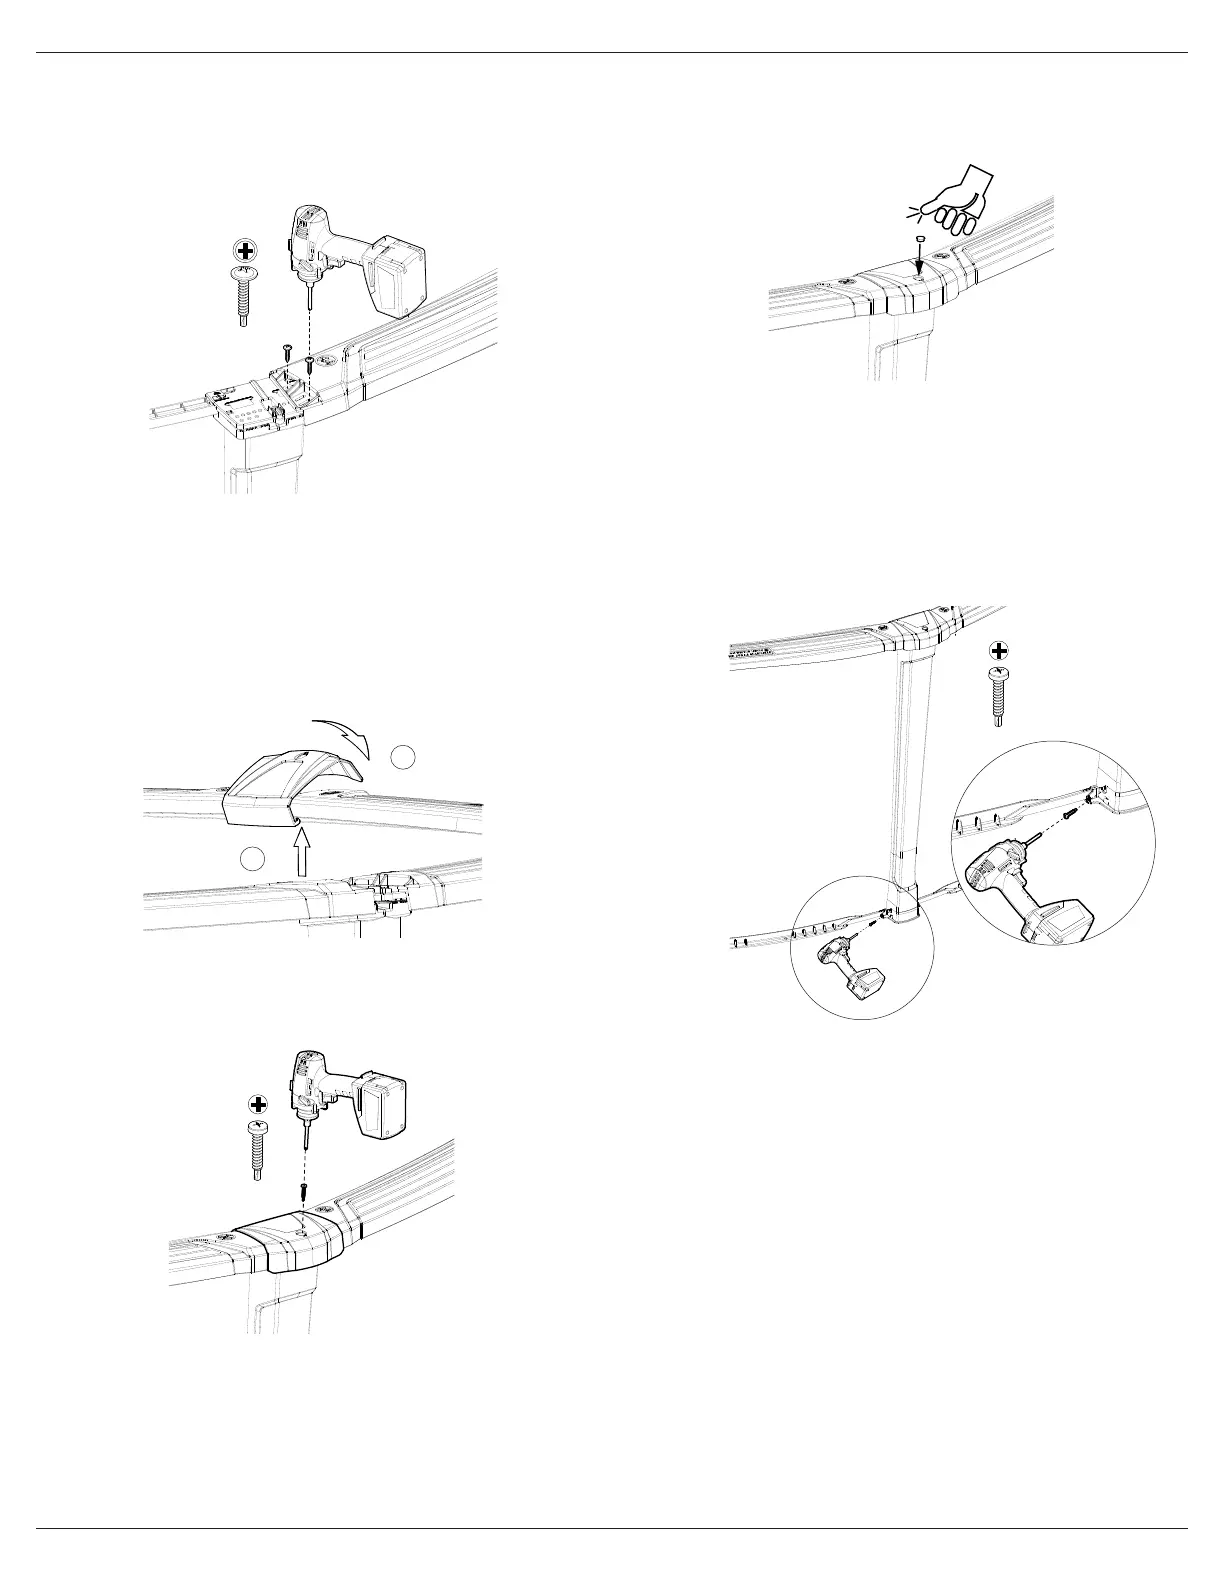
STEP 3
Before screwing top ledge cover, pull them towards the exterior of the pool.
Screw top ledges with 2 screws on each side. Use the outermost holes to screw on
the top ledges.
Many holes are on the top plates for assembly, use the one that seems best located
for your installation.
TOP LEDGE COVER INSTALLATION
STEP 1
From the inside of the pool hook the Top ledge Cover on to the Top ledge.
STEP 2
Rotate the Top ledge cover until it seat properly on the top ledge.
P/N 14455110
SCREW AT LOW SPEED
Max torque 4 NM / 3FT-LB
P/N 14455032
SCREW AT LOW SPEED
Max torque 4 NM / 3FT-LB
PH3
PH3
Pn. 14455110
DRILL AT LOW SPEED
Max torque 4 NM/3FT-LB
Pn. 14455032
DRILL AT LOW SPEED
Max torque 4 NM/3 FT-LB
PH3
PH3
Pn. 14455110
DRILL AT LOW SPEED
Max torque 4 NM/3FT-LB
Pn. 14455032
DRILL AT LOW SPEED
Max torque 4 NM/3 FT-LB
1
2
STEP 4
Install the top ledge cover cap by pushing it into place until it clicks.
STEP 5
Install the safety labels as prescribed in Section Warnings of this manual.
FIXING THE FEET TO THE STRUCTURE
Screw a 2x 14455032 on the bottom of the uprights now be installed to solidify the
whole structure and prevent uprights and bottom plates against ground movements
due to freezing / thawing.
P/N 14455032
SCREW AT LOW SPEED
Max torque 4 NM / 3FT-LB
PH3
PH3
Pn. 14455110
DRILL AT LOW SPEED
Max torque 4 NM/3FT-LB
Pn. 14455032
DRILL AT LOW SPEED
Max torque 4 NM/3 FT-LB
 Loading...