CARVIN
®
SILVER SERIES ABOVE-GROUND POOL | USER MANUAL
7
STEP 2
Reposition bottom plates and rails following steps 11 and 12 (The foundation).
WALL INSTALLATION
Do not install the wall on a windy day. Wait for a calm
windless day. You You must have at least 3 people to
install the wall.
Be careful not to push any sand on or inside the rails
which would make it dicult to insert the wall into it.
WARNING
ATTENTION
STEP 1
Before starting the installation of the wall, make sure you have the following items
in the circle of your pool (inside the rails): two plywood sheets to support the wall,
some sand to make a cove or prefabricated cove sections and a stepladder to be
able to get out once the wall is up and installed.
STEP 2
Note that the skimmer hole and return are located at the starting end of the rolled
metal wall, therefore position the roll to begin the unfolding of the wall of your pool
where you want to position these items.
STEP 3
Place the two plywood sheets inside the circle of the pool close to where you intend
to put the lter and pump. Remove the wall from the box and place it on
a plywood sheet.
STEP 4
Start unrolling the wall by guiding the bottom of the wall into the lower slot of
the rail (already positioned). The rst end of the wall must be in the center of
a bottom plate to allow the installation of the screws so that they are hidden
behind an upright.
STEP 5
We suggest you install the top rails gradually as the wall is unrolled to give more
stability to the metal sheet. It is also recommended to hold and support the top of
the wall until it is fully installed, with the help of several people or by using the vinyl
covered hooks, rope and tent peg attached to the top of the wall to make it stand as
straight as possible.
BASIN ASSEMBLY
Once the wall is completely unrolled and inserted into the bottom rails, you could be
faced with 3 situations :
• The wall seems too long (it is not) See Step 1.
• The wall seems too short (it is not) See Step 2.
• The assembly holes at both ends of the wall are perfectly aligned. Go to Step 3.
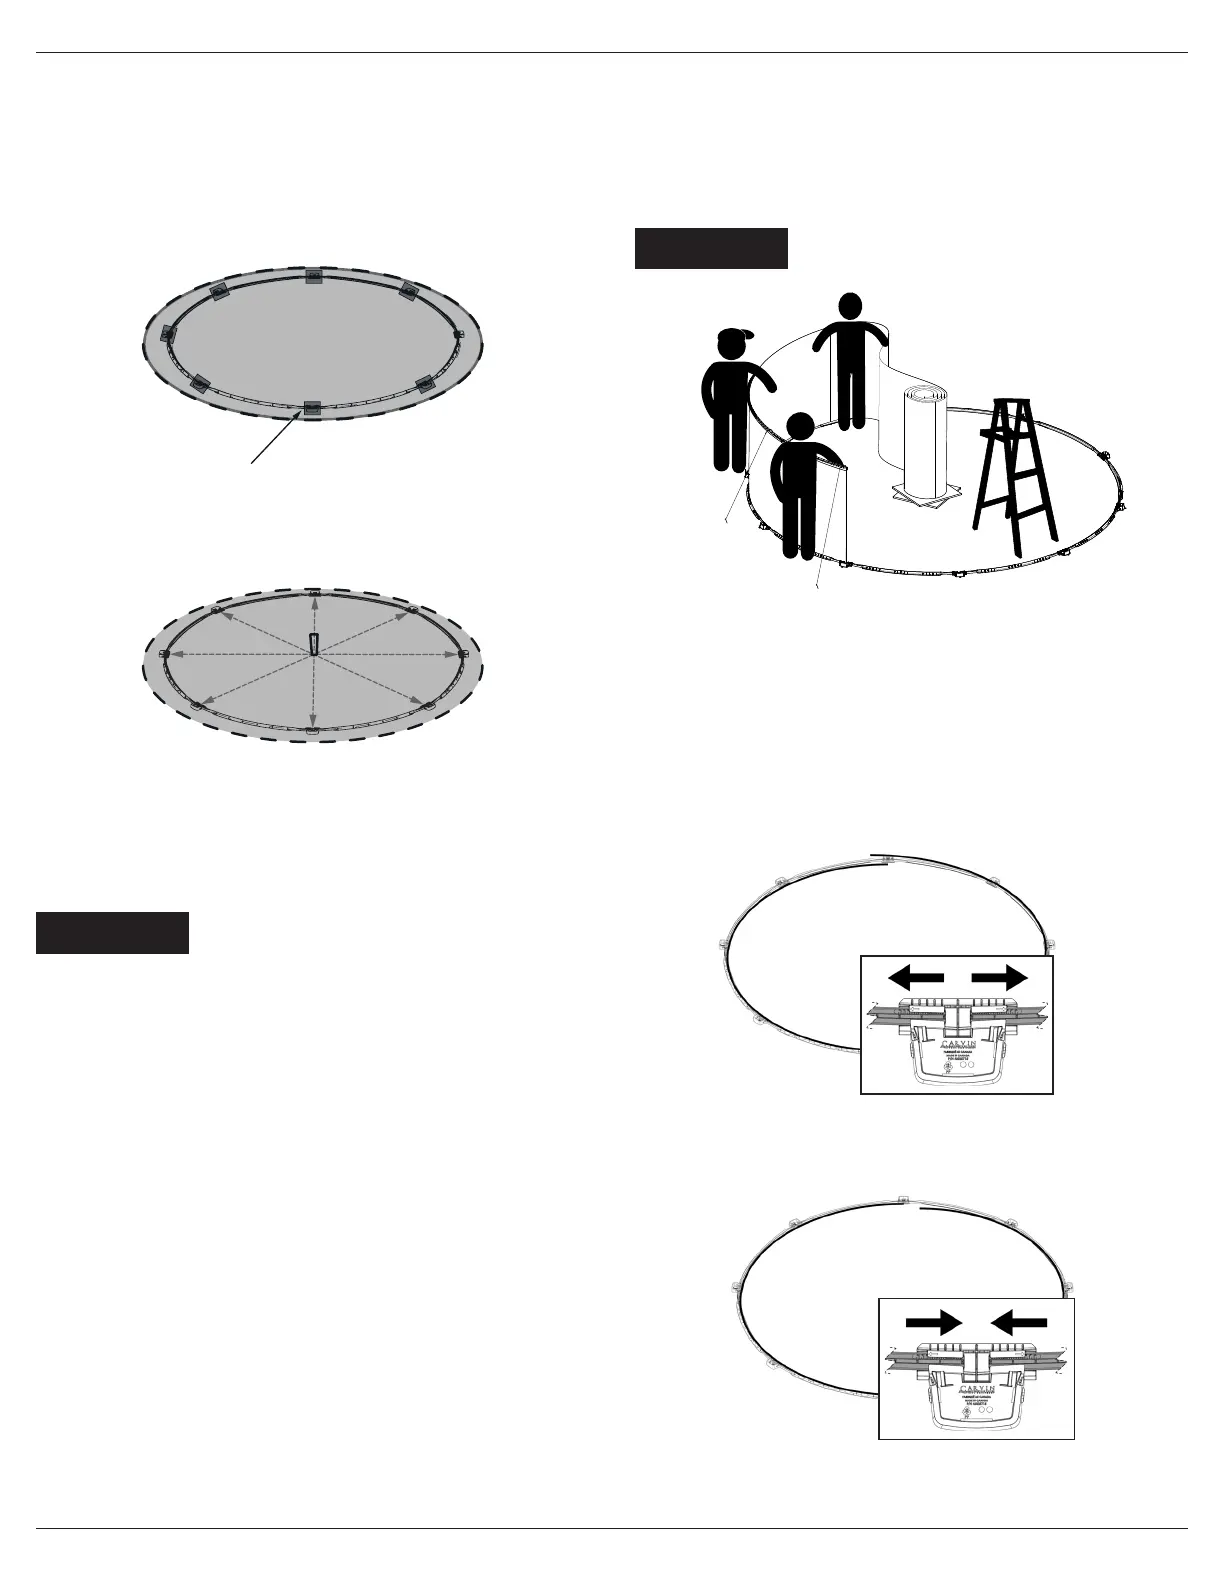
STEP 1
If your wall seems too long, the spaces between the rails in the bottom plates should
be enlarged. Gently tap each rail inside of the bottom plate outwards so that the
circumference is slightly enlarged.
Measure the diameter from the center of the pool
to the interior of the grooves on the rails
STEP 2
If your wall seems too short, the spaces between the rails in the bottom plates
should be reduced. Gently tap each rail inside of the bottom plate towards the inside
so that the circumference is slightly reduced.
If you have done one of the two steps (1 & 2) you absolutely have to recheck
the spacing between the rails in each bottom plate to make sure that spacing
is equal in all plates.
PATIO SLABS INSTALLATION (OPTIONAL)
STEP 1
To have a more solid base under the bottom plates, you can install patio slabs under
each plate. To do so, mark the location of each bottom plate and disassemble plates
and rails. Patio slabs must be buried at the same level as the previously compacted
rock dust. All slabs must be even to ground level rmly supported underneath and
level to all others.
Patio slab
 Loading...