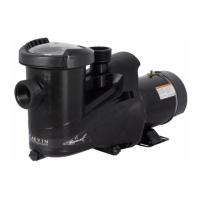
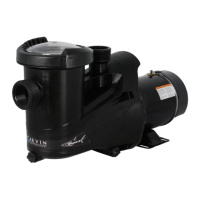
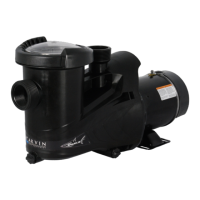
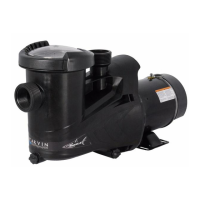
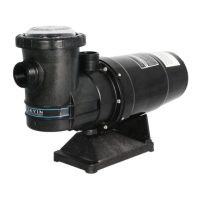
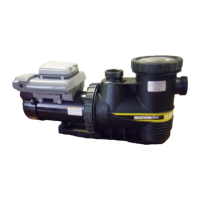
This document describes the Shark Above Ground Pool Pump, a self-priming pump designed for above-ground swimming pools. It is manufactured by Carvin Pool Equipment.
Function Description:
The Shark pump is designed to circulate water for above-ground pools, facilitating filtration, backwashing, and vacuuming. Its self-priming capability allows it to draw water through a dry suction line without the need for additional valves, provided the pump case and strainer body are filled with water before starting the motor. The pump is built from glass-reinforced thermoplastic moldings, which eliminate corrosion issues and insulate water passages from the electric motor. It features a closed impeller that maintains efficiency without field adjustment and runs inside a multi-vane separate diffuser. Ample running clearances between the impeller and case prevent seizure from sand ingress and promote long life. The impeller hub incorporates an insulating sleeve over the motor shaft and carries a mechanical shaft seal with a pure-carbon rotating face working against a ceramic seat. This seal requires attention only when leakage at the shaft indicates a need for replacement. For easy routine servicing, the pump includes a built-in hair and lint strainer with a transparent cover. The design allows for the removal of the motor, bracket, seal, impeller, and diffuser as a single unit by removing four screws, simplifying maintenance and repair.
Important Technical Specifications:
- Piping Connections: The pump features male/female sockets designed to receive 1-1/2" (38mm) threaded fittings.
- Motor Specifications: Specific motor details are provided on the manufacturer's specification sticker on the motor. The manual mentions 2-speed pumps, with HIGH SPEED operating at approximately 3450 rpm for maximum filtration and high turbidity, and LOW SPEED at approximately 1725 rpm for other times.
- Suction Outlet Requirements: All fully submerged suction outlet covers must be listed to ANSI/ASME A112.19.8 standard. The pump should not be used in installations with only one fully submerged single suction outlet. If main drains are present, there must be a minimum of two for each pumping system, each with a Listed Suction Outlet Cover. Wading pools may have additional requirements. Skimmers can supply 100% of the required flow to the pump and must be vented to atmosphere; a skimmer is not considered a second main drain. If two suction outlets are used, the maximum system flow rate must not exceed the rating of any one listed suction outlet cover. If more than two are used, the sum of ratings must be at least twice the maximum flow rate. Suction outlet covers must be separated by a minimum of three feet (3') from the center of suction pipes. Check valves should be avoided, but if used, installation must conform to applicable standards. The pool or spa should never be used if a suction outlet cover is damaged, cracked, missing, or not securely attached; covers must be secured with stainless steel screws.
- Electrical Connections: The pump requires a power supply that matches the information on the pump nameplate. Installation must be performed by a competent electrician in accordance with local electrical codes. Each motor requires a fused disconnect switch.
- Dimensions: The pump measures approximately 21 3/4" (55.3 cm) in length, 9 1/2" (24.1 cm) in width, and 7 3/8" (18.7 cm) in height (from the base to the top of the motor). The strainer nut is 4 7/8" (12.4 cm) in diameter.
Usage Features:
- Installation Location: The pump should be located as close to the pool as possible, but at a minimum distance of five feet (1.5M) from the pool to prevent young children from using it as an access point. It should preferably be in a dry, shaded, and well-ventilated area. If below water level installation is not possible, choose the lowest possible position. A hard, level surface is required for installation. Considerations for drainage, motor ventilation, servicing access, and equipment protection are important.
- Piping: Piping should be kept as simple as possible, avoiding elbows directly at the pump inlet. A straight pipe length is recommended at the inlet. As much of the suction pipe as possible should be below the pool's water level to reduce priming time and prevent air pockets. Pipes should be independently supported to avoid strain on the pump. Gate valves should be installed in the suction and return lines near the filter system for convenient servicing, especially if the equipment is installed below water level. The suction line gate valve must be fully open during operation, and its gland kept tight to prevent air ingress.
- Starting Up: For 2-speed pumps, start and prime the pump at HIGH SPEED only. Do not switch to LOW SPEED until the pump is working properly. High speed is used for maximum filtration and when turbidity levels are high.
- Priming: Before starting, close gate valves, remove the strainer cover, fill the pump completely with water, and replace the cover. Then open gate valves and start the pump. If full flow is not achieved within 4-5 minutes, switch off and repeat. Check for air leaks at the strainer cover, suction line connections, and valve stem glands if the pump fails to work. After about ten minutes, check pool return fittings for air bubbles; continuous air flow indicates suction line leaks.
- Controlling Output: The gate valve in the suction line should remain fully open during operation. If output control is needed, use a valve in the return line.
- Safety Warnings: Never run the pump without water in the pump case, as this can damage the shaft seal.
Maintenance Features:
- Lubrication: The pump requires no lubrication. Refer to manufacturer's recommendations.
- Draining: The pump case has two drain plugs. Ensure suction and return line valves are open for complete draining. Additional provisions may be needed for draining the filter, heater, and pipe lines.
- Servicing: The pump can be serviced without breaking pipe connections. Before any work, close gate valves, switch the ON/OFF switch to OFF, and pull the plug from the receptacle. Servicing should only be performed by qualified personnel.
- Cleaning the Strainer Basket: To clean, switch off power, close suction and return line valves, remove the Strainer Nut and clear cover, and lift out the basket. Clean and replace the basket, ensuring the o-ring is clean and properly seated under the clear cover. Replace the cover, align and hand-tighten the Strainer Nut. Re-open valves and restart the pump. Do not re-tighten the Strainer Nut while the pump is in operation.
- Disassembly for Repair: The manual provides detailed instructions for disassembling key components:
- Bolt Removal: Remove the four nuts/bolts holding the motor to the body using a 9/16" socket.
- Diffuser Removal: Insert a small screwdriver between the two snaps on the motor bracket and gently lift the diffuser tongue to release it.
- Motor Cap Removal: Unscrew the rear cap screw to remove the motor's cap.
- Impeller Removal: Use a screwdriver to block the motor shaft and unscrew the impeller counter-clockwise.
- Motorbracket Removal: Unscrew the four long screws to remove the motor bracket.
- Ceramic Seal Removal: Use a flat screwdriver to push the ceramic from the back of the motor bracket. The flat surface of the ceramic seal must be on top when reassembling.
- Replacement Parts: A detailed exploded view and parts list are provided, including the strainer nut, strainer cover, o-rings, strainer body, drain plugs, diffuser, impeller, motor bracket, mechanical seal, and cord.
- Warranty: Carvin Pool Equipment offers warranties for various components. Light Bulbs/Full Moon Watercolor LED lights are warranted for 12 months. Miscellaneous filter elements, DE grids, white-goods, gaskets, and o-rings are warranted for 12 months. Chlorine generation systems are warranted for 24 months. StarLight/StarBright/StarWhite LED light adapters are warranted for 12 months. Claims for damage must be made to the carrier. Warranty registration is required within 30 days of purchase. The warranty covers defects in material and workmanship for 72 hours of operation or 12 months, whichever comes first. It does not cover products damaged by improper installation, misuse, abuse, negligence, accident, acts of God, or unauthorized repairs. Warranty claims require contacting a local Carvin dealer or Carvin Pool Equipment directly.