CARVIN® POOL EQUIPMENTS
2
INTRODUCTION
Thank you for purchasing a CARVIN® STARJET™ pool water jet (“Product”).
We want to help you get the best results from your new Product and operate it safely. This
manual contains information on how to do that; please read it carefully before operating the
chlorine generator. If a problem should arise, or if you have any questions about your product,
consult an authorized Carvin retailer or distributor.
All the information in this manual is based on the latest Product information available at the time
of publication. The manufacturer reserves the right to make changes at any time without notice
and without incurring any obligation. No part of this publication may be reproduced without written
permission.
COMPLIANCE
The submersible light included in this Product is compliant with applicable safety standards in
Canada and in the United States of America.
IAPMO EGS, File E10078
UL 676, CSA C22.2 No. 89-15
COMPATIBILITY
This Product is compatible with a variety of Carvin above ground pools. Check with your
authorized Carvin retailer or distributor for a list of compatible models.
Only connect the Product’ submersible light to a Carvin Star Series Starter Kit. Consult its User
Manual for power capacity and light controls.
The Carvin Star Series Starter Kit, water tubing, pipes, manifold and other plumbing accessories
are sold separately.
The waterjet feature will work as intended if the submersible light is not connected to a controller.
RECOMMENDATIONS
Only use Carvin 12 mm tubing for this installation. Other tubing will reduce performances of the
Product or affect the water circulation of your pool.
We recommend using a 3-way valve with our 4-way manifold to manage the water return to the
pool. You can install up to 4 StarJet on a Carvin pool. For the StarJet 4-way manifold (sold
separately) connection, use any 1-1/2” PVC SCH40 pipe.
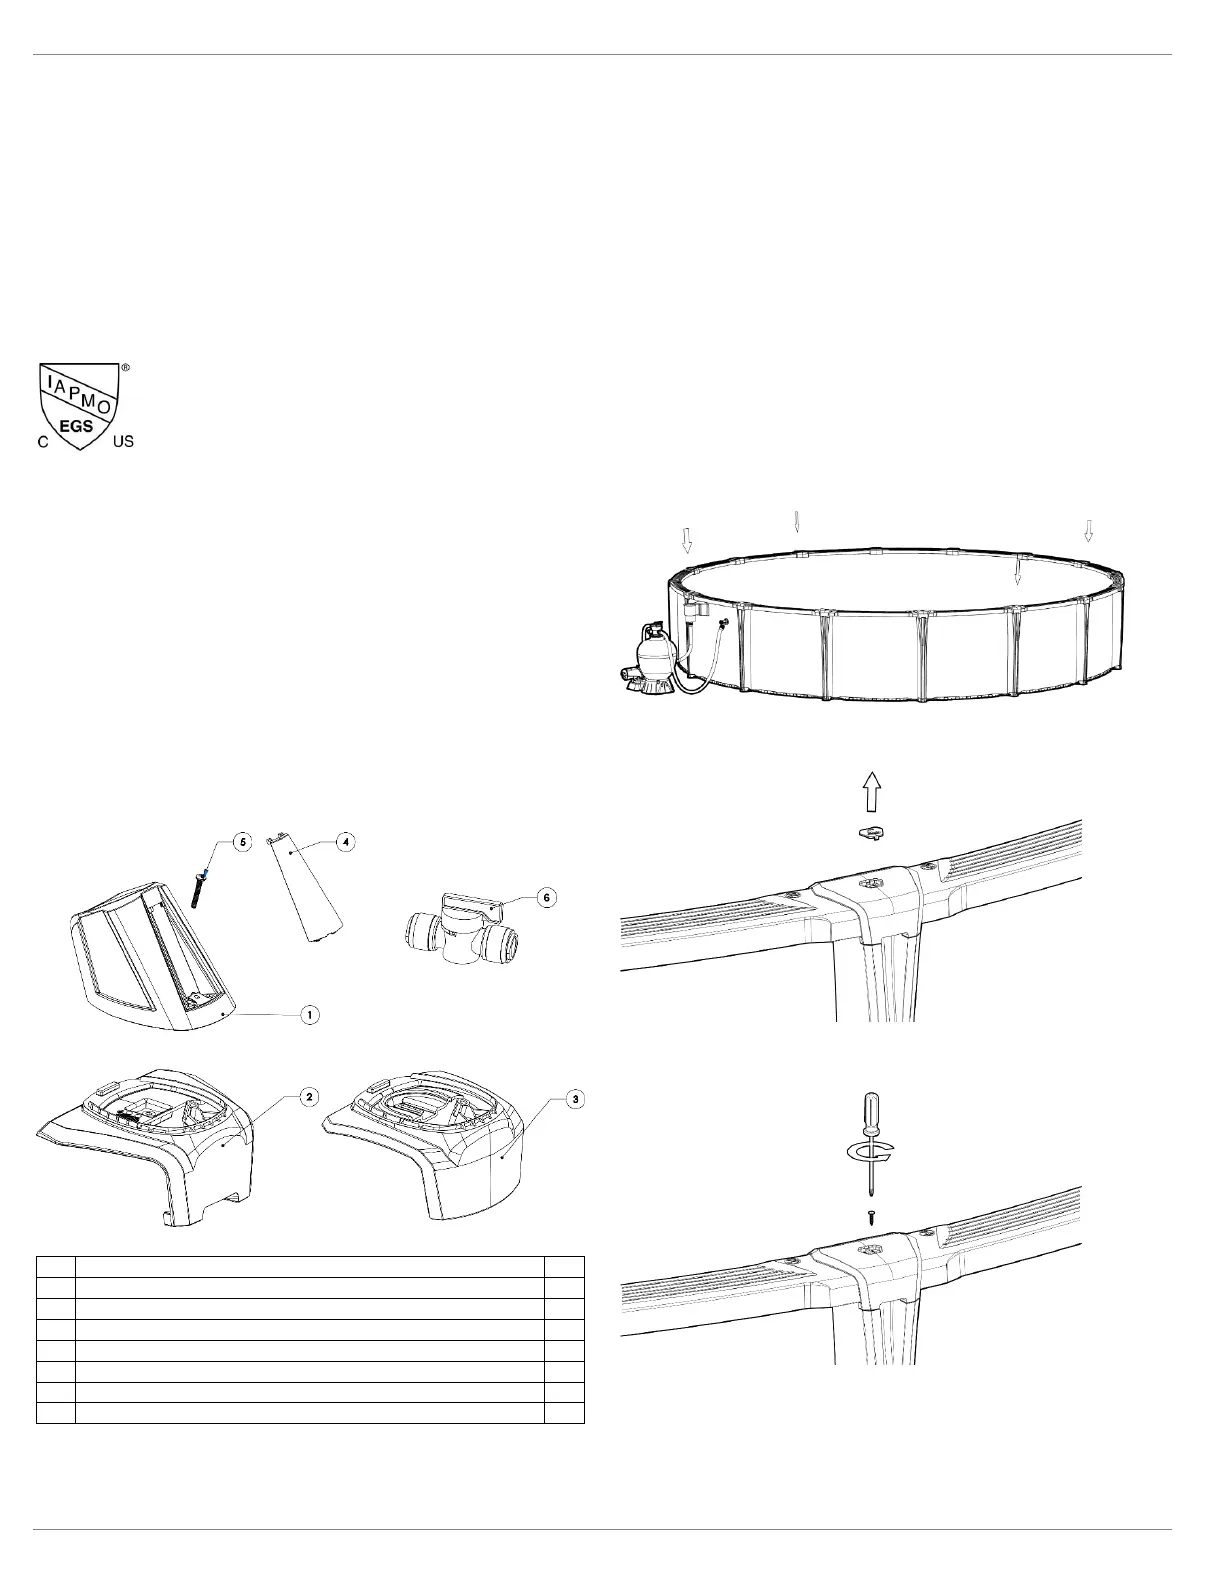
PACKAGE CONTENT
StarJet Shell Assembly, including LED Star Series Light
StarJet Ledge Cover Diamond Serie
StarJet Ledge Cover Gold Serie
StarJet Mounting Screw Cover
FEATURES
HARMONIZED AND STYLISH
The StarJet Pool Water Jet is designed to fit Carvin’s Diamond and Gold Series pools.
BACKLIT RGB WATER JET
Adjustable light color and intensity, when installed with Carvin accessories.
INSTALLATION
The electrical installation must be done in accordance with the Canadian Electrical Code, the
National Electrical Code (USA) or any other local or national requirements.
Prepare the following tools and accessories:
• Power drill with Philips head #2 or a screwdriver #2;
• Small straight screwdriver;
• Tubing cutter or knife.
• A Star Series Starter kit, to power and control lights; and
• 12 mm water tubing.
STEP 1
Select the positions where you want to install your StarJet.
STEP 2
For each selected position, remove the top ledge cover cap.
STEP 3
Unscrew the top ledge cover screw.
 Loading...