CARVIN® POOL EQUIPMENTS
4
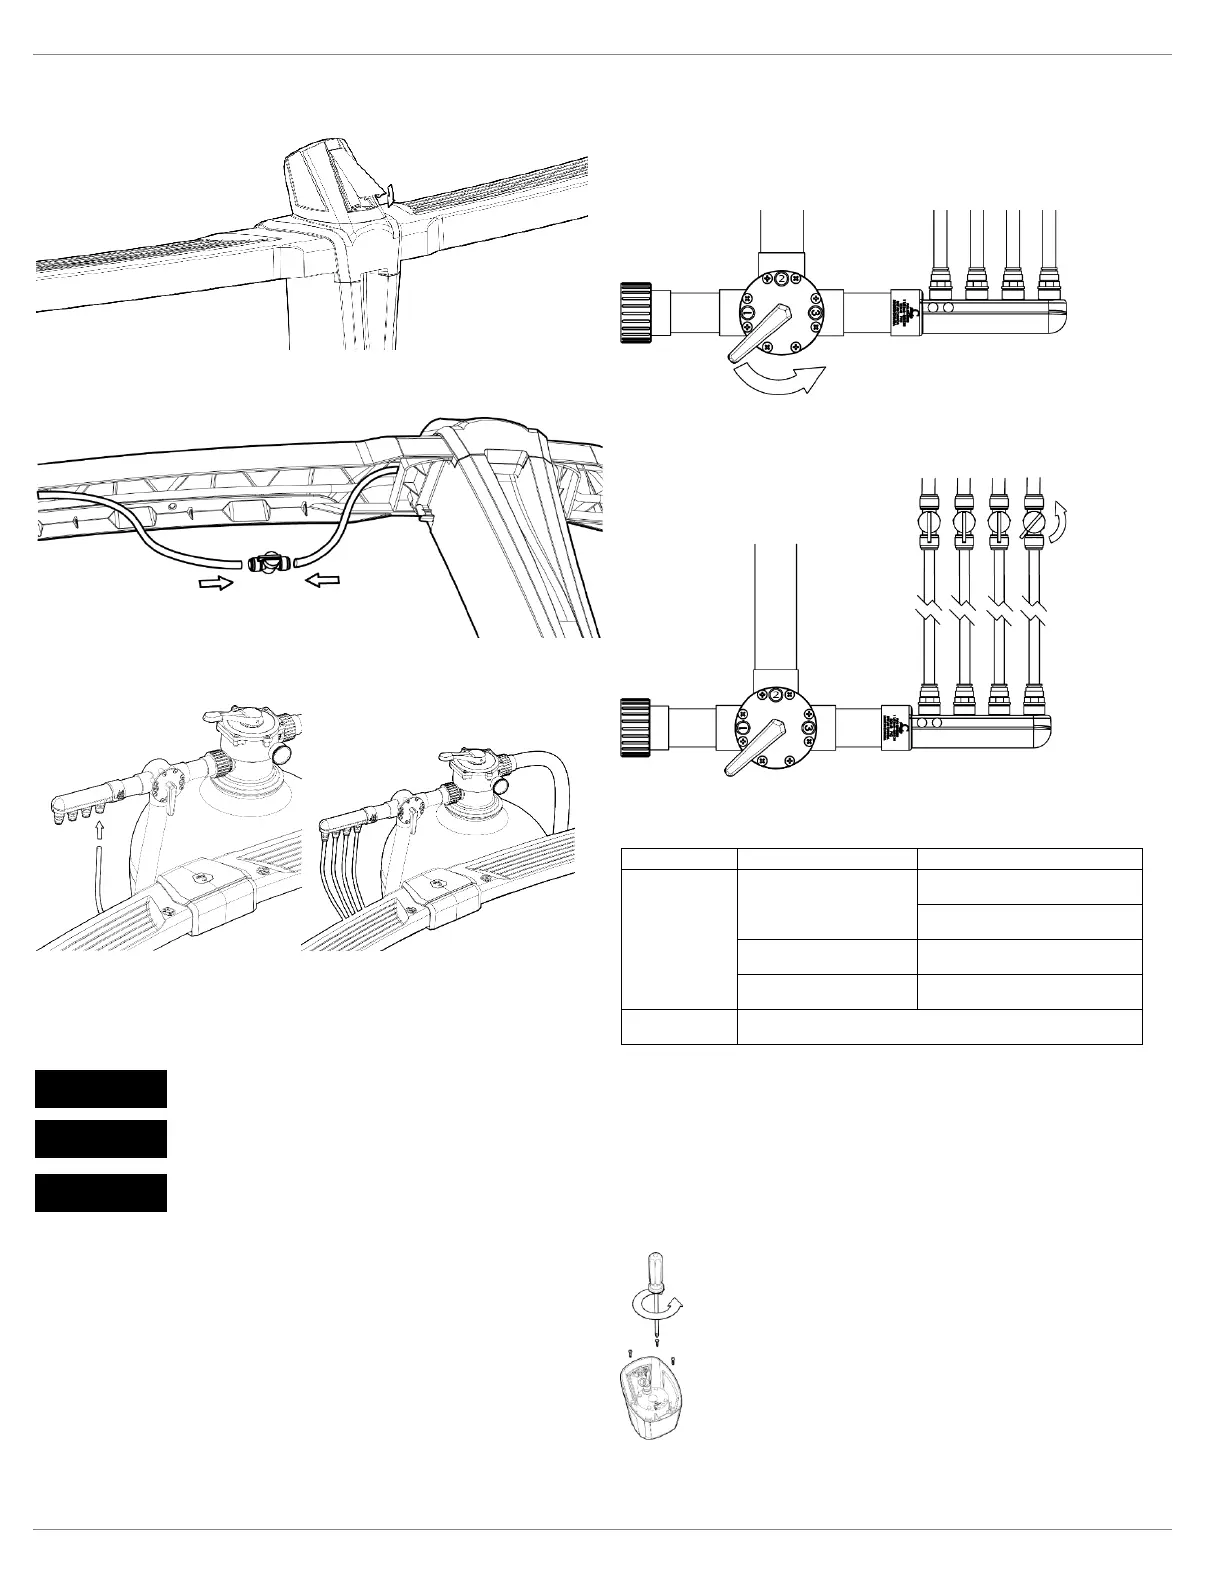
STEP 13
Install the StarJet screw cap.
STEP 14
Connect the 12-inch tubing with the tubing passed around the pool.
STEP 15
Connect each end of tubing to the Carvin 4-way Manifold.
Your installation is finished.
Refer to the Operation section to see how to regulate the flow and return flow
BEFORE OPERATION CHECKS
The Warranty of the product will be canceled if these
conditions are not respected.
Do not energize the submersible light if the water tank
is empty.
Keep debris out of the pool water circulation system.
Before flowing water in a StarJet, do the following inspections:
• Check pool skimmer basket and remove all debris;
• Check pump basket and remove all debris; and
• Check pool filter pressure, if need make a backwash.
OPERATION
As recommended, the StarJet is designed to be used with a 3-way valve.
STEP 1
We recommend splitting the return water 50/50 when the StarJet are used.
STEP 2
Use the flow valves on the manifold to regulate the distance of each StarJet water jet. If more
pressure is need open more the 3-way valve by turning the handle in direction of the position 2.
TROUBLESHOOTING
Water jet quality is
poor
Debris in the circulation
system prevent the water to
flow adequately.
Check pool skimmer basket, pump
basket, and remove any visible debris.
Check the filter pressure and perform
a backwash if needed.
Debris in the StarJet prevent
the water to flow adequately.
Clean the water tank and its diffusers
as prescribed in this manual.
Water tubing is kinked or flat.
Inspect the installation and correct the
water line for optimized flow.
Light is not working
as intended
Refer to the Star Series Starter Kit or the StarGlow Manual.
CLEANING THE WATER TANK & DIFFUSERS
Before disassembling the StarJet, make sure you have checked the point mention in the trouble
shooting. If you have debris in your StarJet that means you filtration system is not operating
correctly. Fix your system before starting the cleaning operation. Other wise you will have to
repeat the cleaning regularly.
STEP 1
Refer to installation step to remove the StarJet Body from the StarJet Ledge cover. Using a
Phillips head screwdriver, unscrews the for screw of the reservoir.
 Loading...