7 - 14
HYDRAULIC PRESSURE SETTINGS
CASE TRAINING CENTER
AUGUST 2000
Adjusting the standard pressure
CX130
CS00E551
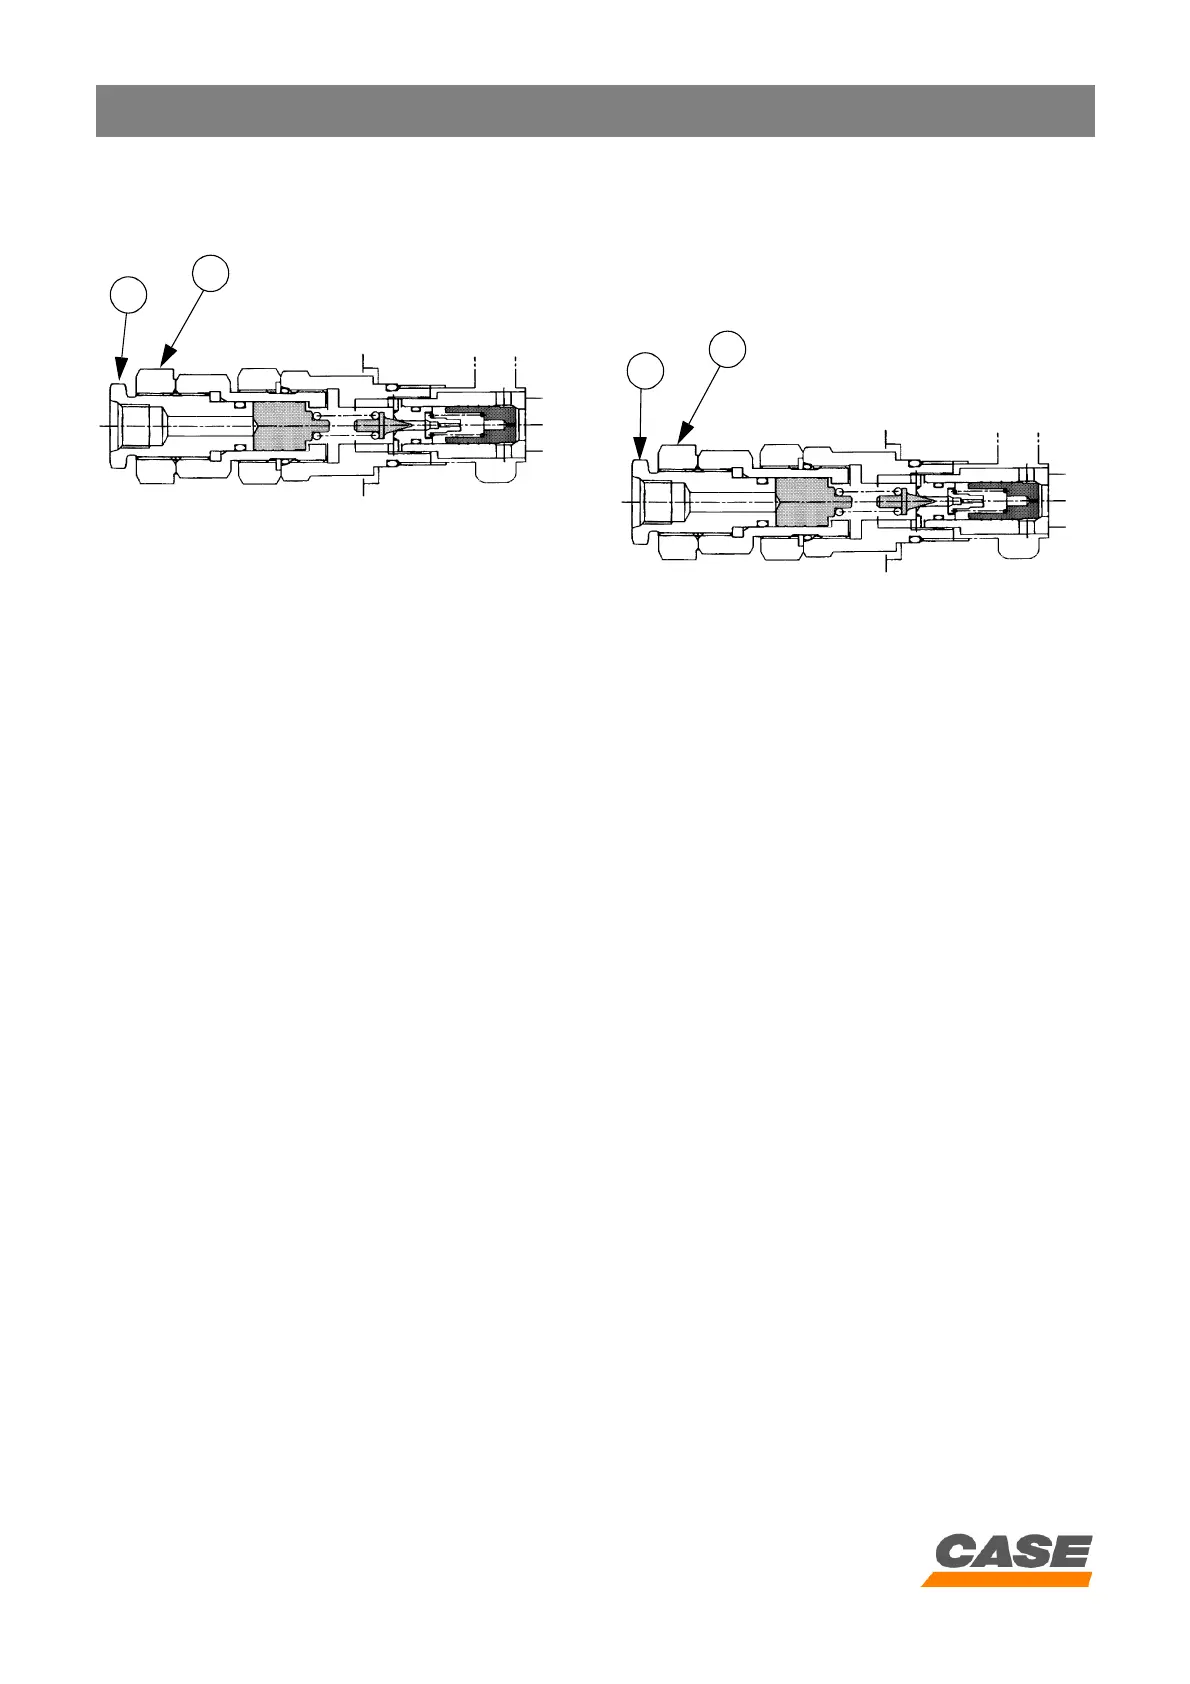
1. Loosen the lock nut (4) and turn the valve
adjusting screw (3) until the standard value is
reached.
Tighten the screw (3) to increase the pressure.
Loosen the screw (3) to reduce the pressure.
2. Tighten the lock nut (4) while holding the adjusting
screw (3) in position.
3. When the adjusting screw has been tightened,
check the pressure again and make sure there are
no leaks.
Attachment secondary relief valves
(B, C, D, E, F and G)
Test
CX130
CS00E551
1. Loosen the lock nut (4) and tighten de 180° the
secondary relief valve (A) adjusting screw (3)
180°.
2. Display the diagnostic screen "CHK1".
3. Operate and hold in position the corresponding
attachment control (against the cylinder stops).
4. Read the pressure on the diagnostic screen, the
pressure should be:
4
3
4
3